Did you ever hear that old anecdote about when Michelangelo was questioned, "How do you carve an angel out of marble?" and he said, "Simple. Cut away all the parts that aren't angel."
So, I'm NOT comparing this to Michelangelo, but I am saying that I like to think about that story whenever I do these refashions. It's like. . .you look at a bid dumpy shirt or dress, but you can see the article of clothing that it WANTS to be. So, you cut away all the parts that aren't it!
Here is the dumpy shirt in question for today. The long sleeves are wayyy too much. The shoulder pads are ridiculous. However, I love the contrast and the structured bow, so that's why I bought this sucker at the thrift store!
First thing: Cut the shoulder pads off!
Next, the sleeves.
Then, turn it inside out and smooth all the wrinkles out.
Fold it in half.
Lay a better fitting shirt over it as a pattern.
Now, here is where I ran into a snag. Remember that Moo Moo to Modcloth dress I posted a few days ago? Well, the issue with the dress was the neckline was too low, so I cut off the shoulder fabric. This allowed me plenty of fabric to work with to bring the dress in. The example of what I just described is in the picture below right.
Now, the problem I had with this black and white shirt is that I wanted to keep the top of the shoulders intact. Notice what that does to the armpits when alterations begin. (Picture on the left.)
That's a problem that I didn't anticipate.
So you may or may not be able to tell, but I had to cut in the sides of the bodice to compensate for the fabric missing in the armpits. This brought the shirts dimensions in drastically and the shirt was potentially going to be way too small.
You can see what I'm talking about a lot better in this picture. Look at the gap in the armpit!!!
So, let's leave that problem alone for a few minutes while we work on the sleeves. Look at these beauties! They are way too blouse-y and peasant-y for the structure of the front placket and bow.
Using another shirt as a guide, I made short sleeves. Getting rid of all that fabric was crucial to make sure that the bow was the focal point.
Okay, back to the bodice problem. I cut out two strips of black chiffon a little over 2" wide.
And I pinned them to the sides of the bodice.
So now the fit problem was fixed. It also created a modern color blocked look.
Okay, back to the sleeves. The sleeves ended up being way too big for the arm holes. This was on purpose, because I wanted gathered, puffed sleeves. So notice below the two pins on either side of the sleeve. Those were marking where I wanted to baste and gather.
I basted between the two pins along the top of both sleeves. You can see how they gathered below. Then, I sewed them to the bodice.
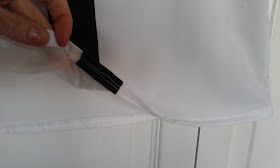
To hem the shirt, I did it in two steps. Rather than trying to fold chiffon over 1/2" twice and iron it--which is a PAIN--I folded the fabric over once and quickly stitched it.
Then, I folded it again and stitched it.
The End!


No comments:
Post a Comment