Showing posts with label tailoring. Show all posts

Thursday, October 26, 2017

Tailoring - Quickest way to Tailor a Dress with a Side Zipper

Facebook has been showing me these seasonal dresses in my news feed lately.

And I love them.


They are so cute!


And so me!

Except one thing: I work for my church and even though most people have fun at Halloween, there are some people that don't particularly like jack-o-lanterns, ghosts, and witches. I am not one to go out of my way to offend people, so I just looked at them wistfully and thought I'd move on. . .


Until I saw this dress!

I mean. . .God made bats, right?

So I ordered it.


Only one problem, though. The smallest size they offered was XL. So. . .


It was way too big.


So. . .normally when I take a dress in, I go for the ol' side seam. However. . .


This dress has a side zipper.

There are two ways to fix this situation. The first one involves taking the zipper out, taking the dress in, and then putting the zipper back in.


No thank you. So. . .I did the second option: Take the already existing darts in even further!

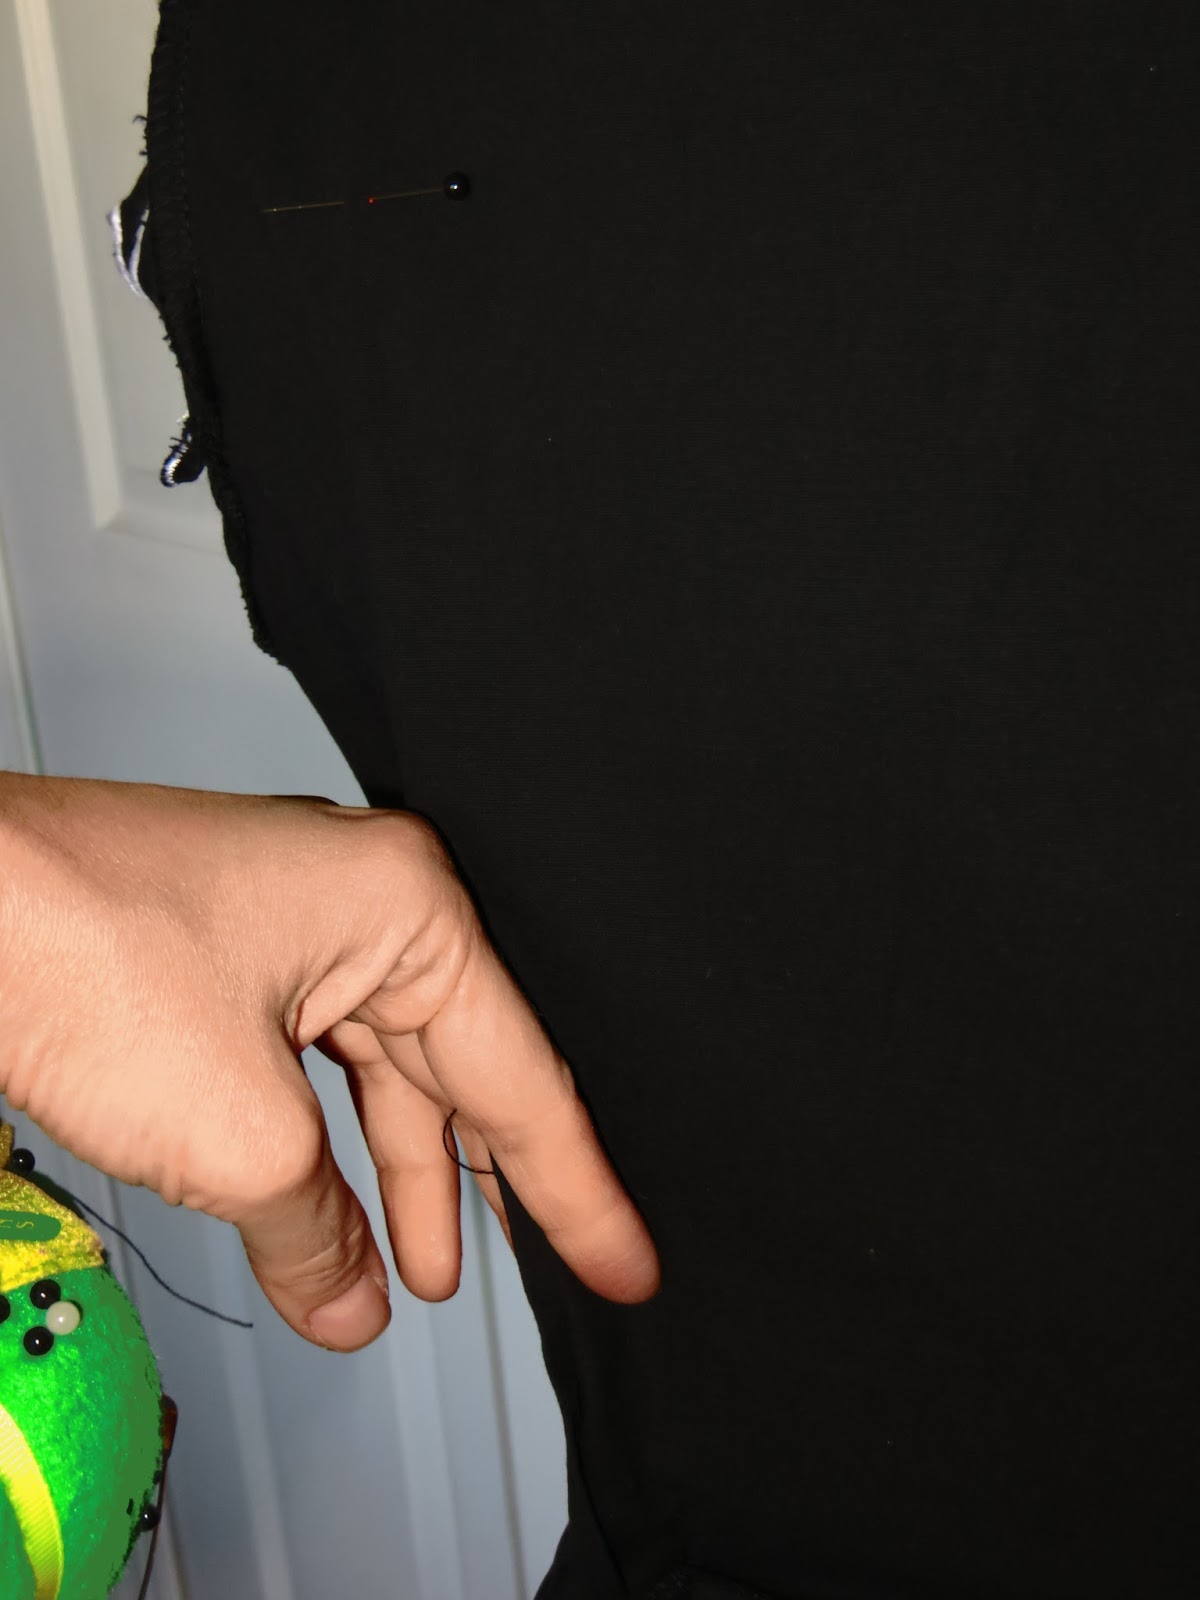
Here you can see the dress--inside out--with the front darts pinned.


I pinched the darts up until I got to a "fading point." I put pins at that point.


Notice: I ONLY pinned the bodice. I left the skirt part alone.


I did the same to the back.


So here is the dress inside out and pinned.


Darts are annoying because you usually just have to sew from the bottom pin and eyeball your way up to the top pin. There is a really fool proof way to make sure that your darts are the same dimension. If you have a French curve and a chalk pencil, you can replicate the same shape on each dart. If you don't have a French curve, you can use a ruler in a pinch. . .but a French curve is better because your body is curved, whereas a ruler is straight. (If you don't have a tailor's pencil, use a regular pencil. It's on the wrong side of the fabric. Who's to know.) 


Then, all you have to do is sew along the line. Easy!


The finished dress. I didn't bother darting the skirt because it looks just as good without the darting, so why do more work?


Add a crinoline and you're done!


The End!


Tuesday, September 19, 2017

Tailoring: Simple Stripe Seam Match-Up

I covered this topic in a previous post, but anyways, here it is again!

I bought this green sweater at the thrift store. I love the colors, but it was a bit big across the bust. No problem. Usually, I try a shirt/sweater on, look in a mirror, and pinch around the excess to see how much I need to take something in. I did that for this sweater, however, I needed to do an extra step if I wanted the stripes to match up.


Okay, this really only works if the garment you are tailoring has stripes that ALREADY match up, or almost match up, at the seams. If the stripes are way off to begin with, trying to force them to match up will result in a bunched up mess.

Also, I know I usually tailor things around the armpit: the sleeve and the bust area. That's how I'm built. This may not be where you need to tailor. Maybe you have smaller hips and a larger bust. So for you, you would pin around the hip area. Same principle, just a different area. You can do this anywhere you need to.

So here is how you do it. First put a pin at the edge of the stripe from the top layer down into the bottom layer.


Now, lift up the seam and see if the pin is sticking through the edge of the stripe on the other side. This one magically was, so I didn't need to adjust anything.


Then, with the seam lifted, stick the pin back into the bottom layer and through to the top following the same stripe, like this.


Now flip the seam back down and. . .See?! A problem! See how the pin is coming up through the stripe instead of at the edge of the stripe? How to fix: Pick up JUST the top layer off the point of the pin. . .


And gently adjust it so that the pin is now sticking through at the edge of the stripe.


Here are a series of pins from the top. . .


And here are the same pins from the other side. They all match up perfectly from both sides.


Then, sew over the pins. Don't pull them out until you actually sew over each pin. Keep those stripes held in place until the last possible second!


Ta da! You can see a slight discrepancy near the armpit, but. . .who's gonna look that close? Only a very creepy weirdo with no life. 
Looks good enough in my book! You're done. Now, go work on your next project!


The End!


Sunday, December 18, 2016

How to Fix: When Stripes Don't Match Up on a Garment

I bought this crazy dress at Rosewholesale.com...which you can find here if you like it as much as I did. 

However, this site is from China and it takes a while to get your merchandise...Also, because they are mass-made, you get little problems like this one. (Notice that the right-hand side dart stripes don't match up.)


Also, if you look along the bottom of the stripes, you will see that the bottom black stripe is kinda wonky as well. No matter. We can fix both problems!


First, take out the seam along the bottom of the stripes. . .


Then, take out the dart in question.


Okay, in order for the stripes to match up, fold the fabric and then pin the stripes. . .


Making sure that they match up from both sides. Then sew up the dart.


Next, I needed to fix the bottom stripe, so I pulled it down enough to make it symmetrical.


There! Both problems solved!


The sleeves were also really large (as in big around), so I tailored those in a bit...which I have ton a billion other times on these posts, so I didn't bore you with how to do that part.


The End!


Saturday, December 17, 2016

Refashioning: Old Lady Pants into Skinny Pants

Updating a pair of pants is pretty easy, but there are some important things you need to look for first.

I really liked the color of these Kathy Ireland (remember that brand from the 90s?) blue velvet pants that were on the Goodwill dollar rack. Velvet is having a moment right now. The legs were way too roomy, but notice how the legs are straight--not flared. That's the first thing to look for.


I put a pair of my favorite skinny pants over them. You can see all the extra fabric along the insides of the legs. If you are wanting to do this project, you can't do it with flare pants. I mean, you can, but you will have to take fabric off both sides of each leg (because flare pants flare out both sides), and that is really hard unless you have another specific situation....Which I shall explain in the next picture.


Okay, see how the inner seam here is just a regular seam with no top-stitching? Let me show you an example of top-stitching in the next picture...


Here is an example of a pair of pants with top-stitching. It's a "flat feld" seam to be exact. Anyways, in order to fix flare pants with flat feld seams (which most of them have, at least in the inner seam), you would have to take all the seam work out--which is at least three rows of stitching per seam. Why all the trouble? Because the top half of flare pants are generally pretty form fitting and you would ostensibly be fixing only from the knee down on both sides. It would look super awkward to sew a normal seam into a flat feld one. You'd get a weird bend in the seams on either sides of your knees. Anyways, that's way too much work, and when I saw the afore-mentioned blue velvet ones, I knew that they wouldn't take much work to fix!


Okay, another thing to be mindful of: the back of the leg is a bigger pattern piece than the front. You can see where my fingers are pointing. On either side of the leg, see how you can see extra fabric creeping up from behind? That is because most people have more dimension on the back sides of their bodies than the front. (If you didn't, you'd look weird.) Anyways, I have seen these "Make Skinny Pants from Your Old Pants" blog posts before, and they don't take into account the percentages of back panel to front panel, and they end up making the front panels too slim and the backs too large. This is because as a pattern is graded (made bigger or smaller), the grader deals with percentages, not just making the shape bigger. Anyways, if I flattened the inner seam and cut the inner seam portion away as a 2 dimensional object, the back panel would be end up being much larger than the percentages you see here, and it would look super "Amateur Hour" when I finished.


So here is how I compensated. I pulled the crotch up!


Then, I laid the red pants on top as a guide for pinning.


I sewed along the pins.


When I tried them on, I realized that the leg on the right side of the screen was tighter than the left. You can especially see between the two pins that it's tighter. What I should have done was to pin one leg, sew it and test it, and then cut both legs to the same measurement before sewing the other leg. That would have saved time. No matter. It's a learning experience!


So what I did was to cut the seam down on the good leg.


Then, I matched up both legs, one on top of each other.


And then cut the bottom leg to match the top one.


You can see here how "off" my sewing was! By almost 1/2 an inch!


I sewed up the second leg. . .


And took out the tighter of the two seams.


I had a ton of fuzzies now, so I took some packing tape and rubbed them all off.


Matching legs.


Below you can see the pants before and after. 


The End!!!