This is a really easy project that you can do in a couple hours...Maybe just one if your internet doesn't suck as bad as mine! (I was trying to watch TV on my computer while I did this, and it kept messing up. So annoying! And we just got broadband!!!! Grrrr....I digress....)
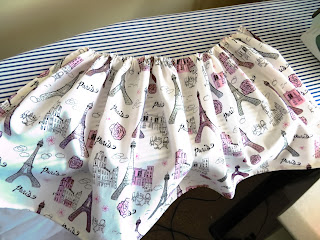
My pastor's wife asked me to make two aprons for her granddaughter for Christmas. This was the fabric. I decided to make them two different ways. It is just a 1/2 yard of 44" wide cotton fabric for both.
First thing I did was to fold each piece in half and stack them on top of each other. Then I cut 4 inches off the top of both of them.
The 4 inches I cut off would become the straps. I folded up about 3/8 of an inch on either side of the straps and ironed them.
Then, I folded them in half and ironed them.
So then, I folded up 3/8 of an inch on the sides of the actual apron parts. (I'm just showing you one as the example here, but I did them the same so far.)
And then I folded that fold over again and ironed.
Okay, this was on the Paris one and not the cupcake one: I cut off the corner of the sides and bottom hem. . .
And I folded the bottom up once. . .
And again, and pinned it in place. I did this to both bottom corners of the Paris apron only.
Then, I pinned it from the right-side. (I always pin things on the right side, because I like to see it while I sew. It just tends to look nicer if you sew the side that will show.)
So, here is my Paris apron so far. It has all the sides and bottoms neatly hemmed.
Along the raw top edge, I did a 6-point basting stitch.
I used my basting to gather the skirt.
Then, I found the middle of the skirt and the middle of the sash and put pins there. (Incidentally, I made sure the pattern was top-side up on both the apron and skirt so it would look right when finished.)
Then, I pinned just the one edge of the sash to the top of the skirt--pinning out from the middle.
I sewed that down.
Then, I let the sash folds fall into place and pinned those--again from the right side. (This picture is showing the wrong side.)
This is the right side. I sewed it down.
The finished Paris apron (from the back).
Okay, so this is how I did the cupcake skirt. I folded the sides of the skirt part in twice and ironed, but I left the top and bottom edges raw.
I basted the top edge and then stitched it to the sash the same way as before. (Again, making sure the print was top-side up.)
Okay, so it kinda looks done, except the bottom edge is still raw.
A closer look at the bottom edge.
Enter: cotton eyelit trim. I stitched the right side of the lace to the right side of the fabric.
It's hard to tell here, but the eyelit trim is sticking out about 1/8" from the pink fabric. This is to make sure the "raw-ness" of the unfinished edge gets covered.
Other than the first pin, I didn't use pins for this because I wanted to make sure the trim and the fabric ended at the same time. (In other words: No ease to worry about.)
So here is it from the right side.
All I did was fold the trim back and iron it.
Here it is with the trim ironed back. I didn't need pins now either because it was laying the way it needed to. Now, all I had to do was stitch it down.
The right side. A finished edge.
The wrong side. Still a finished edge.
And from the inside of the waistbands, the edges are also finished.
The End!!!


No comments:
Post a Comment