Friday, January 31, 2020

Refashioning: Paint it Black: A $1600 Louis Vuitton Handbag for $80!

I admit it. I love high end fashion. But I’m also way cheaper than anyone else I know. So...when that is your fate, you either need to get fearlessly creative, or act like a victim and get massively in-debt.

I opt for the former.

Here’s how you can too!

About a year ago, I started searching the internet for second-hand investment bags from Chanel, LV, Hermès, etc.

I found this Louis Vuitton Vernis Houston handbag on eBay for $80. Brand new, this bag sells for a cool $1600!


Now, listen. I did my homework on this one. There were several of the same bag selling for around the same price—some under, some over. But I had a specific criteria that I searched for: a decent interior, no major rips or scuffs, intact handles, and working zippers. I had to search for a few months,  sell a few of my own items on eBay to get the money, and finally found one that fit the bill.


I know, $80 is a lot for a self-proclaimed cheapskate to spend on one bag, but. . .considering that it retails for $1600, my thought was: I can dye that sucker, and when I get tired of it, I can flip it for at least more than I paid for it. Plus, how many ladies throw away $100+ at the local mall for a subpar Michael Kors bag. I don’t think $80 was a bad spend.

If this sounds crazy, remember that I am the woman who dyed a pair of Chanel shoes a few years ago (and then everyone started doing it). Those shoes look as great today as they did back then, so I was up for this challenge.

If you click the words “Chanel shoes” above, it will take you to my post that shows you how to dye your shoes so that they look excellent and not like a hack job. From that post, and when I dyed a Coach bag silver, I learned that Tarrago dye is really good for this kind of project, so I bought another set in “shiny” black. It costs around $10 on eBay.


Inside is a leather conditioner/prepper, leather dye, small brush, and applicator sponge.


I’m just going to tell you right now, that if you attempt this project—even if you buy the supposedly “patent leather”/shiny version of Tarrago dye....it doesn’t work on this bag! This bag is way too shiny.

I spent a while prepping the bag and then painting the bottom. A few hours later after it was dry, the bottom looked super messy, with tons of brushstrokes and uneven dull spots all over it. That is probably because Tarrago is actually leather paint. Same thing with Angelus. If your leather is super shiny, don’t buy either of those. You need an actual dye, not a paint. Instead, do this....


I happened to have an old bottle of Fiebings black leather dye. It’s only like...$5 or something on Amazon, eBay, or your local shoe repair shop.


So...I’m sorry there are pictures missing in this post, but...this is a really messy process, and it’s hard to take pictures while doing it!

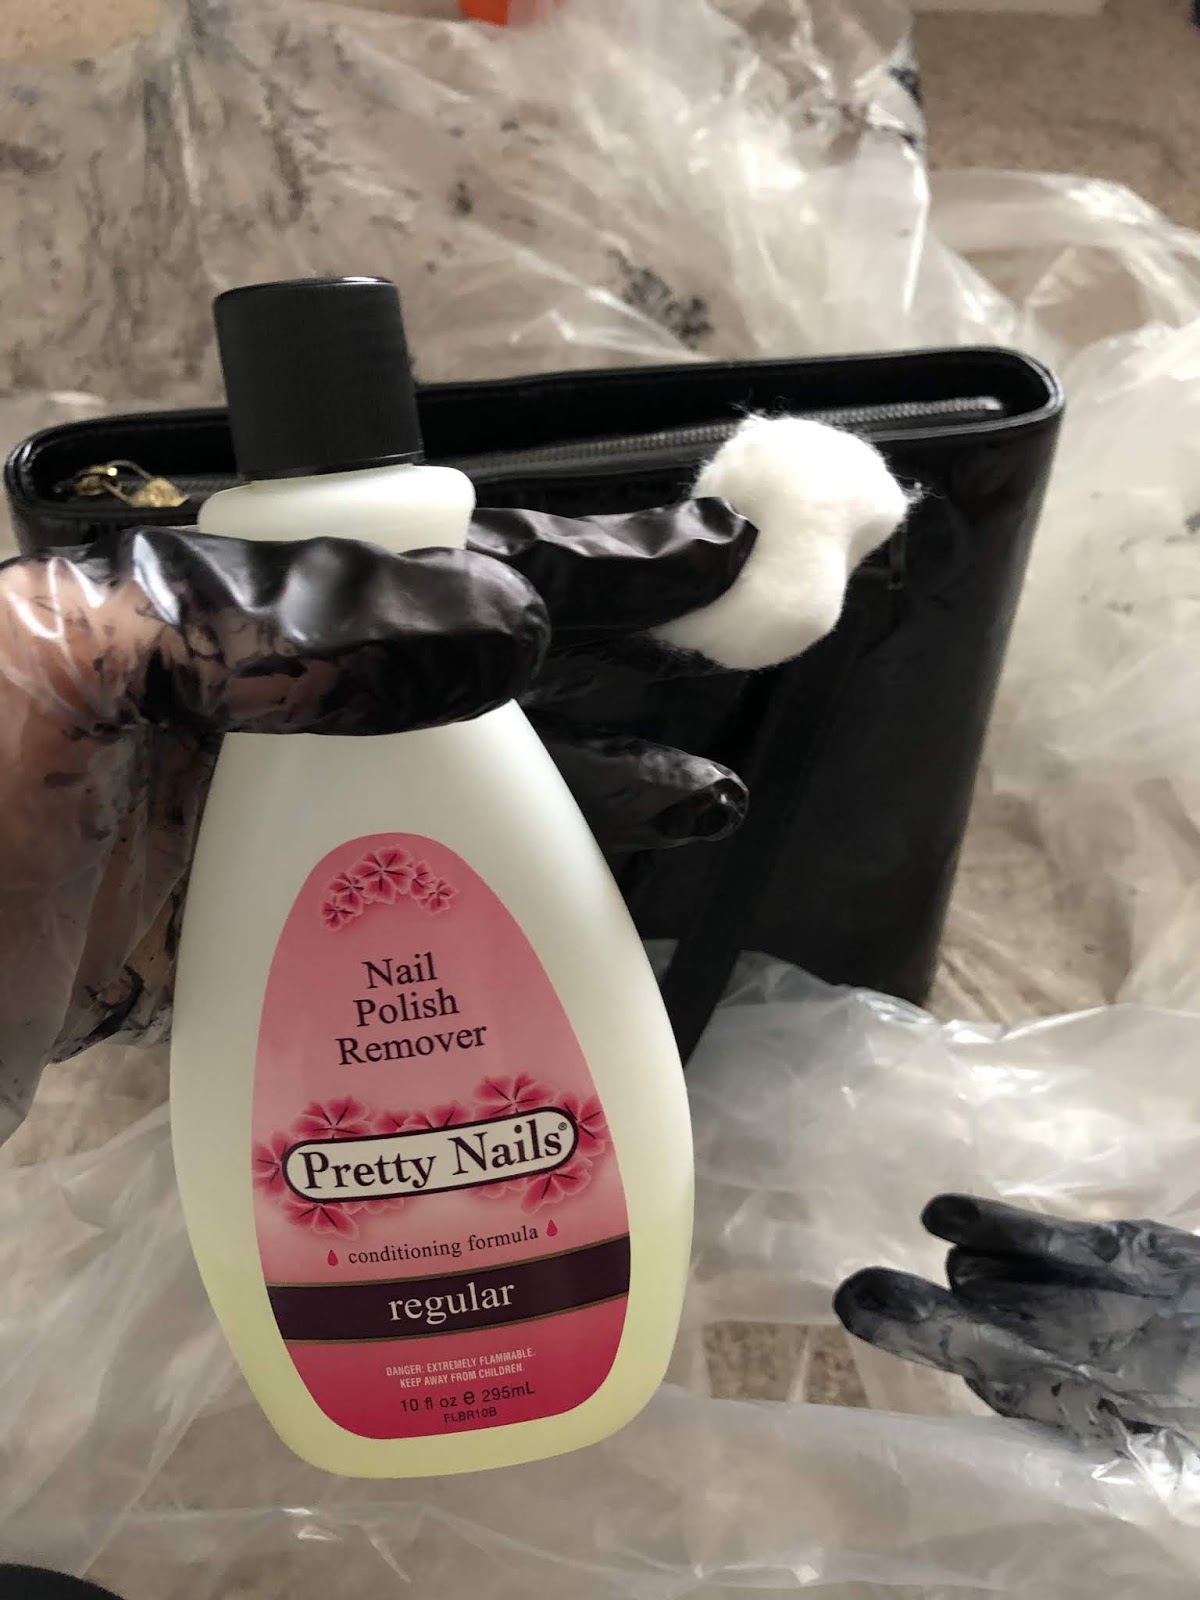
Anyways, do this: Using a cotton ball and nail polish remover, rub all over the bag, the hardware, and the handles. Do this a few times to make sure you remove any residue and “break the seal” over the leather and patent leather. 

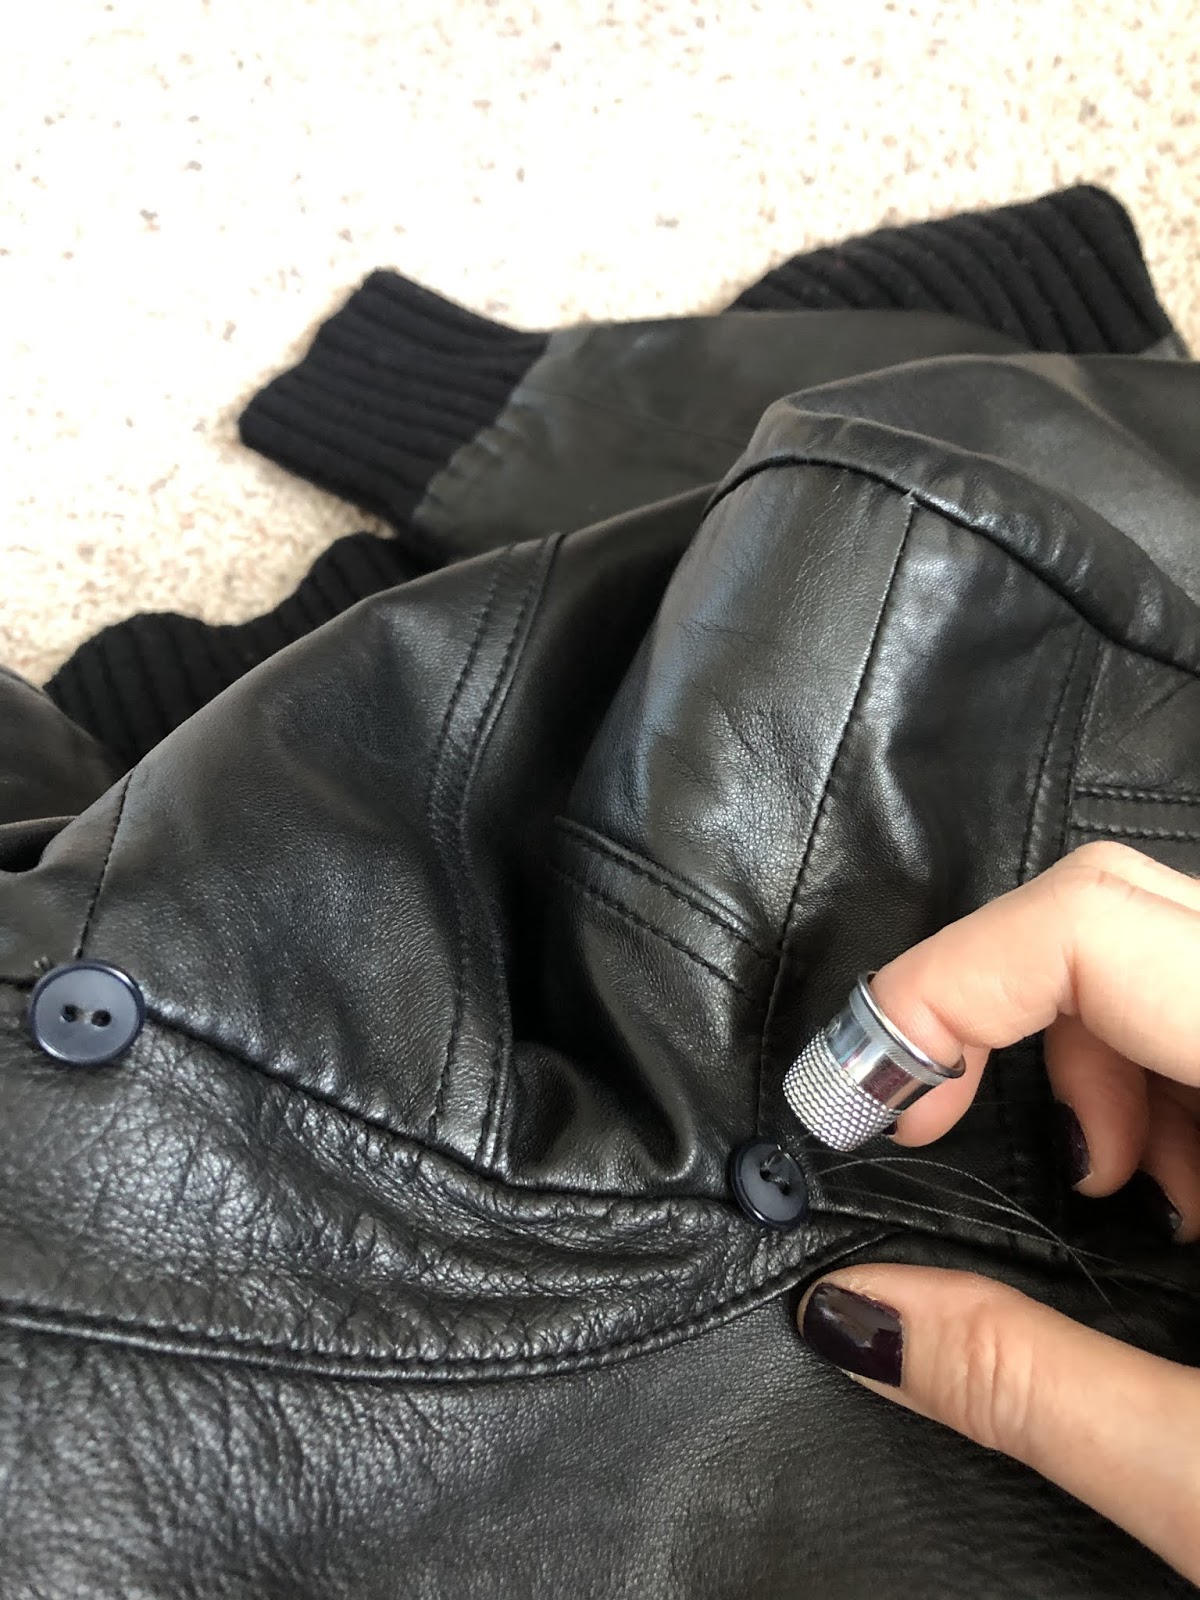
Then, using a cotton ball, sponge, and/or smaller brush, paint over all the surfaces that you want dyed. Don’t worry about the hardware. Just paint over that too. You need to get into all the nooks and crannies.


Then, you need to let it dry somewhere like a garage or basement, but make sure it’s well-ventilated because the dye is really fume-y and can give you a headache. 
(I hung my bag on a camera stand in my garage.)


Now, I know this is unorthodox, and I’m sure there are people who think I’m crazy, but. . .

After it’s dry (give it a few days), go over the whole thing with nail polish remover and a cotton ball. I discovered this by trial and error. I’m sure there are many DIYers who would say never to do this. But this is really the only way to take off the excess and assure that your color won’t rub off onto your clothes. This is also the best way to get the color off your hardware so that it looks like the dye job was professionally done. You could ostensibly use a mild soap and a rag, but. . .I wanted to make sure that the color wasn’t going anywhere. Also, acetone dries super quickly, whereas water takes time to dry and can soak your leather. If some of the color comes off during this step, then you can reapply color and let it dry again. Do this cycle as many times as you need to make sure the color is permanent. It works. I’m telling you.


Look how nice and shiny!


(I did buy some Fiebings Resolene—from Amazon—in case I need it. A lot of sources suggested using Resolene (acrylic sealer) to keep the color from fading and rubbing off onto other surfaces. I plan to use it eventually, but I want to make sure all the surfaces are exactly perfectly black before I go sealing anything. That means I will need to use this bag and monitor it for a few weeks yet. And...I many not even need the Resolene. Plus, I’m a little worried that it might dull the shine...Anyways, I’ll update this post and let you know.)


Because I kept the zipper closed, the interior is clean and neat.


I’m not a huge fan of gold hardware, but. . .if I resell it, other people like gold and black, so I can retain a lot of value by keeping the hardware gold. It’s not obnoxious, so I can live with it.


Looks brand new!


The End!


Refashioning: How to transfer a vintage hood and fur to a jacket and a coat.

Here’s a quickie. This is one of my posts that isn’t quite a “follow these exact rules.” It’s more like, “hopefully, this one gives you an idea.”

So, I go to Goodwill every week. On one of my searchings, I came across this old worn-out coat with a hood attached. What got my attention was the genuine fur trim on the hood. Whatever your moral standing on real versus fake fur, I think you would agree with me that it would be better to reuse vintage fur, rather than throwing it in a landfill, right? So I bought this coat and took it home and then thought about what to do with it.

The coat was pretty gross, and you gotta think about how hoods go on your head. Right? Head lice is a thing, People! Therefore, I detached the hood from the coat and threw it in the washer and hung it to dry. 

(Little secret: You can actually machine wash most treated genuine leather and fur with regular detergent, as long as you hang it to dry and reshape it while it’s drying! Manufacturers don’t like you to know this trick, but you learn these kinds of things when you invest only a dollar in Goodwill finds! Note: doesn’t always work on suede.)


So what I noticed once I got it home was that both the fur and the hood itself were removable with buttons and button holes. This gave me an idea!


I live in South Carolina, and winter barely ever gets below freezing. As a result, I usually end up wearing this leather jacket all winter. I thought....Wouldn’t it be nice if it had a hood in case I’m out and about and the temperature drops suddenly?


I examined the collar to see where the best placement would be to sew on some buttons. I opted for right in the seam and under the collar. That way, they would be unnoticeable when I took the hood off, and easily removable if I ever get tired of having buttons on my jacket. (Read: In the seam, the holes wouldn’t puncture the leather.)


Fortunately, I had five matching black buttons in my inventory.


Here is a view from the outside of the coat. I started by finding the middle back seam for the first button, and then measured the other four buttons out from the middle.


When sewing leather, you should probably have thimble close by. 


Here are the buttons sewn onto the second jacket.


And here is the hood with fur trim attached to the second jacket. Looks like it was made that way, doesn’t it?


_________________________________________________________________
Second Idea: Fur trim on an existing coat.

So...just so that I could get the most out of the luxurious fox fur trim, I decided to make it “addable” to a dressier coat that I have. I really really like this coat and wear it a lot—especially with dresses. I had a feeling that adding fur trim would take it up a notch! 
(I was right! Scroll down!)


So, to keep the buttons discreet (for the times I don’t want trim), I sewed black buttons into the black part of the hood. This view is from the front.


And this is from the back. I can easily take these buttons off if I ever get tired of them without damaging the coat.


Look how lovely!


Super cute and cozy!


Now, go raid your Goodwills!

The End!


Customize Your Glasses Frame’s Color! (Bonus Video: How to get glasses lenses back into their frames when they won’t fit!)

So I have a weirdly small face, and it's not easy for me to buy glasses at optician offices. I enjoy buying cheap glasses online from places like Zenni (click the link for $5 off) and Eyebuydirect (Click the link and enter: IFPGTPHSFC for $10 off!). You can find glasses for as little as $6.95 a pair including lenses!

(Many people complain that buying glasses online is too risky. All you need is a ruler that measures in centimeters to measure the width of your face, pupillary distance, and lense size. You also need your current prescription. Both of these websites let you virtually try on glasses before you buy.)

So...I have this thing...where I feel like I have to have everything in every color. So far, I have several pairs of glasses in several neutrals, red, blue, yellow, and purple. Then, I saw these orange ones on Eyebuydirect. On the site, they looked to be a very bold orange, but in reality they were more like a rusty brown:


You can see, they really read as brown when I wear them!


Well, that was disheartening, especially since I’d ordered two pairs!! (I work for VIPKid, and wanted orange glasses for teaching, and then one pair for wearing normally.) Well, since I’d ordered two pairs, I decided to search Pinterest for some ideas on how to change glasses frames’ colors. One blogger mentioned painting with nail polish. What a terrible idea!! The color was what I wanted, but look at all the terrible brush strokes!


Here you can see the brush strokes more clearly. Gross!


See how bad the nail polish looks on me? It just looks dirty. So annoying.


Okay, so the next part of the blog is some trial and error. If you are strapped for time, skip to the end. If you wanna see the entire thing, stick with me. (It won’t take long. Don’t worry.)


So, another blog suggested popping the lenses out and spray painting them. Okay, that is a dumb idea for several reasons: (1) I’ve spray painted things before, and it’s really hard to do in winter, because it’s cold and windy, and you can’t do it in your house because of the fumes and the potential mess. (2) Spray painting is fine for shoes and some clothing, because they are far enough away from people’s sight lines that an uneven coating isn’t too noticeable. Because glasses are on your face, the coating needs to be PERFECT or else it looks like trash and you will never wear them out of the house. Trust me. (3) There is no way to ensure that the inner ridge for your lenses stays clear of paint buildup. You need to be able to pop your lenses back in, right? You can try to tape off that inner ridge, but then your spray coating needs to be super super accurate. If you have ever spray painted anything before, you will know that this is a fool’s errand. There is a reason people use spray paint for big projects and not little ones like glasses. (4) Blog posts of glasses that have been spray painted look like crap. I know that sounds mean, but. . .I’m being honest.

Glasses are on your face, People. They need to be PERFECT. This is not time for arts and crafts!

So, what to do....

Then, I started searching synthetic dyes. I have dyed some of my clothing before with fabric dye. But I had no idea that there was such a thing as synthetic dye. I watched a few YouTube videos of guys who had dyed their frisbee golf frisbees with synthetic dye, so I thought. . .maybe that would work!

I found a dye called iDye Poly (from Amazon) in a bold orange color. The directions said to add the dye and the reactor (in the same package) to boiling water. I got an old pot (NOT USED FOR FOOD, OBVIOUSLY!!!), a packet of dye, a meat thermometer, and a small tub of cold water.


Make sure you’ve removed your lenses, before you start dying them!!


So, then I brought water and the dye to a boil.


The package said to keep the dye at 165 degrees, but a helpful YouTuber said to keep the water around 140 for thin plastic (so it won’t warp), dip it for a few seconds, rinse it in cold water, and then repeat until the color is what you want. 

I didn’t want to ruin my meat thermometer, so I measured the heat from underneath the pot.


So that’s what I did....dipping, and....


...rinsing....


I did that over and over for about 30 minutes, but the color still wasn’t where I wanted it, although, it became definitely bolder. This is probably due to the fact that I was dying on top of a translucent rust color. I should have started with a lighter orange, yellow, or even clear frames....oh well. 
Just to show you, I put the original photo underneath this one, so you could compare.
After:

Before:


And if you need to see them on my face, the first one is the before, the second is after. Even though, the color looks very different in the pictures above, you can see below that they still look brown on me (and when I wear brown, it really makes my nose stand out!!!).

Before:

After:


So....that was a frustrating waste of time. I was back at square one. I was going to give up, but then I started searching Zenni again and found these: orange and pink (because I’d been wanting some pink ones for a while too.)


This is what they looked like on me. I mean....they are okay, but...the color is so light that they kinda wash me out and age me.


So....third time’s the charm, right? I ordered some RIT DyeMore Synthetic dye (also from Amazon) in pink and orange.


I repeated the whole “dip and rinse” method that I had done above. The pink ones took about fifteen dips. The orange ones I dipped twice!


FINALLY! Colors I like!! And so professional looking! Also, notice that my face looks so much more proportional and in focus! Colors are important!

Before: (so you can compare)


And because sometimes, the dying process can shrink your frames a tiny bit, and your lenses may no longer fit.....
Bonus: Video on how to get lenses back into frames when they won’t fit!


The End!