Showing posts with label functional. Show all posts

Friday, February 26, 2016

Refashioning: Making Clothing More Functional - Dress into a Skirt (Method 3)

I have done two "Dresses into Skirts" blogs using two different methods. (You can find them here and a NO SEW method here.) Today, I am going to show you a third method. 

I did it with the sleeveless dress below. This dress makes me think of the Portlandia sketch, "Put a Bird on It!"


Okay, so up close we can see a waste band that is similar to the "No Sew" waistband from my prior blog post, with one significant difference. The "finished" portion, instead of being at the top of the waistband, is actually at the bottom of the waist band. That means if we want a finished edge, we will have to cut off the skirt portion and wear the bodice as a top. Well, the bodice is the part that I'm not thrilled about, so this post is about how to make a dress with this particular waistband situation into a skirt.


I got out my trusty pinking shears and cut above the waistband and into the bodice about 2 inches or so. I wasn't careful, because this part doesn't matter. I just needed to remove most of the bodice.


So then, what I did was to fold the 2" portion to the inside. This is looking at it from the front. . .


. . .and this is looking at it from the back.
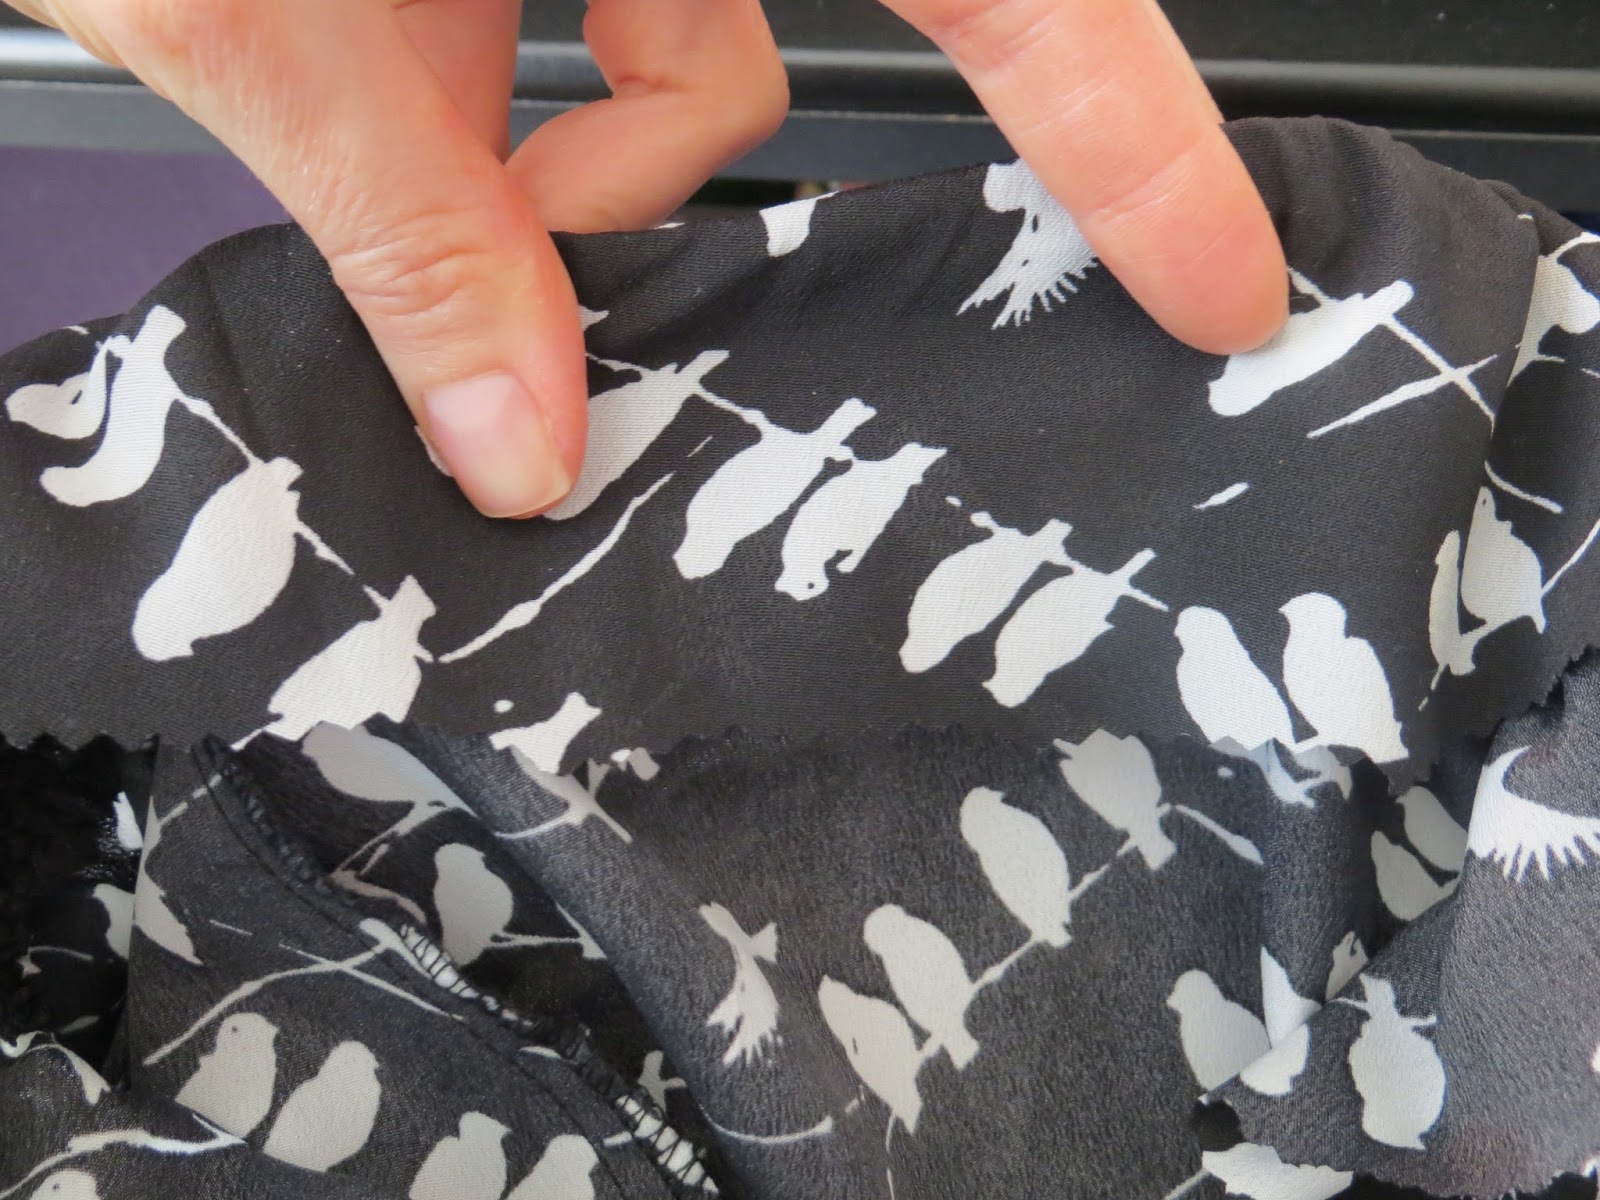


With the 2" seam folded to the back, I tacked the waistband down with the needle sticking into the fabric. I used a straight stitch.


Then, I gently pulled the elastic flat and continued stitching in the ditch just under the elastic.


When, I was done, my stitches were almost invisible. . .to the untrained eye. . .


I didn't bother trimming the excess off, but you can if you want. I suggest using pinking shears so you don't have to worry about the fabric fraying.


The End!


Refashioning: Making Clothing More Functional - Fixing a Weird Trend

Sometimes, you find an item at the thrift store and you go, "Now that trend must've lasted about five minutes!" That's how I felt about this dress. From the front it's super Minnie Mouse cute. . .


. . .but from the back, it makes you go, "Crap!" and put it back on the rack, because. . .you can't wear a bra with it!


Fortunately, it's a simple fix.


The first step was to cut the twisted part down the center. To do this, I worked the fabric so that I could fold the bottom of the twist in half like this:


Then, I made a small cut in the fold.


Then, I worked the top part of the twist and folded it in half like this:


And I made a small cut in that fold. (I'm pointing at it).


Then, I worked the fabric so that I was looking at the untwisted band, flat, with my two cuts.


And I cut down the middle.


This cut allowed the twist to lie flat.


I sewed up the middle. Still a problem, because of that hole. If you don't mind the hole, you are done here, but I didn't want my bra to show.


I found a piece of fabric that was slightly larger than the hole.


I pinned it to the inside of the dress around the hole.


And I stitched it up. 

You may like the "before" look better than my fix. It's seriously a preference thing. Anyways, I hope it gives you an idea!


The End!


Saturday, February 13, 2016

Refashioning: Making Clothing More Functional - Replacing a Panel

Sometimes what keeps you from wearing an item isn't the fit or the dimension. Sometimes, there is just one odd thing about it that you just wish were different. Like the dress below, for instance. I loved everything about it, except the weirdly patterned panel right in the front. It was just obnoxious enough that I would never wear the dress like that.


Using the lining from the dress I modified in a prior blog post, I cut out a piece of black lining fabric. I wasn't precise in my cutting. I just made sure the piece was bigger than the panel I wanted to cover.


Then, I just pinned the panel over the horrid panel, folding it flush as I went.


A close up of one of the corners.


Then, I sewed over it with a straight stitch.


This was fine, except, there were some little tiny gaps. Most people might not notice them, but I sure would. . .


So I went back over the panel again--this time with a zig zag stitch.


Perfect!


The End!


Wednesday, February 10, 2016

Refashioning: Making Clothing More Functional - Two Okay Dresses into One Great One

Okay, so at first glance, you might wonder what is wrong with these two dresses. They are both perfect Type 4s and seem to be exactly my style. Well, honestly, this is just a personal preference thing to me. This is what I find wrong with them: The dress on the left is just boring to me. I have a couple other hounds tooth dresses that I end up wearing when I am in the hounds tooth mood, so this one always gets neglected. The dress on the right is actually a weird tunic thing and while it looks great in the picture right here, scroll down one.


See??? Who designed this? The pleats billow out right at the boobs, making the wearer have absolutely NO SHAPE!


I am actually a fan of a good Korean hanbok, which also cut off at the boobs, but this dress is trying to attempt the same thing but with slinky fabric, so the result is an epic fail. However, I LOVE the red polka dots, so let the harvesting begin!


So, if you remember my blog post about turning dresses into skirts, you will remember that the placement of your zipper is very important before you start cutting. In this case, I was harvesting the top of the hounds tooth dress, so I made sure that the zipper was zipped all the way up.


Also really important: I cut below the bodice and left about 1/2 an inch of the skirt part. This is to allow for seam allowance.


To free the polka dots, I cut the skirt off the. . .can I even call it a bodice? Anyways, you will notice the skirt part has those pleats and if I had cut into the skirt, I would have had to re-pleat them, so I cut into the "bodice" part up 1/2 an inch to allow for seam allowance and also to save having to re-pleat the skirt.


See the line of black at the top? That's the seam allowance I'm talking about.


Then, I pinned the first bodice to the second skirt.


I used my quilt seam allowance measurement thingie (I don't know technical terms sometimes. . .It's that metal arm thing next to the outside of the fabric) to keep a steady measurement of an inch seam allowance.


The finished dress.


Okay, so the belly is still a little pouchy, but at least the skirt starts well under the chest, so you can see that the wearer has a shape! I will definitely wear this dress more often! 


                           It may not be your cup of tea, but hopefully you got an idea from it!


                                                                             The End!