If you are like me, you have a problem trying to figure out what to get your man for Valentine's Day. I guess if you are the woman, you are allowed to skip this one every once in awhile since V-day is traditionally the time when the man buys stuff. Anyways, I just love my little baby and wanted to make him something.
I was at the thrift store the other day and came across this pattern. It was kind of a ghetto deal where the paper patterns, in order to conserve paper on the part of the printers, were on the fronts AND BACKS of the same piece of paper! You were supposed to leave the "master" paper alone (as in not cut it), and then trace around the pieces you wanted using special pattern tracing paper. Um. . .I'm going to cut the patterns I need from the patterns in the package and DEFINITELY not buying more paper, thank you! Why do you think I bought the pattern! I did have to tape computer paper together to trace some of them. . .That was annoying. Oh well, the pattern was only a quarter.
Okay, rant over.

I went to another thrift store and found about 4 yards of this. . .I don't know what to call it. It's fleece on one side and shiny on the other. Anyways, it was bright royal blue and very soft and warm. I'd been looking on and off for the past few years for a classy "smoking jacket" for Billy to lounge in at home, but never found anything I liked. The stars aligned and I made the robe you see below:

I followed the pattern for the major parts, but as you can see my finished product is shorter and the pockets are different from the ones on the pattern packet. Actually, they are quite different as the ones you see in the picture above are really false pockets. Instead, I opted for side pockets at the seam rather than applied pockets. I just feel that side pockets are more comfortable. Plus, the robe looks classier this way.
(At one point I was trying to hurry, and I accidentally sewed a side pocket onto one of the sleeves! That's what happens when you make clothes for someone tall as a giant. You get lost in a sea of fabric.)
I used the sheen vs. fleece of the garment to make contrasts in the over-all aesthetics on the outside. In other words, most of the garment is shiny, but the false pockets, collar/band, waist chord, and sleeve cuffs are fleece. I did this to add interest to the look, but mostly I kept the fleece on the inside as functionality for warmth. Also, (I didn't take a picture of this, but. . .) I made the insides of the pockets fleece inside.
How I did the false pockets:
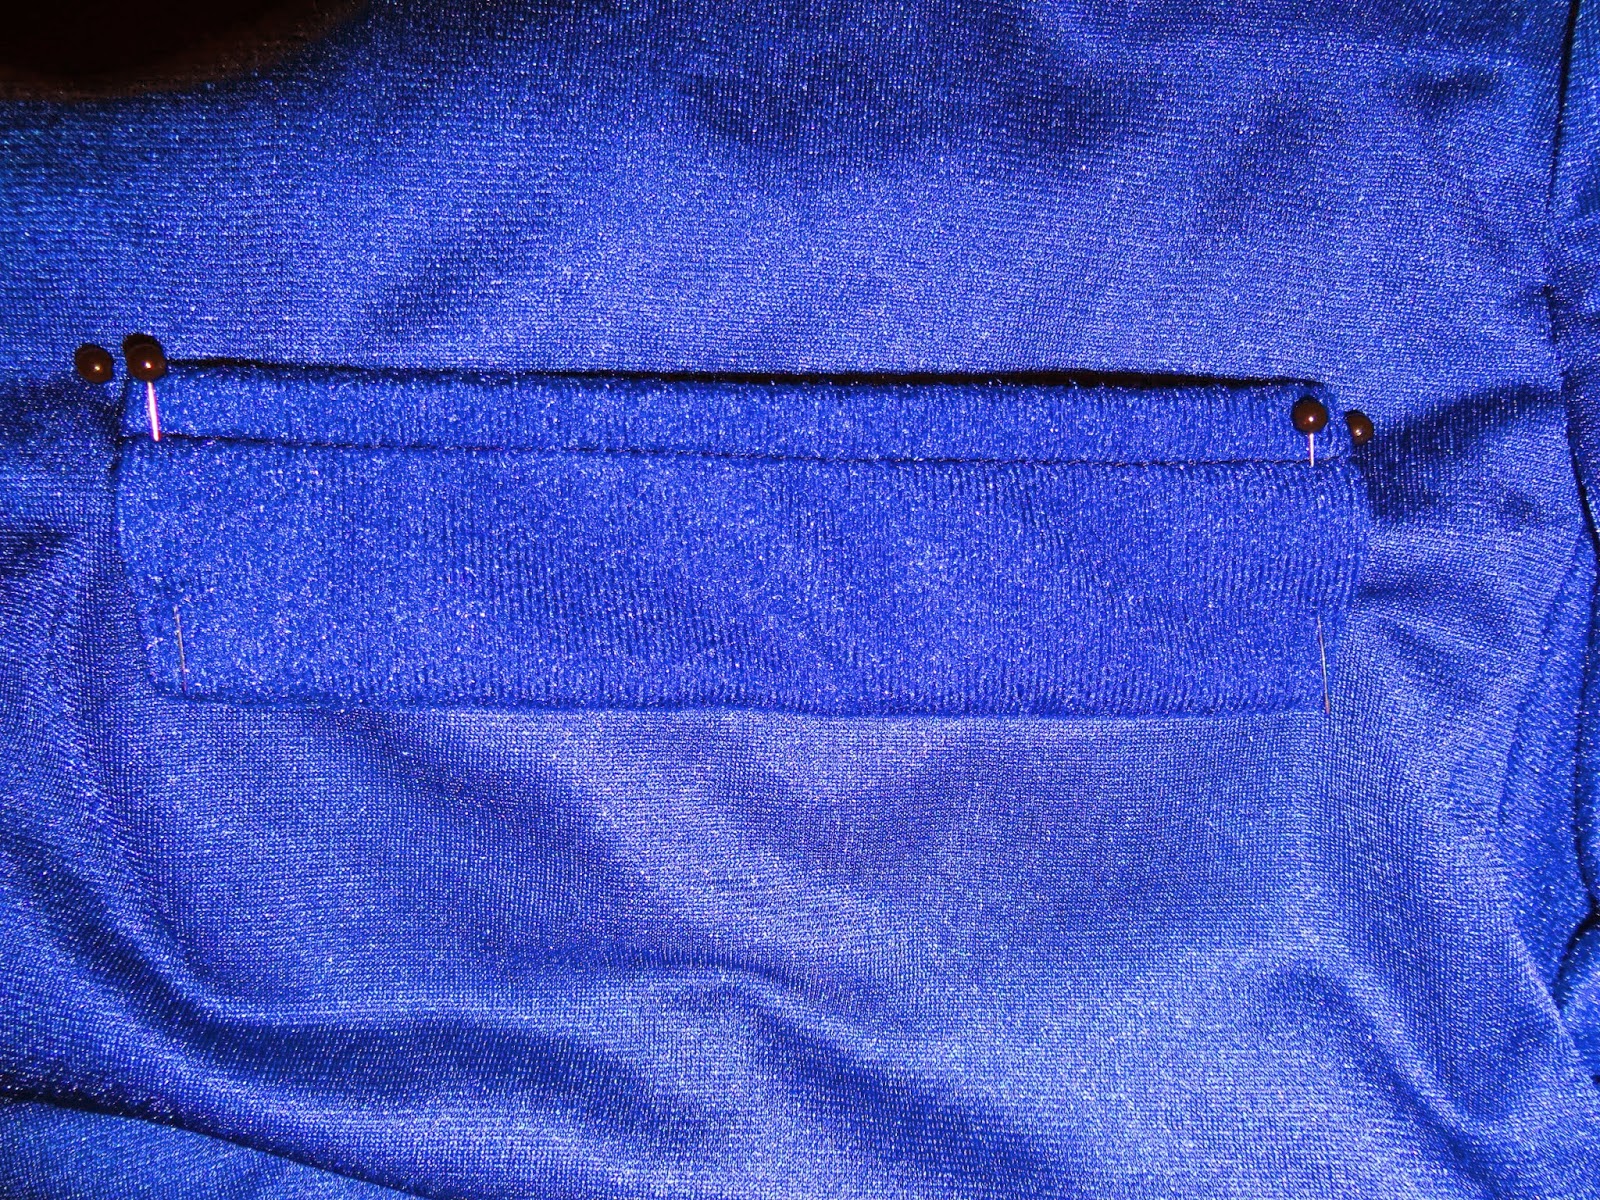
This part actually took the longest, because it was the hardest to plan. First, I had to determine where the tops of the pockets would fall in relation to the outer and inner seams on the front, how far below the belt they would be, and how wide they would be. This wasn't easy, but I won't bore you with specifics. After doing that, I put pins to mark where the top of the pocket should fall:

Leave it to Blogger to make my explanations even harder by putting my pictures in sideways. . .Anyways, if you turn your head to the right and pretend the right-hand side of this picture is the top, I laid my fake pocket on top of where the first pins were, but measured down halfway and pinned the pockets to the garment:

Okay, now the top is the top. See where I stitched? That was what those pins above were for.

Then I trimmed the top part off:

Then I folded the bottom part up to meet the first pins:
Then I stitched up the sides. If you look at sports jackets, this is what the tops of the pockets look like.

This really makes me crazy, because the false handkerchief was my favorite part and the picture is sideways no matter what I try. . .Anyways, if I can direct your attention to tipping your head to the left. . .

I also put in an internal tie to keep the whole jacket in place. This wasn't part of the pattern, but. . .it's a good idea if you make a robe. One side attaches to the waist of the left-hand side seam, and the other side attaches to the waist of the right-hand side seam of the collar/band.

If you see how I'm tugging at the waist chord in the back, you can see that I've attached the chord to the actual garment at the middle back of the waist (picture is sideways again). This keeps you from losing the chord in the wash. I learned that trick from a coat I own.

I also tacked the folded over cuffs of the sleeves so they stay in place, but still look folded and unattached.

He's cute, but he refused to model, so. . .Here is the finished product. . .modeled by the floor!


The End!
No comments:
Post a Comment