I just wanna be clear here.
I started this blog, years ago, as a creative outlet from the hum-drum of life. I do projects all the time, but posting them online sort of holds me accountable. If I didn't post things here, I would be less likely to actually do them. I really enjoy learning new things, and I enjoy posting and cataloging them here, so I'm thankful to have this medium.
This blog is a needle in a haystack. There are millions of DIY blogs out there. Isn't that great? We can all learn from skilled people who bother to share their ideas and projects. We live in a day and age where information has become so accessible that you can actually learn a new skill every time you open YouTube. Back in the olden days, you would have to apprentice for years to learn a new skill...or at least read a book.
This accessibility is good and bad.
It's good because the ability to learn is literally a click away.
It's bad because once something amazing becomes uber-accessible, people stop caring. Most people don't avail themselves to this fountain of knowledge. Instead, they just get dumber playing games, watching TV, and posting mindless things on social media.
Anyways, my point with this blog is not so much to show off or to get you to ask me to do all these projects for you (Note: I'm for hire, but it'll cost ya!). I work a regular job, albeit part-time, but I still have all the duties of a regular housewife, plus random "extra-curriculars" with my church, friends, and family. So, I actually don't have as much spare time as you may think. It's just that when I do have time, I try to use it. I try to use my time either learning a new skill or honing an old one. I do this in hopes that my brain stays creative.
A wise lady once told me, "You gotta use it, or else you will lose it."
But it's not just me. You can be creative too. That is my MAIN reason for this blog: to inspire you to try something new yourself. Some of my posts are step-by-step. Others are just informative. Others are a combination of the two. But the main purpose of this blog is to inspire you. If I do something that you like, there is literally nothing stopping you from doing the same (barring a physical handicap).
I think sometimes people think that there are creative people and that there are non-creative people. Most people I talk to consider themselves the latter. I think that is crap. If you are living and breathing and have any kind of appreciation for art or crafts or DIY or whatever, the only thing stopping you from doing them is yourself.
I think the main reason people tell themselves that they can't be creative in certain areas is because of fear. It may sound silly to say that. I mean, are people cowering in trepidation of a pair of scissors and a glue stick? No. But what I mean is fear of failure. If I can tell you anything helpful, I hope you will at least hear this: Don't be afraid of failure.
Sometimes, I simply like to do projects to see what I can learn from them. Not all projects have to be perfect winners. In fact, I didn't post this (and I TOTALLY should have) but I actually slit my finger open on my rotary cutter while cutting pieces for my first T-Shirt quilt and had to run to the bathroom to get it to stop bleeding all over the place. On my second T-Shirt quilt, I actually sewed a big, horrible fold into the outer seam and had to take out about a foot of stitches and resew them.....and I've been sewing on a machine SINCE I WAS SIX YEARS OLD, People! So, no one is perfect, but you know what?
It's called "learning"....and no one is immune!
But the problem is that most people let their fear get the better of themselves, and then that fear turns to very real laziness. I mean, really. Why spend eight hours on a quilt when I can just run to the store and buy a blanket for $12? Who has time for all that mess? Why spend days sewing a dress when I can just get my crafty friend to do it?......But at what real cost, though? When we live like this, we (...yes, fuel the exploitative "Made in China" machine, but that is a whole other can of worms...) end up completely losing that amazing feeling of accomplishment and self-worth.
And isn't that what made America great? ;)
Anyways, don't be afraid of failure. This project today is sort of testament to that. (What? There's an actual project to come? This isn't just a self-righteous sermon???) Sometimes, you should just try your hand at something you've never done before, simply so that you can learn about the process. Even if the end result is crap and you will never end up using or wearing it, if you bother to learn what went wrong or what could have been improved, you will be better for it. The process itself actually (1) gives you a deeper appreciation for people who do the skill for a living ("Oh...I was going to pay him only $20, but this is clearly a $100 job!") and (2) you end up getting one step closer to becoming an expert yourself.
So...thanks for listening, and I hope that you take to heart what I've said. Now, let's get into today's project and end this rant that was not unlike a current episode of Saturday Night Live:
Really preachy and went on a liiiiittle too long.
So today, Kids, we are going to make a pair of shoes. Remember that post where I made those Kimono-style shoes? Anyways, I was searching "leather shoe pattern" on Pinterest the other day, and came across these old Viking/Nordic patterns for shoes. I don't know why I'm always so dazzled by shoe-making, but I really am. I'm still learning, and one day, I'll get it right!!!
(But today was not that day! Oh well, read on!)

I'd never seen a pattern like that before, and I was inspired by the other-worldly look of all the branch-like pieces sticking out from the toes. It's not really my cup of tea to wear personally, but from a mathematical standpoint, the fact that they all gathered--from seeming chaos into toe-covering order--was really compelling to me.

Okay, so...I didn't take pictures of this part, but what I did first to make my own pattern was to make a "tape cast" from a pair of ballet flats. I saw a tutorial about it several years ago on YouTube where this kid covered a stiletto with cellophane and then added strips of masking tape all around until the shoe was covered. Then, he cut the tape/cellophane part off the shoe. I thought that would be a great way to make a pattern for a shoe, so that's exactly what I did...except I used black gorilla tape instead, because I didn't have masking tape.
The picture below is after I cut the tape off the shoe. You can see that there are a bunch of triangular pieces sticking out. (If you make a tape cast shoe pattern this way, you don't have to cut it off this way. You can cut it off any number of ways as long as you get the whole thing to flatten.) I did it this way because I wanted to try to make a shoe--sole and top--in all one piece of leather. I also wanted to allude to the "branch-like" tendrils of the Viking shoe above, but in a more modern pointed-shoe way.

I traced my tape cast onto some cardstock. I added a little bit of seam-age in different places, trying to anticipate the final result.

Okay, so taping it together, this shoe looks pretty cute, no?

Part of the reason it looks so good is because the cardstock has so much body to it. Because it can stand up on its own, it holds a really great shape.

So here I traced the card stock onto some leather. Then, I cut out two mirror-image pieces. (One for each foot.)

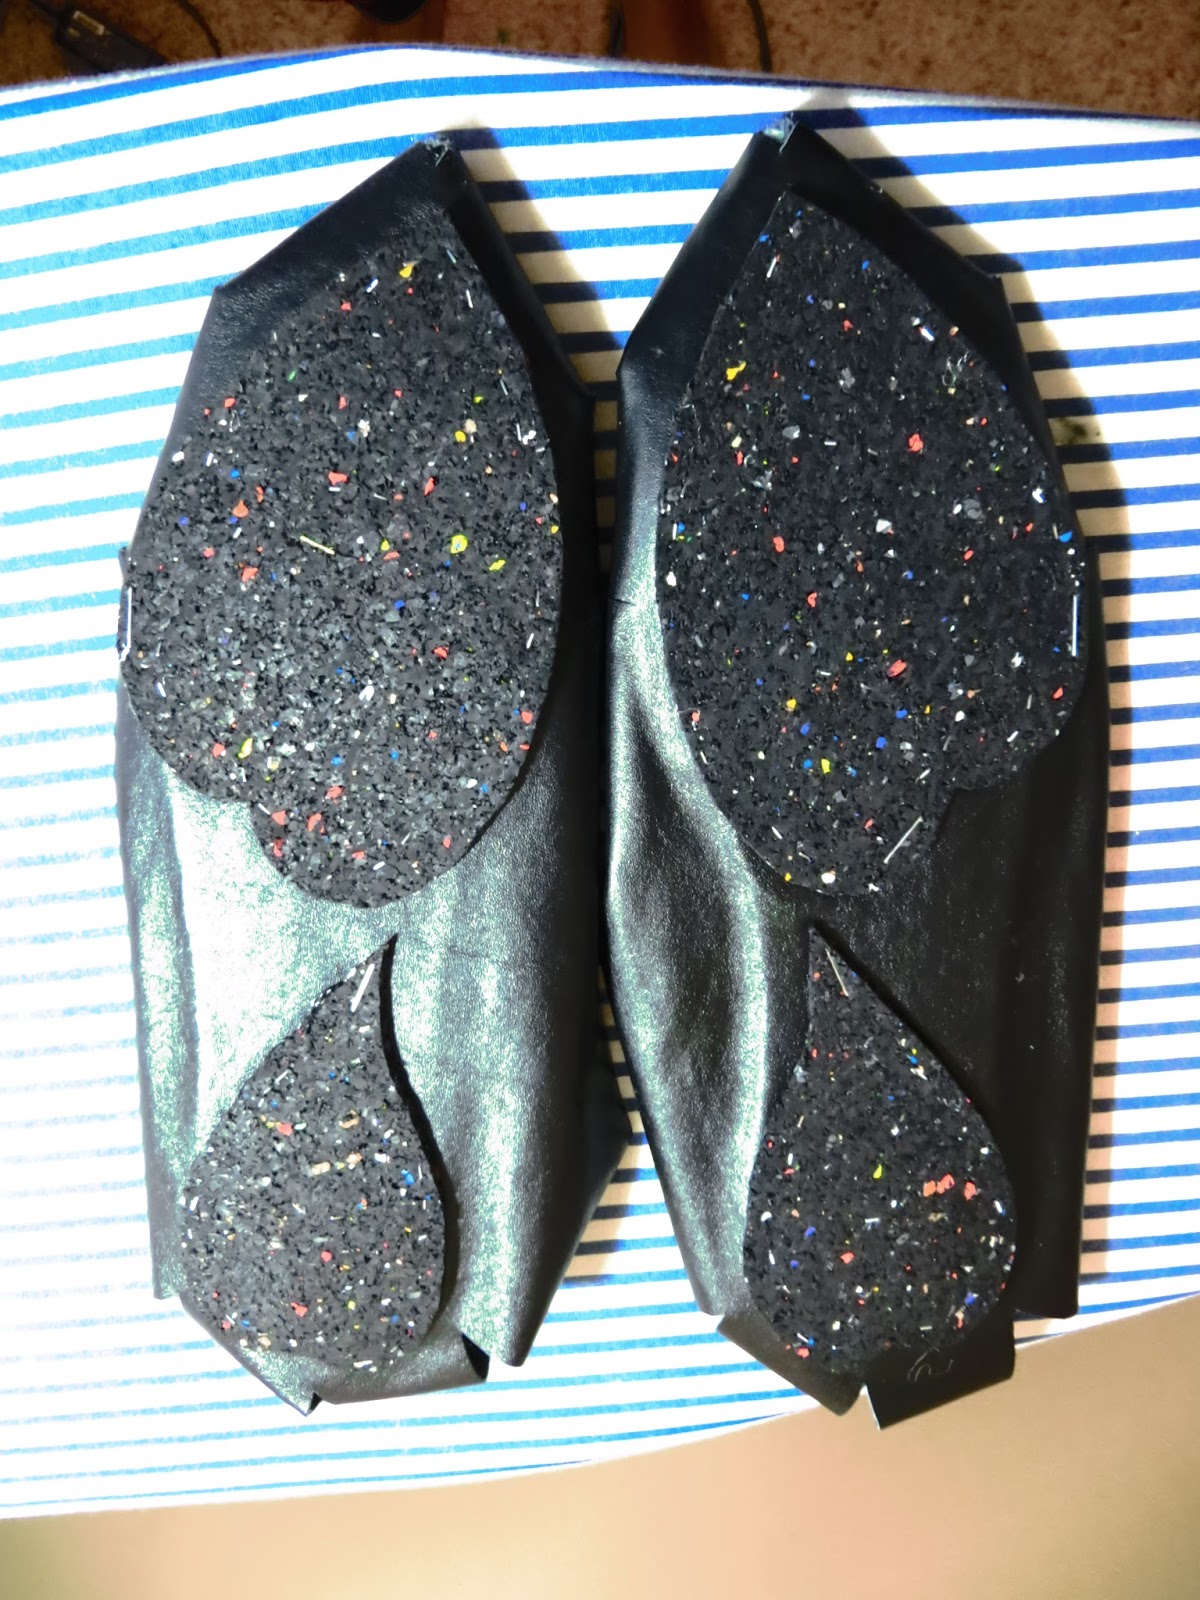
Okay, so...Tieks, right? You know how Tieks have that double sole? (Well, you do now! Just look at the picture.) Anyways, I wanted to try that.

But I stylized mine. I made the ball and the heel parts into hearts. I thought that was kinda cute. (Copyright: Jessica Jones 2017.) :) I used recycled rubber from a roll that I think is supposed to be used for car mats or something. Anyways, I glued the pieces on and then stapled them in place. I learned from my last post on shoe-making that glue alone (even the really special cement-type glue that is EXPRESSLY for shoe-making alone) peels off over time. A stapler was the closest thing I had to those little nails or the industrial rubber/leather sewing machines that are used for shoe-making. And you know what? It worked!

I cut out some plastic canvas to use as the sole stabilizer and glued that in place.

Then, I cut out some craft foam to use as the cushion. (It works really well! Very comfy.) I think you can buy this stuff at Dollar Tree. After that, I cut out a piece of leather and glued it over the cushions to cover them.

Okay, so skipping ahead, I sewed a few stitches in the heels to hold those pieces in place, and then I sewed a few stitches in the toe area to keep those pieces in place. They were supposed to have only needed one stitch in the heel and one in the toe area because all the pieces were supposed to have gathered up to those two points, but...that ended up not actually working.
Anways, here are the finished shoes.

I mean, I guess they were a success if you are into Tom's and hobo-chic shoes like that. I'm not. These shoes looked different in my head, and they are way too big, so I'm not happy with them, but...oh well! I learned stuff for sure!

Next time, I think I will try making a tape cast of a sock instead of a shoe. See, I think that my taping around the outside of an entire shoe added a lot of extra, unnecessary dimension. I've heard that some people make tape casts of their socks for this reason. If I had taped around a sock, I would have had a better, more tailored pattern of my actual foot. Or...you know what? Forget the sock, I'll just put cellophane around my foot and tape that! That way I won't ruin a sock.
Also, I think I will definitely reinforce the leather with something with more substance...either interfacing or maybe another layer of leather. I'm just trying to figure out how to make a shoe with the least amount of sewing and without having to buy a shoe form (called a "last") and nails and all that stuff.
I am really happy with the sole and the inner workings of the shoe, like the cushion and the plastic canvas, so I'll have to remember that part. Good thing I have it posted here!

So...what did I learn? Well, This whole process took five or six hours and I found that I still have a lot to learn.
I learned that maybe Tory Burch isn't so much the hack as I once thought she was...Ha!
(Just kidding. I like Tory Burch.)
Shoe making is a definite art!

The End!


