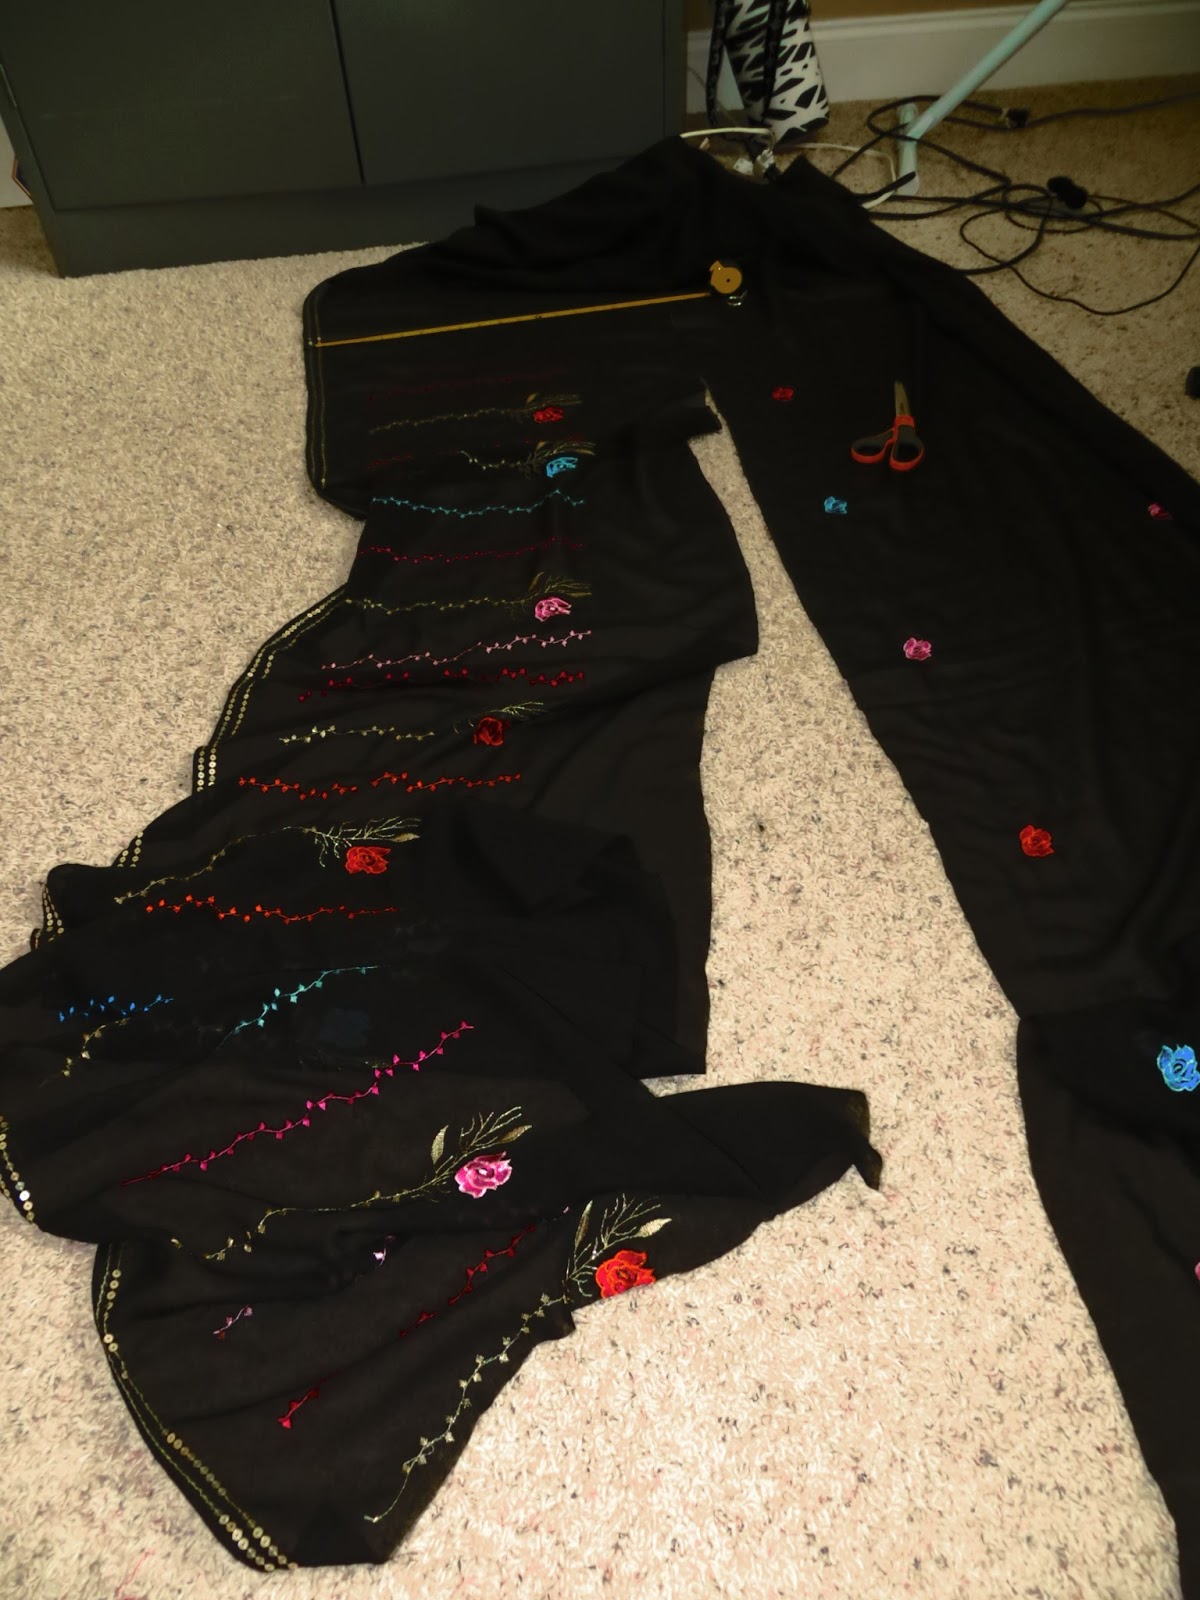
Okay, so this post is going to be a project that is TOTALLY outside my comfort zone.
But. . .I did it anyway.
I was in Texas recently and noticed that these kimono/caftan/cardigan/duster/robes were everywhere.
Like. . .everywhere. On people. In stores. In shop windows. Everywhere.
I studied a few of them and saw that there was really nothing to their construction--just a few seams. My first inclination was to hate them--Not on other people! On many ladies, they looked super chic and perfect. But, I am not a flowy kinda girl, so I just sorta noted them as something I would never wear and tried to move on.
Here are some examples. They come in different fabrics, but mostly airy thin, non-stiff fabrics like chiffon and silk. They also come in different lengths. This first one is shorter.
But they also go down to the floor like this one.
Some of them have a bit more structure like this one.
I did notice that most women who wore them tended to wear all black under them. . .
. . .That was when I started to consider possibly making one myself.
Once I got back home, I remembered that I had this black sari that I'd bought off the streets in Jaipur, India about eight years ago. I've collected about five or six saris from my various travels, but this one has always been my favorite. (After learning about "Dressing Your Truth," now I know why!)
Anyways, another point to make is that embroidery is currently a VERY hot trend (especially rosettes), and this sari is covered in embroidered rosettes!
But did I really want to cut it up? I mean. . .what if I ever have some international event that requires dressing up in cultural garb? Will I have missed my chance to wear this amazing piece?
Then, I thought, "Jessica. . .when are you ever going to wear this? You live in the Bible Belt and everyone would probably freak out if you showed your mid-riffs.
"Plus, you're white as a sheet, so. . .You will just look like a poser anyway."
Good point!
So, I decided to see if I remembered how to put a sari together--sort of as a last "Hurrah" for my poor sari before I started cutting it all apart. . .I learned how to do this from an Indian lady I met in Singapore.
Well, I remembered!. . .Without any outside help! Not bad for a white girl who last did this probably nine years ago!
I love how saris always make a lady's butt look amazing. It's a little hard to see here as my dress form doesn't have legs, but. . .just take my word for it!
(If you ever wondered what goes under a sari, this is it. Basically, the sari is a huge long piece of fabric and you wrap it and fold it and tuck most of it into the waistband of a petticoat like this red one.)
Okay, this next picture denotes about an hour's worth of time as I was playing with the sari and seeing how much fabric I had to work with and then telling myself to go for it and start cutting. . .and then talking myself out of cutting it. . .and so on.
So, to get myself motivated, I started to hem the back bottom part of the section that gets thrown over the shoulder. (That is the fanciest part of any sari.) It needed hemmed anyway, and it helped me to get over the fear of refashioning it.
My first step was to sew the raw edge under about 1/2 an inch. . .
Then, cut off the excess. . .
Then, fold it under another 1/2" and sew it down again. It's kind of a pain to sew the seam twice, but chiffon doesn't iron very well, it shifts a LOT, and you do have to hide the raw edge because it unravels like crazy. Folding, sewing, and then folding and sewing again is the only way to make sure everything stays in place.
Okay, once that edge was hemmed, it was time to start cutting. I found that the embroidery only covered the sari for 137 inches. I found that if I divided that by three (I'll tell you why later) and accounted for seam allowances, I would end up with a duster that was about 45 inches long--or just above the ankle on me. That seemed a decent length as I didn't really want a short one, but I also didn't want it dragging on the floor. (If you make one, you may want a different length.)
So here is how I cut what would become the back panel: I started by laying the fabric out flat on the floor. Then, I measured about 45.5".
I moved the tape measure in a few inches and cut from the edge to the 45.5" mark.
Then, I carefully moved the tape measure in a few more inches and cut to the 45.5" mark again.
I kept doing this. . .
. . .until the whole panel was cut through. (Incidentally, this is the best way to cut thin, chiffon-like fabric into a perfectly dimension-ed square or rectangle. This method assures that your whole piece of fabric is the same length all the way across. If you just lay a piece of chiffon down and cut straight from end-to-end, the fabric will shift and your line will go zig-zaggy and all over the place.)

Okay, so I set that piece above aside. Do you notice how much prettier the piece above is? That is what I was talking about when I said that one end of a sari is always prettier and more decorative: It's the part that gets thrown over the shoulder. Anyways, there is still some pattern that continues for several more feet, as you can see below. But notice something else: Do you see how the left-hand edge of the fabric has sequins whereas the right-hand side (where I'm pointing) does not? Okay, this is why I divided the embroidery measurement by three. I wanted to have sequins running down both sides of the two front panels as well. That meant that I would have to cut these thinner two panels from the left-hand side of the fabric you see below.
This will make more sense in a little bit.
Okay, so I found that the fabric was 42" across. I also measured the back of my neck and found that I needed about 4" for a neck space. That meant that the two front panels would need to be 19.5" across. (42 - 4 = 38. . .38/2 = 19. . .plus 1/2" of seam allowance = 19.5)
Again, I used my method of laying the tape measure on top of the fabric, and scooting it up as I cut to my 19.5" mark with each scoot. (The horizontal lines really helped me keep the tape measure straight, so look for patterns like that in the fabric to guide you.)
Okay, so then, I took my long strip of fabric and folded it in half. It was about 46.5" long. Perfect.
I held my hand on the fabric close to the fold to assure that I was cutting neatly down the fold.
Then, I laid the back piece down and the two front panels on top. Hopefully, now you can get the visual you need if you are wanting to do this yourself. You will first need to make sure that all pieces are hemmed at the bottom. (Remember how I hemmed the back panel?. . .Well, you can see in the picture below that the front pieces needed hemmed as well.) After that, only three seams: the sides (leaving room at the top for arm holes), the shoulders, and then the long inside opening seam (bottom up to the neck, and then back down to the bottom on the other side.)
After hemming the bottom of the front panels, I stitched the side seams together. Okay. . .so. . .I did this a bit different from how you would normally do it. NORMALLY, you would pin the sides RIGHT sides together and sew. . .BUT! My fabric happened to have sequins along the edge of the RIGHT side of the fabric. Because I wanted to showcase these sequins, I pinned the fabric WRONG sides together. Does that make sense? I hope so.
Okay, before I started sewing, I chose a very large size 5 straight stitch. Why did I use such a big stitch for chiffon? Aren't you supposed to use tinier stitches for thinner fabrics???
Normally, yes. However, this duster thing is a trend. That means, it's probably going to go out of style by next year or the next. Also, there is a significant chance that I will personally hate this duster on me! I chose a big stitch so that I would more easily be able to take the stitches out if (and maybe when) I decide to refashion it into something else!
Okay, so here are my sides all ready to be stitched. Do you see the white pins on the right-hand side? Those were indicating to me where the arm holes were going to start, so I would sew from the white pins down to the bottom hem.
See the white pin behind the foot?
So, in this picture the duster is actually upside-down. Those slits at the bottom are actually the arm holes.
The next step was to sew the shoulder seams. See where my finger is? that is the bottom of one of the arm holes. So, when you sew this seam, make sure to start from the edge of the arm hole and sew toward the neck. Both times. This will keep everything flush. (This time, I sewed with WRONG SIDES together.)
Shoulder seams typically need a little reinforcement, so I bound them with black lace.
Can you see both of the shoulder seams here? (Sorry that everything is black and hard to see!)
The last step was to finish the edge of the opening. You can do this a variety if ways. You could roll the edge if you have a rolling foot, or you could do like I did before to hem: Fold and stitch in place, then fold again and stitch in place. However, that last method takes up a lot of seam allowance, so I opted for binding lace again, but in a different way.
So, first what I did was to lay the lace on top of the RIGHT side of the fabric and stitch it along the edge.
Then, I folded it under like this: . .(1). . .
. . .(2). . .
. . .(3). . .
With it folded like this, I stitched it in place from the WRONG side of the fabric. This hid the raw edges, gave some stability to the the fabric, while at the same time not taking up a ton of fabric in seam allowance.
Here is the finished duster. I paired it with a black T-Shirt, black stretchy moto pants, and black moto booties.
The kids these days are all wearing these dusters more open like this. (If you wear it more closed, it tends to look a little matronly.) To do this, just kinda fold the front edges back and let it hang loosely open.
(If I can summon up enough courage, I will wear this to church tomorrow and then update this post with a picture of me wearing it!!!)
UPDATE: Well!. . .I did it!
The End!