Today, we are going to make spa packs! Who's excited?
A few months ago, my husband and I went to Seoul. I lived there for three years, and we had a week of vacation to burn before our Thailand mission trip, so I begged and begged and we went. I wanted to show him around! Anyways, I took him to the Dragon Hill Spa (featured in the show "Better Late Than Never"). Our favorite sauna there was the salt sauna. It had salt rock built-in to all the walls and little spaces that looked like big sand boxes of pebble-sized pink salt that you could lay on top of with a blanket.
Salt has lots of amazing health properties--one of which is that it gives off negative ions when heated. You can google "negative ions" to find out the benefits, so I won't bore you with that. It also has detox properties. You can google that too. There is controversy over whether this stuff is legit.
Alls I can say is, it works for me, People!
As soon as we got home, I found a really good deal on 20 lbs. of medium sized pink Himalayan salt on eBay. I was going to recreate the spa!
This is how to make reusable hot/cold salt packs.
(I realize that Himalayan salt can be expensive, so you could also use rice or beans to do this, but you won't get the controversial negative ion properties. Just the hot/cold properties. Don't use table salt. That's just stupid.)
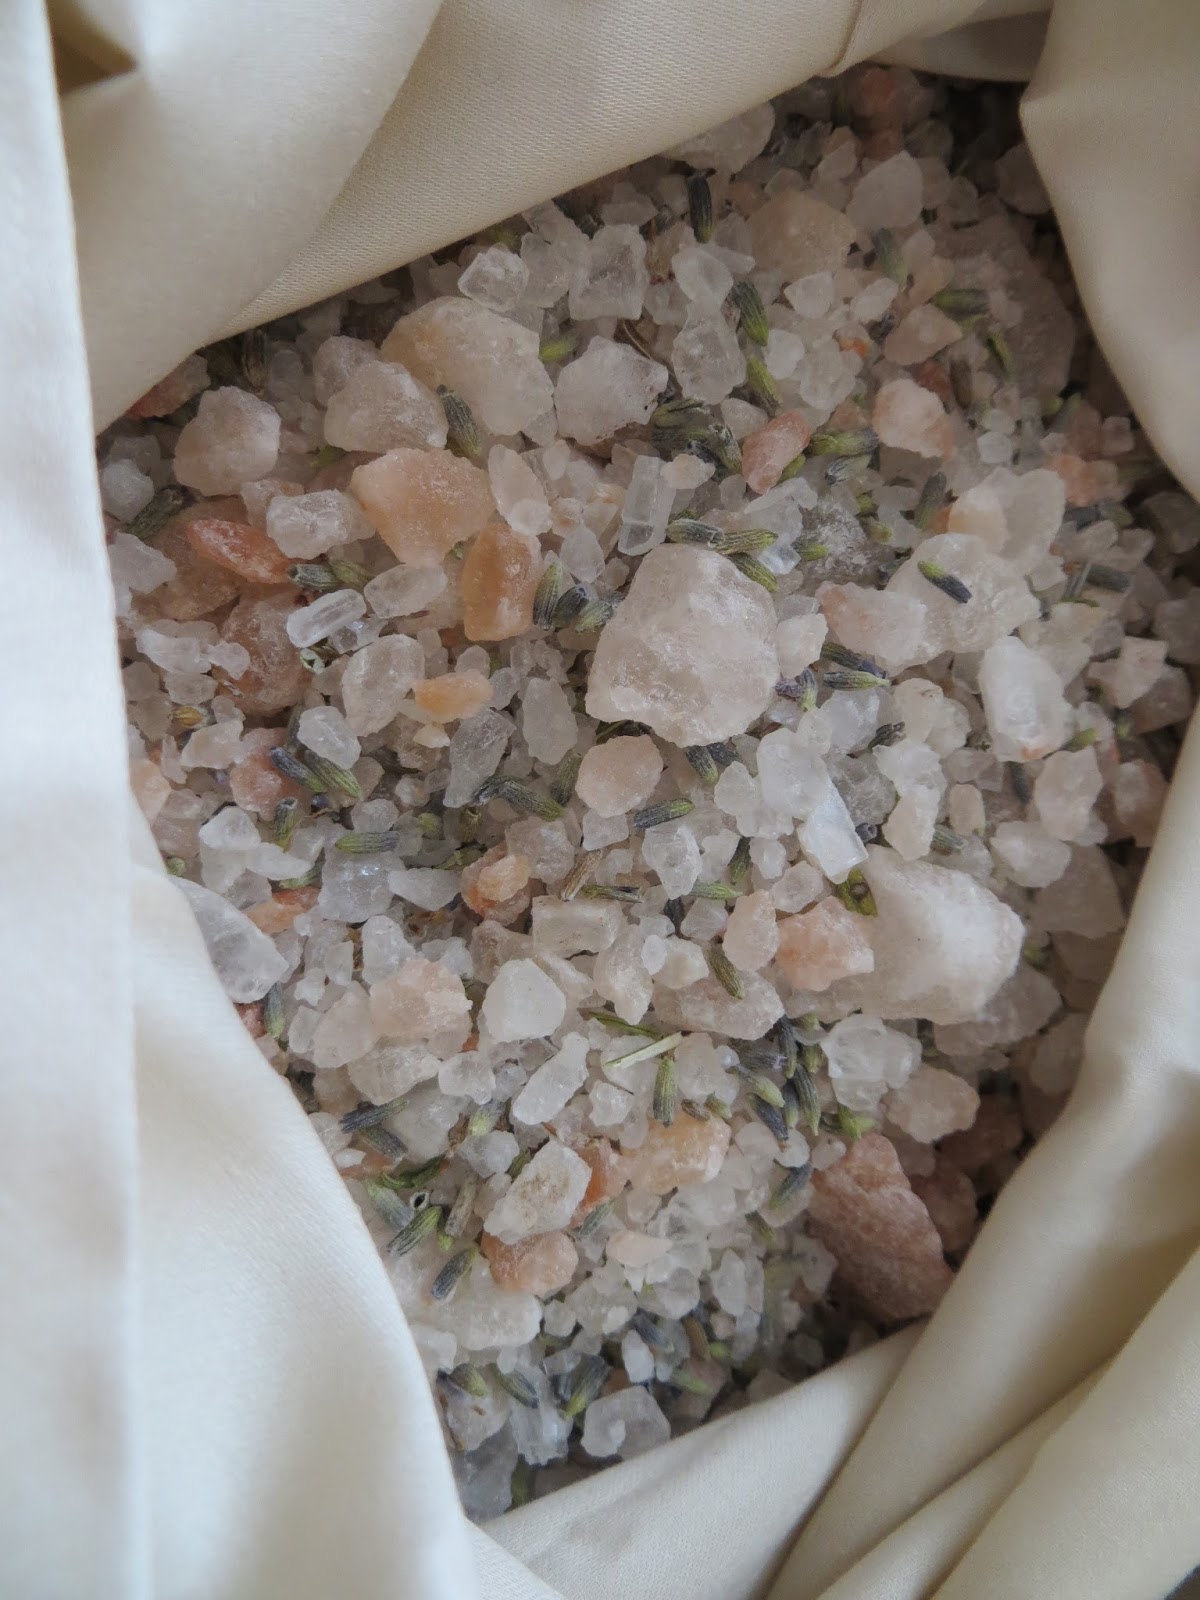
This is what I used: pink medium-sized Himalayan salt and a red solo cup for measuring...
...lavender...(You don't have to use this. I just had way too much from the last time I made soap.)
...a pillow case...(Or you can just sew your own in the size of your choosing. I just had these and wasn't using them.)
First off, you need to turn your pillow case inside out. Then, add three red solo cups of salt to your pillow case.
Then, add the lavender (if you want to or have it).
Then, shake it up so it mixes.
Next, hold the pillow case by the opening and shake the salt to the bottom. Lay the pillowcase on the floor and pin it through the middle like this. The pins are pointed up.
Next, roll up the open side of the pillow case like this, pick it up by the roll, and take it to your machine.
You can see the roll on the right side.
Once you have that seam created, go back and make another seam right next to it. This will ensure that the salt stays sealed inside the fabric.
Next, pick the pillowcase up with the seam you just created in your left hand and the bottom seam of the case in your right. This will make all the salt dump to one side. Then pin this area in quadrants like the picture below. It helps to pin the middle first and then pin the other two areas. I put extra pins around the bottom quadrant to keep the salt from escaping too much during sewing. (Salt is essentially a rock and can break your sewing needle.) Pick it up the way you laid it down (left hand on middle seam, right hand on bottom seam) and take it to the machine.
Start on the side farthest away from the salt, and do it like this: Start sewing about two inches from the middle double seam. Sew down a few inches and stop. Then, pick up the sewing foot and move the fabric down a few inches. Start sewing again. Stop when you are about two inches from the end. Make sure to back tack each time. (Look at the next picture to see what this means.)
So on the right of the sewing machine foot, see that broken line of sewing? That's what I was describing above. Those gaps will allow the salt to shift inside the bag.
Next, sew the middle line, but make sure to sew a broken line there as well.
So, this picture is backwards, but you can see the two broken lines and you can see that the salt is reservoired (Is that a word? No.) into the pinned area. Next, take all the pins out, pick the case up by the "salt end," and shake the salt all down to the other end.
See how the salt is all shaken to the other side now? Then, pick up the case by the former "salt end," and flip it over.
When it is flipped, pin the last quadrant with the pins pointing to the middle seam and away from the bottom hem.
Next, sew one last broken line.
Next, shake your pillow case until you can feel salt distributed evenly in all four quadrants.
Next, grab the open side of the pillow case and turn it back right side out. Make sure the corners of the open side meet the middle seam like this. This is important. If you don't make your pack from a pillow case, make sure you make it with at least two layers of fabric. Salt gets kinda powder-y and it's better to have two layers to ensure you don't get dust everywhere.
Then, pin both seams together and sew them in place.
You're done!
NOTE - It is reusable. You can heat it in the microwave or put it in the freezer over and over. The one note of caution I have is not to get it wet because salt will combine and harden in a stiff unpleasant shape. It can also melt away if you have it in too much water. If you do happen to get it wet, lay it out in direct sunlight for a few hours so it can dry out. Make sure to break up the damp area so it doesn't harden into one rock-hard blob.
You may think, "Why don't I just make it water proof?" That's fine except the whole point of using salt is for it's properties, and that requires porous fabric.
I got all creative and bought a discounted massage/heat mat on eBay. I laid a few pillow case packs on it. So nice and relaxing! I can really tell a difference. If you don't want to invest in a mat, you could always just make a few packs, put them in the microwave for a few seconds, and then lay on them. . .or cover yourself with them. Whatever you want! Get creative and go relax!
The End!