Showing posts with label DIY. Show all posts

Friday, January 31, 2020

Refashioning: Paint it Black: A $1600 Louis Vuitton Handbag for $80!

I admit it. I love high end fashion. But I’m also way cheaper than anyone else I know. So...when that is your fate, you either need to get fearlessly creative, or act like a victim and get massively in-debt.

I opt for the former.

Here’s how you can too!

About a year ago, I started searching the internet for second-hand investment bags from Chanel, LV, Hermès, etc.

I found this Louis Vuitton Vernis Houston handbag on eBay for $80. Brand new, this bag sells for a cool $1600!


Now, listen. I did my homework on this one. There were several of the same bag selling for around the same price—some under, some over. But I had a specific criteria that I searched for: a decent interior, no major rips or scuffs, intact handles, and working zippers. I had to search for a few months,  sell a few of my own items on eBay to get the money, and finally found one that fit the bill.


I know, $80 is a lot for a self-proclaimed cheapskate to spend on one bag, but. . .considering that it retails for $1600, my thought was: I can dye that sucker, and when I get tired of it, I can flip it for at least more than I paid for it. Plus, how many ladies throw away $100+ at the local mall for a subpar Michael Kors bag. I don’t think $80 was a bad spend.

If this sounds crazy, remember that I am the woman who dyed a pair of Chanel shoes a few years ago (and then everyone started doing it). Those shoes look as great today as they did back then, so I was up for this challenge.

If you click the words “Chanel shoes” above, it will take you to my post that shows you how to dye your shoes so that they look excellent and not like a hack job. From that post, and when I dyed a Coach bag silver, I learned that Tarrago dye is really good for this kind of project, so I bought another set in “shiny” black. It costs around $10 on eBay.


Inside is a leather conditioner/prepper, leather dye, small brush, and applicator sponge.


I’m just going to tell you right now, that if you attempt this project—even if you buy the supposedly “patent leather”/shiny version of Tarrago dye....it doesn’t work on this bag! This bag is way too shiny.

I spent a while prepping the bag and then painting the bottom. A few hours later after it was dry, the bottom looked super messy, with tons of brushstrokes and uneven dull spots all over it. That is probably because Tarrago is actually leather paint. Same thing with Angelus. If your leather is super shiny, don’t buy either of those. You need an actual dye, not a paint. Instead, do this....


I happened to have an old bottle of Fiebings black leather dye. It’s only like...$5 or something on Amazon, eBay, or your local shoe repair shop.


So...I’m sorry there are pictures missing in this post, but...this is a really messy process, and it’s hard to take pictures while doing it!

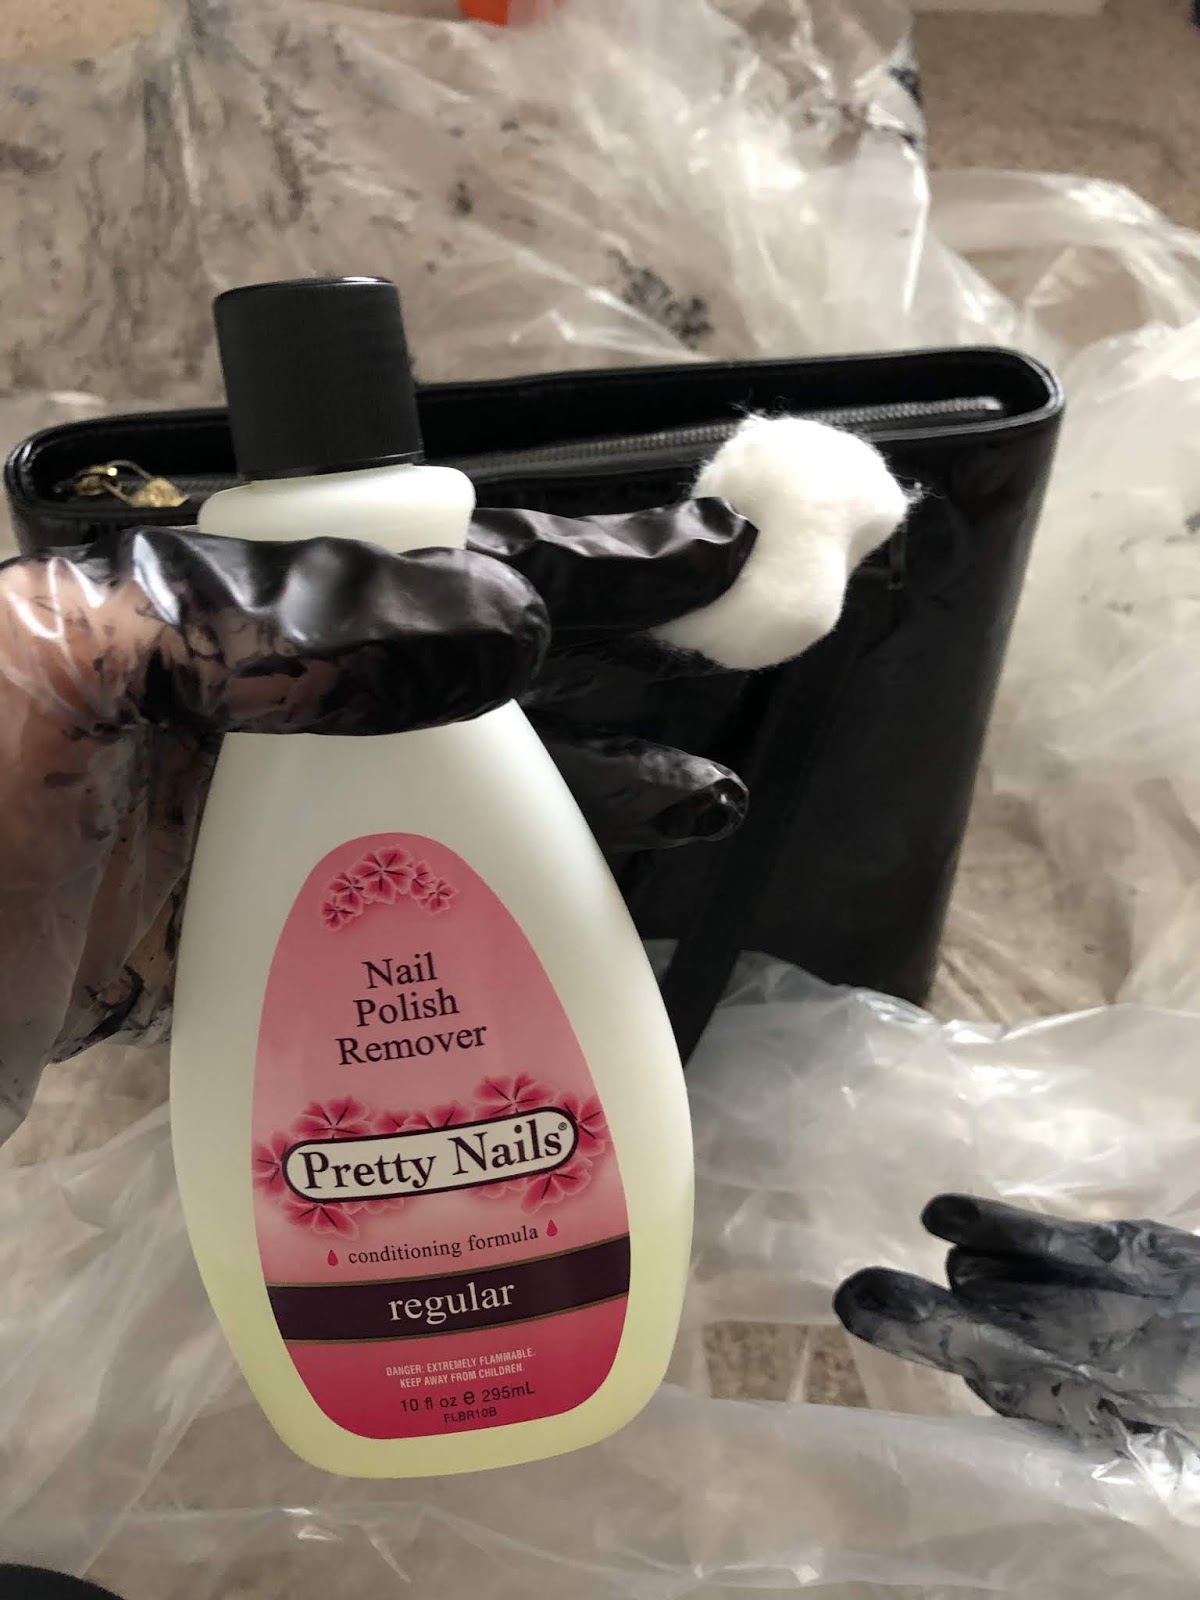
Anyways, do this: Using a cotton ball and nail polish remover, rub all over the bag, the hardware, and the handles. Do this a few times to make sure you remove any residue and “break the seal” over the leather and patent leather. 

Then, using a cotton ball, sponge, and/or smaller brush, paint over all the surfaces that you want dyed. Don’t worry about the hardware. Just paint over that too. You need to get into all the nooks and crannies.


Then, you need to let it dry somewhere like a garage or basement, but make sure it’s well-ventilated because the dye is really fume-y and can give you a headache. 
(I hung my bag on a camera stand in my garage.)


Now, I know this is unorthodox, and I’m sure there are people who think I’m crazy, but. . .

After it’s dry (give it a few days), go over the whole thing with nail polish remover and a cotton ball. I discovered this by trial and error. I’m sure there are many DIYers who would say never to do this. But this is really the only way to take off the excess and assure that your color won’t rub off onto your clothes. This is also the best way to get the color off your hardware so that it looks like the dye job was professionally done. You could ostensibly use a mild soap and a rag, but. . .I wanted to make sure that the color wasn’t going anywhere. Also, acetone dries super quickly, whereas water takes time to dry and can soak your leather. If some of the color comes off during this step, then you can reapply color and let it dry again. Do this cycle as many times as you need to make sure the color is permanent. It works. I’m telling you.


Look how nice and shiny!


(I did buy some Fiebings Resolene—from Amazon—in case I need it. A lot of sources suggested using Resolene (acrylic sealer) to keep the color from fading and rubbing off onto other surfaces. I plan to use it eventually, but I want to make sure all the surfaces are exactly perfectly black before I go sealing anything. That means I will need to use this bag and monitor it for a few weeks yet. And...I many not even need the Resolene. Plus, I’m a little worried that it might dull the shine...Anyways, I’ll update this post and let you know.)


Because I kept the zipper closed, the interior is clean and neat.


I’m not a huge fan of gold hardware, but. . .if I resell it, other people like gold and black, so I can retain a lot of value by keeping the hardware gold. It’s not obnoxious, so I can live with it.


Looks brand new!


The End!


Customize Your Glasses Frame’s Color! (Bonus Video: How to get glasses lenses back into their frames when they won’t fit!)

So I have a weirdly small face, and it's not easy for me to buy glasses at optician offices. I enjoy buying cheap glasses online from places like Zenni (click the link for $5 off) and Eyebuydirect (Click the link and enter: IFPGTPHSFC for $10 off!). You can find glasses for as little as $6.95 a pair including lenses!

(Many people complain that buying glasses online is too risky. All you need is a ruler that measures in centimeters to measure the width of your face, pupillary distance, and lense size. You also need your current prescription. Both of these websites let you virtually try on glasses before you buy.)

So...I have this thing...where I feel like I have to have everything in every color. So far, I have several pairs of glasses in several neutrals, red, blue, yellow, and purple. Then, I saw these orange ones on Eyebuydirect. On the site, they looked to be a very bold orange, but in reality they were more like a rusty brown:


You can see, they really read as brown when I wear them!


Well, that was disheartening, especially since I’d ordered two pairs!! (I work for VIPKid, and wanted orange glasses for teaching, and then one pair for wearing normally.) Well, since I’d ordered two pairs, I decided to search Pinterest for some ideas on how to change glasses frames’ colors. One blogger mentioned painting with nail polish. What a terrible idea!! The color was what I wanted, but look at all the terrible brush strokes!


Here you can see the brush strokes more clearly. Gross!


See how bad the nail polish looks on me? It just looks dirty. So annoying.


Okay, so the next part of the blog is some trial and error. If you are strapped for time, skip to the end. If you wanna see the entire thing, stick with me. (It won’t take long. Don’t worry.)


So, another blog suggested popping the lenses out and spray painting them. Okay, that is a dumb idea for several reasons: (1) I’ve spray painted things before, and it’s really hard to do in winter, because it’s cold and windy, and you can’t do it in your house because of the fumes and the potential mess. (2) Spray painting is fine for shoes and some clothing, because they are far enough away from people’s sight lines that an uneven coating isn’t too noticeable. Because glasses are on your face, the coating needs to be PERFECT or else it looks like trash and you will never wear them out of the house. Trust me. (3) There is no way to ensure that the inner ridge for your lenses stays clear of paint buildup. You need to be able to pop your lenses back in, right? You can try to tape off that inner ridge, but then your spray coating needs to be super super accurate. If you have ever spray painted anything before, you will know that this is a fool’s errand. There is a reason people use spray paint for big projects and not little ones like glasses. (4) Blog posts of glasses that have been spray painted look like crap. I know that sounds mean, but. . .I’m being honest.

Glasses are on your face, People. They need to be PERFECT. This is not time for arts and crafts!

So, what to do....

Then, I started searching synthetic dyes. I have dyed some of my clothing before with fabric dye. But I had no idea that there was such a thing as synthetic dye. I watched a few YouTube videos of guys who had dyed their frisbee golf frisbees with synthetic dye, so I thought. . .maybe that would work!

I found a dye called iDye Poly (from Amazon) in a bold orange color. The directions said to add the dye and the reactor (in the same package) to boiling water. I got an old pot (NOT USED FOR FOOD, OBVIOUSLY!!!), a packet of dye, a meat thermometer, and a small tub of cold water.


Make sure you’ve removed your lenses, before you start dying them!!


So, then I brought water and the dye to a boil.


The package said to keep the dye at 165 degrees, but a helpful YouTuber said to keep the water around 140 for thin plastic (so it won’t warp), dip it for a few seconds, rinse it in cold water, and then repeat until the color is what you want. 

I didn’t want to ruin my meat thermometer, so I measured the heat from underneath the pot.


So that’s what I did....dipping, and....


...rinsing....


I did that over and over for about 30 minutes, but the color still wasn’t where I wanted it, although, it became definitely bolder. This is probably due to the fact that I was dying on top of a translucent rust color. I should have started with a lighter orange, yellow, or even clear frames....oh well. 
Just to show you, I put the original photo underneath this one, so you could compare.
After:

Before:


And if you need to see them on my face, the first one is the before, the second is after. Even though, the color looks very different in the pictures above, you can see below that they still look brown on me (and when I wear brown, it really makes my nose stand out!!!).

Before:

After:


So....that was a frustrating waste of time. I was back at square one. I was going to give up, but then I started searching Zenni again and found these: orange and pink (because I’d been wanting some pink ones for a while too.)


This is what they looked like on me. I mean....they are okay, but...the color is so light that they kinda wash me out and age me.


So....third time’s the charm, right? I ordered some RIT DyeMore Synthetic dye (also from Amazon) in pink and orange.


I repeated the whole “dip and rinse” method that I had done above. The pink ones took about fifteen dips. The orange ones I dipped twice!


FINALLY! Colors I like!! And so professional looking! Also, notice that my face looks so much more proportional and in focus! Colors are important!

Before: (so you can compare)


And because sometimes, the dying process can shrink your frames a tiny bit, and your lenses may no longer fit.....
Bonus: Video on how to get lenses back into frames when they won’t fit!


The End!


Tuesday, July 30, 2019

De-Fashioning: Updating a Moto Jacket DIY

I haven't done a post in a while. This doesn't mean I have been sewing. It just means that I don't think to take pictures as I'm sewing!

So...I made sure to document this one.

Anyways....

You know how moto jackets used to look like this a few years ago? The double collar was huge. Not so much any more. Especially on this red jacket. I have small shoulders and the points and angles were just way too overwhelming.


So decided that I would tone it down a bit by taking out the neck part of the collar. I just went into the seam and ripped the whole seam out along the neck.


I took the neck collar out.


Then, I just pinned the neck seam back together and sewed it down.


Because the front flaps were top-stitched, I went ahead and top-stitched around the whole neck seam to make it uniform.


And, there you go! Really easy. I have to say the collar lays a lot better now, besides the fact that this is a more modern silhouette. 

Try this on that jacket that you have in your "give away" pile and see if it works for you! (Depending on how your jacket is constructed, you may be able to just cut the neck part out without taking the whole thing apart and resewing it!)


The End!


Friday, January 18, 2019

"The One Sleep Eyemask to Rule Them All" 2.0 - New and Improved!

So, about four and a half years ago (has it really been that long??...Gosh, I'm old...), I made a pattern for what I deemed "The One Eyemask to Rule Them All." You can find it by clicking ---> here. (Actually, you need to click there if you want to try this project, b/c it includes the pattern I used. And it's free.) 

Anyways, if you read that last post, you will learn that I am a really strange sleeper. I CANNOT sleep with any light nor sounds of any kind. I also...prefer to have my ears covered. I know. It's weird. Guess what. It's okay. I fixed the problem by buying an ear-covering-eye-mask in Korea when I lived there years ago. So...I'm not the only one! Someone else has this problem too!

Anyways, all that to say...my former mask--patterned after the Korean mask--was alright, but fell short in one major area: I woke up every morning with deep creases on my face made from the red binding I'd added around the outer seam.

Okay...so...why it took me four years to revamp it, I don't know, but anyways, the point is I did it, so without further ado, let's get to the new project.


To rid myself of the weird creases every morning, I decided to choose 100% silk satin. Silk has long been lauded as a luxury fabric and for good reason. Not only is is durable while being lightweight and aesthetically beautiful, it also is a great surface on which to sleep. (Remember when I made that silk satin pillow case? No? Well, click --> here then.) Anyways, I made a silk pillow case from an old prom dress that I never wore and couldn't sell online. I've been sleeping on it every night since I made it, and it's fantastic. Best pillowcase ever! My hair is far less frizzy with less breakage and I have fewer breakouts, just to name two reasons for why I am such a believer in sleeping on a silk surface.

A word about 100% silk satin. It's a luxury fabric. That means if you go to the fabric store to try to track it down, you are going to pay a pretty penny for a tiny bit of it. Instead of that mess, consider finding an article of silk satin clothing from the thrift store. The top below is a tunic that I actually bought on sale at a retail store, but it doesn't fit me very well. I had tried to sell it on Poshmark. It sat there for about a year with no takers, so I gave up and decided to repurpose it for my sleeping purposes. I'm glad I did. (You can see that I already cut a sleeping mask out of the bottom hem at the start of this project. That's because I wanted to trial run this project before promoting it to make sure it actually worked. Boy am I glad I cut that stupid shirt up! I love my eye mask! So...this project is really my making a few more masks that I can alternate when one of them has been washed and is hanging to dry.)

Okay...so...for reals this time, let's talk about the project and how you might replicate it.

You need: silk satin (if you can't find 100% silk satin, try just 100% non-satin silk. If you can't find 100% non-satin silk, try a polyester satin. It's not as good, but it's better than moisture-stripping cotton.). You also need black-out fabric. I used extra curtain fabric. It doesn't have to be curtain fabric, but curtain fabric is really really good for this because it is very opaque. You can easily test fabric by holding it up to the light. If it doesn't allow light to pass through, use it!

You also need: elastic, Velcro, glass beads (substitutes will be mentioned later), and....a stapler!


First, cut out both fabrics using the pattern in the link I already gave you at the top of this post. You need to add a seam allowance around it. I eyeballed about 1/4" around. You can see in the pictures below.


Then, with the right sides of both fabrics together, pin them.


Cut a two lengths of wide-ish elastic. (There are four in this picture because I actually made two eye masks at once.) These are roughly 6 inches long.


Open the sides of your pinned mask and stick the elastic in. (You can actually do this before you pin the fabric together in the first place.)


Then, stitch around. Make sure to leave an opening at the top middle of your mask so you can turn it right-side out. The picture below shows me back stitching over the elastic. I did this to assure the elastic was secure in the side seam.


Then, cut little notches around the curviest parts of the seam. This helps it lay better when it's right-side out.


Turn the mask right-side out.


Okay, first of all, see how there is an opening at the top middle of the mask? Make sure it's the TOP of the mask you leave the opening in and not the bottom. 

Okay, so get your pattern back out and notice where the lines are drawn. This sections off the "ear" parts from the "eye" part.  Put pins on either end of that line.


Then, just stitch straight from one pin to the opposite pin.


Then, turn it upside down and sew about a 1 to 1 1/2" line straight up the middle. This is where the mask will hit your nose and nose bridge.


Turn it back around and measure about 1 to 1 1/2" out and above the nose line to make eye lines. You may want to actually hold the mask to your face (BEFORE PINNING!!!) to see where your eyes hit in relation to the nose line. 


Then, stitch roughly 1 inch lines.


Okay, so now let's discuss filler options. You know how fancy spas have those eye masks that have fancy things in them like lavender and seeds and whatnot? So...you can totally use lavender...or rice...or seeds...or whatever. I used glass beads and here's why: Because I wanted to be able to throw my masks in the wash! Glass beads have a nice weight to them, so you get that spa-like feel, but you can also wash your mask in your weekly laundry and it won't get gross bacteria buildup or...mold! Ick!

A word about glass beads: They are awesome, but I do have to say that glass retains a colder room temperature than...say...cotton or lavender or other fillers. So, it's really nice to put a glass bead-filled eye mask on in summer. It's very refreshing. However, right now it is winter and so I will say, it takes a few minutes against my skin for the glass beads to stop being so dang cold. If you are a light sleeper, this can rob you of those first crucial moments when you are trying to fall asleep, so...what I do: I read the Bible before falling asleep. While I'm reading, I put the eye mask under my body, so it can heat up for a few minutes. Then, when I put it on my face, it's not so jarringly cold and it feels quite nice.


Okay, so, as I said, I made two masks at once. I actually tried to fill the other one with poly-fill stuffing. Well, after I filled it, I held it up to my face, and guess what...I could still see light peeking through the bottom. When I held the glass-filled one up, I could manipulate the beads to block all the light out. Also, the fact that the beads have weight keeps the fabric down, so less light comes through....Suffice to say, I pulled all the poly-fill out and filled the second mask with beads as well. 

If poly-fill works better for you, though, go ahead and use it. Use whatever filler you want.


Then, sew the top "filling" gap up.


Okay, so now comes the adding of the Velcro. Almost all Velcro you buy nowadays comes with a sticky backing. I'm not sure why companies think this is a good idea. First of all, sticky back Velcro is not permanent, no matter how sticky it is. It comes off in just a few washings. Furthermore--and if you sew at all, you will hear me on this--it's SUPER annoying to sew through! It gums up your sewing machine and the gum NEVER comes off your needle! Then you try to hand sew it, and guess what...same problem: You have to throw your needle away because it's covered in gum.

I am going to save you a ton of time and heartache with a simple hack.


First of all, take the strip off the backing...


Then, fold the edge of the elastic down toward the side that will receive the Velcro.


Stick the Velcro on over that fold...


Then, COMPLETELY BYPASS THE SEWING and use a stapler!

That's right! I said a stapler! Staple it just like I have it below and your mask is done! No messed up sewing machines. No unsalvageable needles. It's permanent, washable, and it takes three seconds! 


So here is the finished mask. Hurray for light/cold ears/crease-free sleeping!


The End!