Showing posts with label RIT. Show all posts

Friday, January 31, 2020

Customize Your Glasses Frame’s Color! (Bonus Video: How to get glasses lenses back into their frames when they won’t fit!)

So I have a weirdly small face, and it's not easy for me to buy glasses at optician offices. I enjoy buying cheap glasses online from places like Zenni (click the link for $5 off) and Eyebuydirect (Click the link and enter: IFPGTPHSFC for $10 off!). You can find glasses for as little as $6.95 a pair including lenses!

(Many people complain that buying glasses online is too risky. All you need is a ruler that measures in centimeters to measure the width of your face, pupillary distance, and lense size. You also need your current prescription. Both of these websites let you virtually try on glasses before you buy.)

So...I have this thing...where I feel like I have to have everything in every color. So far, I have several pairs of glasses in several neutrals, red, blue, yellow, and purple. Then, I saw these orange ones on Eyebuydirect. On the site, they looked to be a very bold orange, but in reality they were more like a rusty brown:


You can see, they really read as brown when I wear them!


Well, that was disheartening, especially since I’d ordered two pairs!! (I work for VIPKid, and wanted orange glasses for teaching, and then one pair for wearing normally.) Well, since I’d ordered two pairs, I decided to search Pinterest for some ideas on how to change glasses frames’ colors. One blogger mentioned painting with nail polish. What a terrible idea!! The color was what I wanted, but look at all the terrible brush strokes!


Here you can see the brush strokes more clearly. Gross!


See how bad the nail polish looks on me? It just looks dirty. So annoying.


Okay, so the next part of the blog is some trial and error. If you are strapped for time, skip to the end. If you wanna see the entire thing, stick with me. (It won’t take long. Don’t worry.)


So, another blog suggested popping the lenses out and spray painting them. Okay, that is a dumb idea for several reasons: (1) I’ve spray painted things before, and it’s really hard to do in winter, because it’s cold and windy, and you can’t do it in your house because of the fumes and the potential mess. (2) Spray painting is fine for shoes and some clothing, because they are far enough away from people’s sight lines that an uneven coating isn’t too noticeable. Because glasses are on your face, the coating needs to be PERFECT or else it looks like trash and you will never wear them out of the house. Trust me. (3) There is no way to ensure that the inner ridge for your lenses stays clear of paint buildup. You need to be able to pop your lenses back in, right? You can try to tape off that inner ridge, but then your spray coating needs to be super super accurate. If you have ever spray painted anything before, you will know that this is a fool’s errand. There is a reason people use spray paint for big projects and not little ones like glasses. (4) Blog posts of glasses that have been spray painted look like crap. I know that sounds mean, but. . .I’m being honest.

Glasses are on your face, People. They need to be PERFECT. This is not time for arts and crafts!

So, what to do....

Then, I started searching synthetic dyes. I have dyed some of my clothing before with fabric dye. But I had no idea that there was such a thing as synthetic dye. I watched a few YouTube videos of guys who had dyed their frisbee golf frisbees with synthetic dye, so I thought. . .maybe that would work!

I found a dye called iDye Poly (from Amazon) in a bold orange color. The directions said to add the dye and the reactor (in the same package) to boiling water. I got an old pot (NOT USED FOR FOOD, OBVIOUSLY!!!), a packet of dye, a meat thermometer, and a small tub of cold water.


Make sure you’ve removed your lenses, before you start dying them!!


So, then I brought water and the dye to a boil.


The package said to keep the dye at 165 degrees, but a helpful YouTuber said to keep the water around 140 for thin plastic (so it won’t warp), dip it for a few seconds, rinse it in cold water, and then repeat until the color is what you want. 

I didn’t want to ruin my meat thermometer, so I measured the heat from underneath the pot.


So that’s what I did....dipping, and....


...rinsing....


I did that over and over for about 30 minutes, but the color still wasn’t where I wanted it, although, it became definitely bolder. This is probably due to the fact that I was dying on top of a translucent rust color. I should have started with a lighter orange, yellow, or even clear frames....oh well. 
Just to show you, I put the original photo underneath this one, so you could compare.
After:

Before:


And if you need to see them on my face, the first one is the before, the second is after. Even though, the color looks very different in the pictures above, you can see below that they still look brown on me (and when I wear brown, it really makes my nose stand out!!!).

Before:

After:


So....that was a frustrating waste of time. I was back at square one. I was going to give up, but then I started searching Zenni again and found these: orange and pink (because I’d been wanting some pink ones for a while too.)


This is what they looked like on me. I mean....they are okay, but...the color is so light that they kinda wash me out and age me.


So....third time’s the charm, right? I ordered some RIT DyeMore Synthetic dye (also from Amazon) in pink and orange.


I repeated the whole “dip and rinse” method that I had done above. The pink ones took about fifteen dips. The orange ones I dipped twice!


FINALLY! Colors I like!! And so professional looking! Also, notice that my face looks so much more proportional and in focus! Colors are important!

Before: (so you can compare)


And because sometimes, the dying process can shrink your frames a tiny bit, and your lenses may no longer fit.....
Bonus: Video on how to get lenses back into frames when they won’t fit!


The End!


Friday, May 11, 2018

Refashioning - Dying a Trench Coat .... Bonus: Get a Facial and Clean Your Shower Curtain

So...I bought this Candies trench coat a few months ago at the thrift store.


It's really nice and was in near perfect condition. The only thing I didn't like about it personally was the color. This pale pink color washes me out like none other.


Well, I decided to put it up for sale on eBay and Poshmark where it has been sitting for as many months. People "liked" it and added it to watch lists, but no one ever bit. I even took it to a consignment shop and they didn't take it. I was so confused. It's super stylish, a great fit, never goes out of style, etc. If the color had looked good on me, I would TOTALLY have bought this! I mean...the color looks terrible on me, and I still bought it! Ha!

Anyways, people don't make sense. . .

After months of waiting, I knew what action I should take: Dye it hot pink!


So, I downloaded the Hobby Lobby app and pulled up my 40% off coupon, drove to Hobby Lobby, found "Fuchsia" RIT dye and bought the 8oz bottle. (Regularly $4.95, but between $2-$3 with my coupon!)


According to the directions on the bottle, you are supposed to use 1/2 a bottle per pound of fabric with three gallons of water--the hotter, the better. The coat weighs only one pound, but I wanted the color to be as saturated as possible, so I decided to use the whole bottle of dye.

Also, the coat is cotton, so the bottle suggestions for organic fabric was to add 1 cup of salt to the dye bath. Also, it said to add 1tsp of dish detergent.

So. . .I know that some people buy a huge cauldron sort of pot for dying, but. . .when you think about the clean up, and the fact that the item has to be rinsed and re-rinsed after the dying, plus the fact that water splashes, plus the fact that I would have to store said cauldron somewhere when I'm not using it. . .

I dismissed that idea and chose to do the deed in my washer. 
(I've done this several times before, and I can tell you, it works great!)


So, here is my step-by-step, tried-and-true method.

First of all, fill my kettle with as much water as it will hold and turn it on so the water boils.


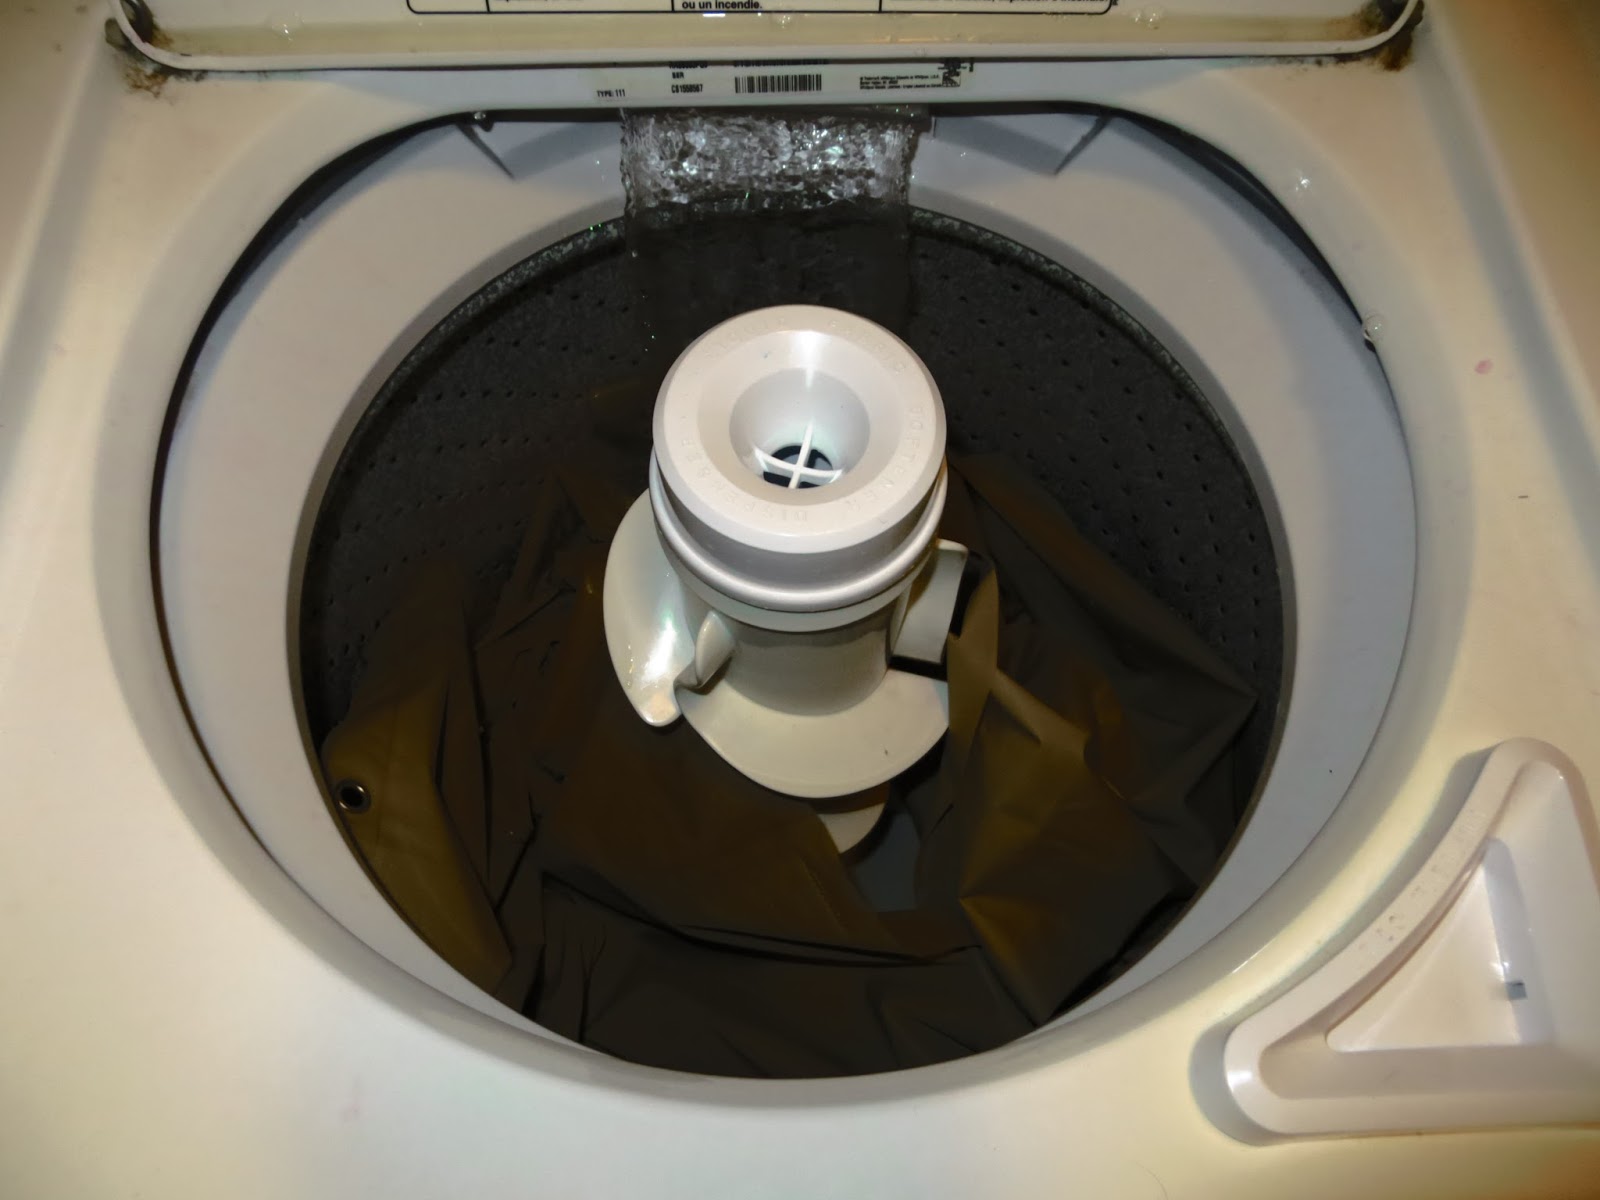
After about a minute of letting the water boil, I started my washer. I put it on "small" load size and "hot/cold" for water temperature. While the water was filling up, I added the cup of salt, the teaspoon of dish detergent, and the bottle of dye. I actually rinsed out the bottle of dye and dumped it into the rest of the water. I did that a couple of times until the water came out of the bottle clear. (This is to utilize as much dye as possible, and also reduces drip potential when walking it to the trash can.)

I took a long pole and swished the mixture around until the salt was dissolved and all the ingredients were well incorporated. At that point, I turned the water off and added the trench coat. I didn't let the water fill up more than necessary, because too much water dilutes the color. 

[It helps to spread the garment out long-ways and drop it down in the washer in a circle (versus balling it up and throwing it in). This helps the dye adhere more evenly to the garment.]

Once the water in my kettle started boiling, I poured it into my washer. This hot water made the rest of the water just that little bit hotter to really bring out the color. (I've tried using just the hot water in the washer itself, and it's not hot enough to create saturated color.) Then, I took my pole and started pushing the garment down under the water. You can see in the picture below that there were air pockets in the clothing that made it pop up above the water. If you walk away and don't push them down, those pockets will not get dyed consistently with the rest of the garment, so stirring and pushing is really really necessary. This is a 30 minute labor of love. (I've learned this the hard way.)


So. . .30 minutes is a long time to stir and push, and I hate wasted time, so I decided to walk away for a second and put on a face mask. These paper masks take 20 minutes to work, and I'd been working for ten minutes on the coat already, so. . .voila! 


So, with the mask on, I came back to my washer and stirred and pushed some more. 

Another tip: maybe once or twice during this stirring step, take your pole and pull the garment out of the water and then push it back down the other way, if you can. This just helps the dye get into any hidden folds that were created when the clothing was first put into the water.


Okay, so after the 30 minutes of stirring and pushing, I turned my washer back on. I used the remaining water to rinse my pole off so I wouldn't have pink droplets all over my wash room.


While the washer worked I dried my pole by resting it on an old towel.


This is the coat after the dye bath.


Okay, but I wasn't done. The directions say after that first wash, the item needs to be washed again, in warm water this time, with a mild detergent. This is for two reasons: (1) to set the color so it won't bleed onto other clothing the next time you wash it and (2) to help clean your washer of residual dye.

I didn't have mild detergent, but I did have some Oxi booster which is good for bringing color out in clothing, so I used a tiny bit of that.


This is how much I added.


I also sprinkled a little more salt into the wash since salt helps lock color into organic threads.


Then, I added my coat again.


Okay, so after the washer had run its course, my garment was nicely dyed; however, the inside of my washer was still a little messy. You can see pink droplets all over my washer lid here.


Enter: bleach and one more wash cycle.


So, I ran one last small load with hot water, and I slowly poured bleach over the stains on the lid. This bleach ran into the washer. If you do this, you can run this as an empty load, if you want. . .but I HATE wasting things, so I took this opportunity to add a shower curtain to the bleach water. Why? Because this is the best and easiest way I've discovered to wash a dirty shower curtain. Why spend hours scrubbing off the soap scum, calcium deposits, and whatever else when you could just throw it into a washer with bleach and be done with it!? I've done this method since college and it works like a charm!


After the curtain cycle, you will notice that my washer is squeaky clean and I barely had to do anything to get it there! Plus, I have a super clean shower curtain to boot!


Oh! Before I forget, here is the finished trench coat! 


And here is the "Before". . .


And here is the "After"!


The End!


Wednesday, July 29, 2015

Refashioning: Altering and Dying a Jean Jacket

So, I am part of this fashion facebook board and on it I have a faux arch-nemesis, Susan, who challenges me to different fashion battles. This past time it was thrifted polka dots. She wants to do a jean one, but I told her I was still in search of the perfect jean jacket. That Thursday, I found this on the dollar rack. It's way too big and the wrong color, but. . .it was so great! I had to pay a dollar for it. 


See how long the cuffs are?


Using a jacket that fits me as a guide, I cut away the inner part of the arms and the side seams and stitched them up.


I would have stopped there, but. . .as you can see this blue is washing me out. 

I was not finished.


Okay, so this part is for all you people that I tell about RIT dye and who act all scandalized like, "You do WHAT in your washing machine????" It's really okay, guys. It's made to work in your washing machine, and it's actually a lot less messy than trying to do it in your tub or in a plastic bin!

All you do is start your machine on a small load with hot water. Let the water fill up and don't close the top--to keep the agitation at bay. Pour in a cup of salt (for cotton blends) and a bottle of RIT dye and then add your article(s) of clothing (up to two pounds). (Last week, I dyed six pairs of jeans that were starting to fade using two bottles of dye and two cups of salt. Just fyi.) You can stir it with a big stick if you want, but just make sure your clothing is submerged and wait 30 minutes before you close the lid and start the cycle. The washer does literally the rest of the work. After the washer is done, put your clothes in the dryer and run an empty cycle with bleach through your washer.


I put a blanket over the top of my machine to keep any of the dye water from splashing out. (We have an old machine. Can you tell?) I also did this during the bleaching step.


This is after the bleaching step. See? Nothing to worry about. I think it's actually cleaner than it was before I dyed anything. Just make sure to bleach RIGHT AFTER the dying step so the dye doesn't have time to set.


So now it's the color I wanted, but the buttons were still a little wrong. I like pewter, but I don't look that great in it.


Enter: Silver fingernail polish.


The buttons on the right have been painted. See the difference?


Okay, almost done. The last thing that was bugging me was that the shoulders were too broad. Fortunately, I had some "for real" 80s shoulder pads in my inventory for just such an occasion.


I hand stitched them in.


Okay so....I am from Ohio, but my husband is from South Carolina....Is it just me or do you hear the "Gettysburg" soundtrack in your head when you see this too? Anyways, I like it. It looks like it could be a museum piece. 
(And in lieu of the SC "Rebel Flag" conspiracies lately, I can make a "Daughters of the Union" statement! Haha!)


The finale: Proof that "Dressing Your Truth" works. I snap into focus when I am wearing certain colors.


The End!!