Wednesday, July 29, 2015

Refashioning: Altering and Dying a Jean Jacket

So, I am part of this fashion facebook board and on it I have a faux arch-nemesis, Susan, who challenges me to different fashion battles. This past time it was thrifted polka dots. She wants to do a jean one, but I told her I was still in search of the perfect jean jacket. That Thursday, I found this on the dollar rack. It's way too big and the wrong color, but. . .it was so great! I had to pay a dollar for it. 


See how long the cuffs are?


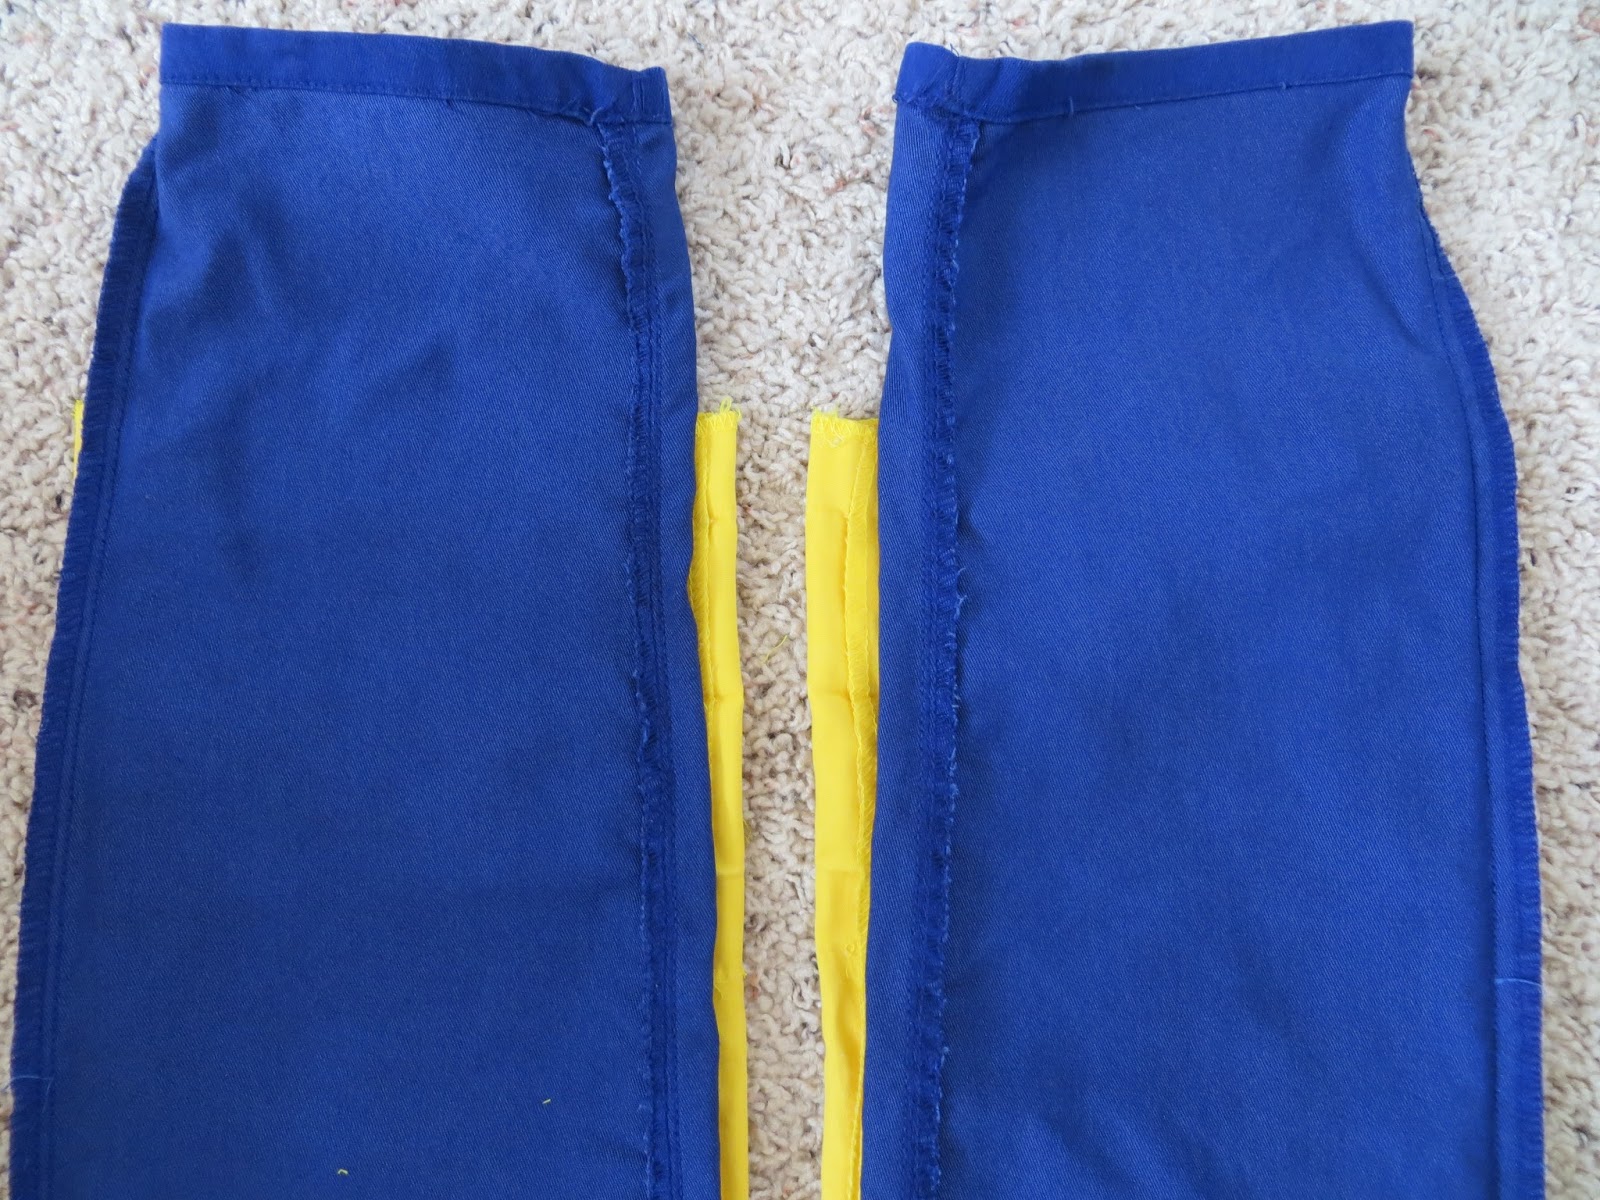
Using a jacket that fits me as a guide, I cut away the inner part of the arms and the side seams and stitched them up.


I would have stopped there, but. . .as you can see this blue is washing me out. 

I was not finished.


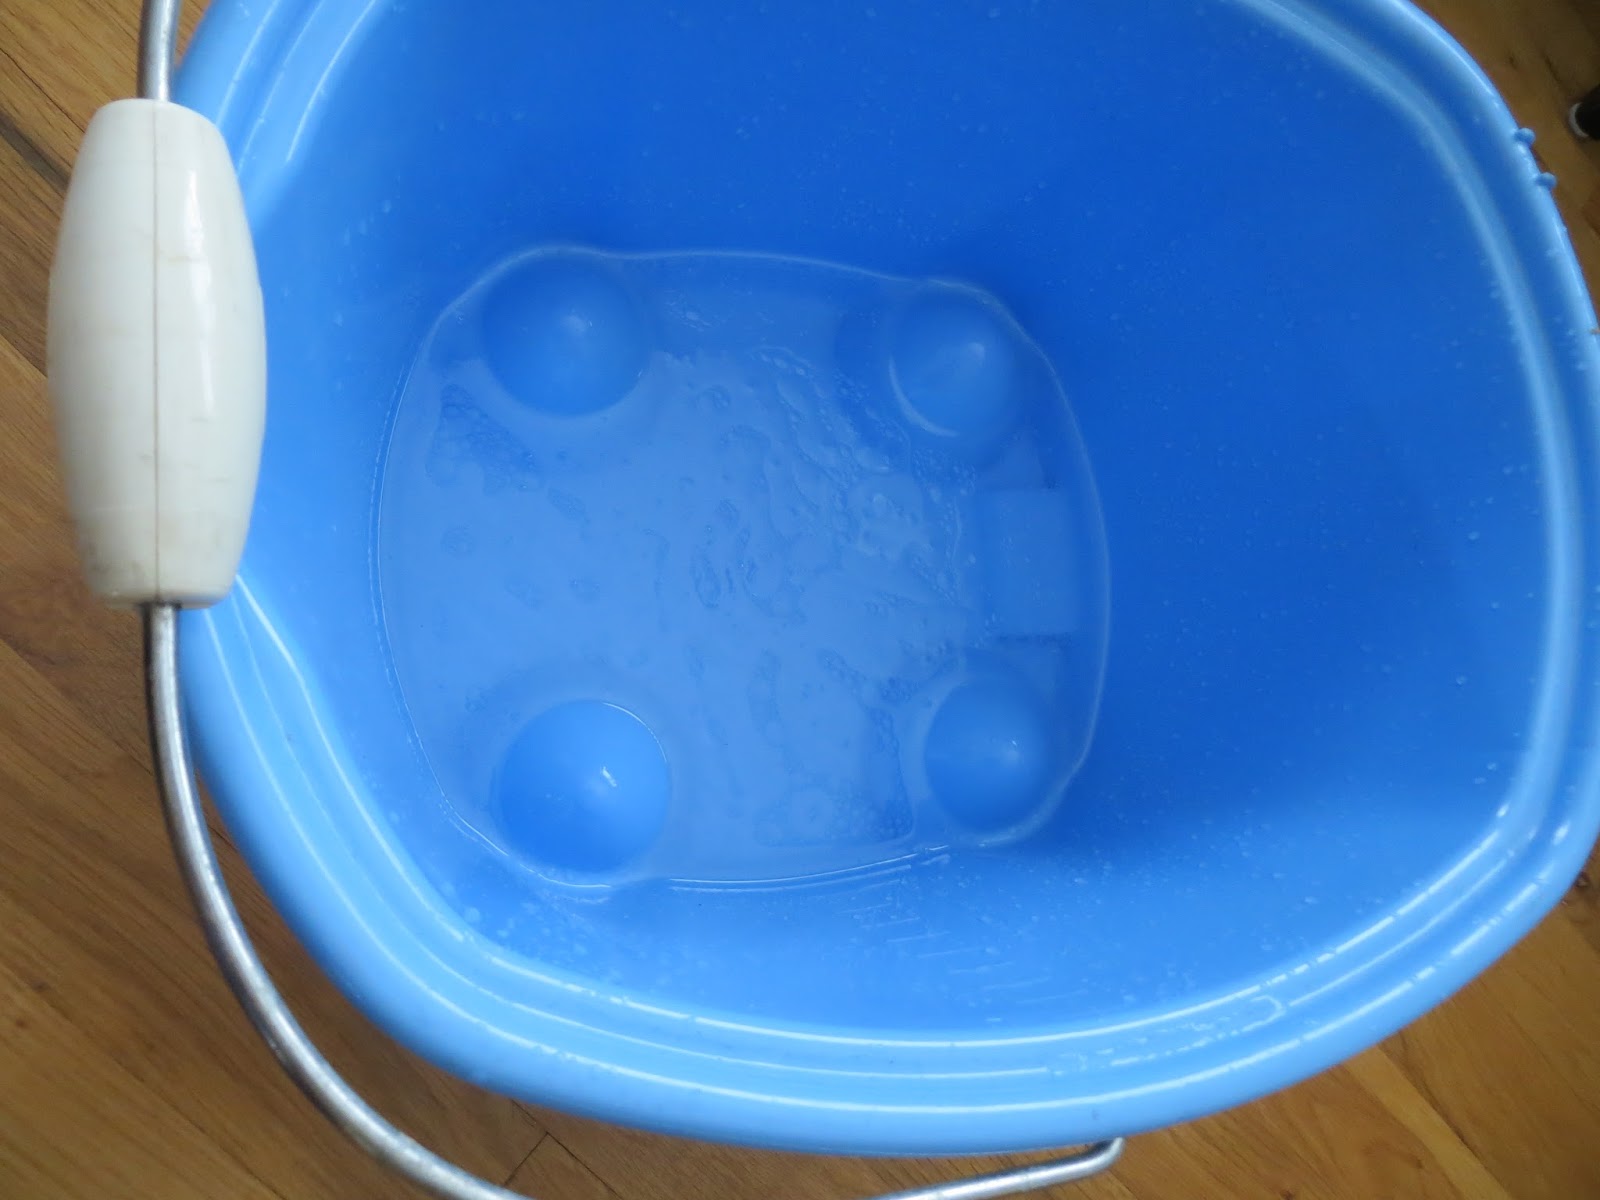
Okay, so this part is for all you people that I tell about RIT dye and who act all scandalized like, "You do WHAT in your washing machine????" It's really okay, guys. It's made to work in your washing machine, and it's actually a lot less messy than trying to do it in your tub or in a plastic bin!

All you do is start your machine on a small load with hot water. Let the water fill up and don't close the top--to keep the agitation at bay. Pour in a cup of salt (for cotton blends) and a bottle of RIT dye and then add your article(s) of clothing (up to two pounds). (Last week, I dyed six pairs of jeans that were starting to fade using two bottles of dye and two cups of salt. Just fyi.) You can stir it with a big stick if you want, but just make sure your clothing is submerged and wait 30 minutes before you close the lid and start the cycle. The washer does literally the rest of the work. After the washer is done, put your clothes in the dryer and run an empty cycle with bleach through your washer.


I put a blanket over the top of my machine to keep any of the dye water from splashing out. (We have an old machine. Can you tell?) I also did this during the bleaching step.


This is after the bleaching step. See? Nothing to worry about. I think it's actually cleaner than it was before I dyed anything. Just make sure to bleach RIGHT AFTER the dying step so the dye doesn't have time to set.


So now it's the color I wanted, but the buttons were still a little wrong. I like pewter, but I don't look that great in it.


Enter: Silver fingernail polish.


The buttons on the right have been painted. See the difference?


Okay, almost done. The last thing that was bugging me was that the shoulders were too broad. Fortunately, I had some "for real" 80s shoulder pads in my inventory for just such an occasion.


I hand stitched them in.


Okay so....I am from Ohio, but my husband is from South Carolina....Is it just me or do you hear the "Gettysburg" soundtrack in your head when you see this too? Anyways, I like it. It looks like it could be a museum piece. 
(And in lieu of the SC "Rebel Flag" conspiracies lately, I can make a "Daughters of the Union" statement! Haha!)


The finale: Proof that "Dressing Your Truth" works. I snap into focus when I am wearing certain colors.


The End!!


Saturday, July 25, 2015

Colorblocking - When Shirts are Too Small

When I was in Korea, I used to go shopping in the underground with my friend Holly. She was always on the look out for a black dress with one big peacock feather across the front of it. When I found this sequined shirt on the dollar rack at Goodwill, I bought it because it reminded me of her, even though it's about forty sizes too small. Okay, so I can manage to squeeze it on, but. . .it ain't pretty!


I keep just about all my salvageable scraps from other projects, and below are some sleeves that I cut off another dress in order to make it sleeveless. I decided these would help me to fix my shirt by the method of color blocking. I thought about using another color, but because the peacock feather is such a feature, I decided a monotone blocking would be best.


I laid them on top. You can start to see how I would use them to fill out the sides of my shirt.


I put them behind the shirt to give you a better idea.


First, I cut the side seams almost all the way to the armpits.


Then, I cut the sleeves till they were the right size to sew into the sides of the shirt.


I pinned them all together and sewed them up.


This is the finished shirt.


Well, really this is the finished shirt. I tried on the one above and the hips were way too roomy, so I took them in about an inch.


It's a little dark, but you get the idea. Never let size be an obstacle to buying a shirt you like! You can always color block it!


The End!


Refashioning: Capris into Ankle Pants

I got these awesome yellow capris from my friend, Sandy, but. . .and I'm not sure you can tell in the picture, but the left leg was just a hair tighter than the right leg (maybe it's not the pants, but maybe my legs are different sizes!) and I knew that would bother me if I wore them anywhere. They just made a rule at my work that we can no longer wear capris, but we can wear ankle pants. (Also, capris kind of make me look like a hobbit sometimes because my ankles are thin, but my calves are HUGE.)
(See picture for all these details.)


Therefore, I was determined to turn these into ankle pants. First, I cut the cuff seam and lowered the cuff. (See picture below.)


Then, I cut the entire bottom hems out and unfolded them.


Then, I laid some skinny pants on top of them to get an idea of how much to narrow the calves. You can see that the one on the right sticks out a bit more.


I pinned both sides of each calf so that they were the same size before stitching.


Then, I sewed a straight stitch along the bottom hems. (I know I should have done a blind stitch, but. . .I didn't feel like it.)


Then, I ironed them.


Not too shabby.


The End!


Oil Dying - When Other Oil Stain Removal Methods Don't Work


So, remember when I blogged about how coconut oil is the best thing for your hair ever? Well, it is. . .however if you try to put it in your hair after getting dressed, it can stain your clothes. See pics below. 


I was particularly mad about this shirt because it's Ralph Lauren, and I hadn't even gotten the chance to wear it yet!!! Grrr...


The culprit:


So, I tried many things to get the stains out. I tried rubbing Oxy into the stains, letting them sit, and then washing them and hanging them to dry. Didn't work. I tried lemon juice and vinegar too. Nothing worked. Those pictures above are actually taken AFTER all of these mentioned methods, so you can see for yourself that they didn't work. I was going to donate the ruined clothes to Goodwill, but I was super mad because I wear those blue pants all the time. . .


Then, I got the idea, "If you can't beat 'em, join 'em." 


I took my half used jar of coconut oil, some boiling water and a plastic tub and went to work.

First, I put the boiling water and oil into the tub and stirred it up till the oil was all melted.


Then, I added my shirt and pants and kneaded them and flipped and kneaded and flipped until they were fully saturated.


I waited a few minutes and then wrung them out as much as I could and threw them into the wash (on cold).


I hung both to dry. . .and I'm pleased to say that the pants look GREAT! I feel like the color is actually even more vibrant than before and the stains are completely gone.


However. . .the green shirt was completely ruined. The original stains were still there, and all I had accomplished was making new ones...


Oh well. You win some, you lose some! At least the pants were saved!


The End!