I am on the search for the perfect bold, red motorcycle jacket.
So, I figured. . .why not make one?
I searched and searched Pinterest for "refashioning leather jackets" but nothing was very inspiring. Most of it was of people taking the sleeves off one jacket and putting them on another jacket.
Boring.
Skip ahead. So I found this big old 80s leather coat while thrifting the other day.
I studied it an studied it to see if there was enough fabric on it to make what I was wanting to make.
It was huge, and therefore perfect!
Before working on the jacket, I thought I would make a skirt out of the large bottom section of the coat, so I cut it off.
The bottom hem was actually narrower than the top seam of this section, so I flipped it over and made the bottom hem into the waist line.
The picture below shows how I sewed the back seam of the skirt. I took the original front seam (with the button placket) and clamped it together. Then I just sewed the front seam together to make the back seam of the skirt. (Hint: If you sew leather, use clamps not pins. [1] leather is too thick and rubbery for pins [2] pins make irreversible holes in leather [3] clamps hold the layers together better so they don't shift. I just used regular office supply clamps. You don't gotta be all fancy about it!)
So then I wracked my brain to figure out if I wanted an elastic waist band or a zipper closure? I wasn't feeling the zipper, and I remembered I had this skirt that I never wear that had not only a wide piece of elastic at the top, but also a crinoline lining.
So, I cut the striped top layer off the skirt. . .
And clamped the elastic part to the waistband of the leather.
I sewed it together using a zig-zag stitch. (Hint: If you sew leather, you either need to buy a Teflon or roller foot so that your foot doesn't stick to the leather....OR...you can just do what I do: Sew with the foot against fabric on top and with leather on the bottom. The foot glides along fabric and the feed dogs underneath don't stick to the the leather, so everything feeds through the machine at the same time.)
A close up of the finished waistband. I kinda like how sewing the elastic by stretching it against the leather caused the leather to gather when unstretched. Looks really modern.
Front:
Back.
Because I installed the elastic and lining to the leather in one piece, it kept the crinoline intact. I don't know that I've ever seen a leather skirt with crinoline, and I kinda like the effect. If I get tired of it, I'll just cut it off!
Okay. That was the easy part. Now to tackle that jacket!
So, I knew I wanted to make something like this Chanel-style collarless jacket that I already have. (NO! It's not real Chanel!!! I wish!!!)
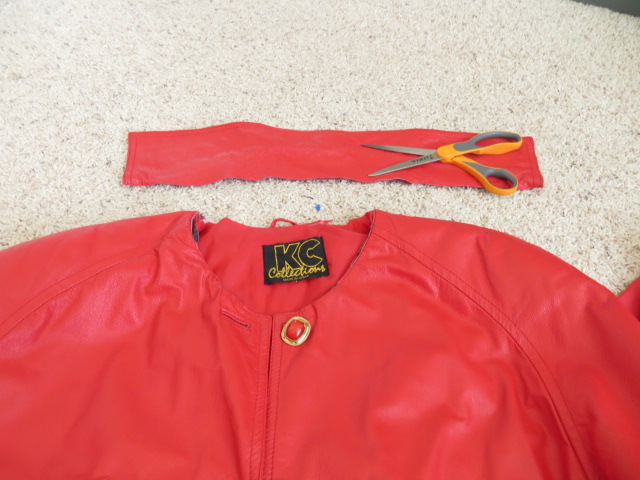
First step in making a collarless jacket: Cut the collar off! Ha!
Then, I cut all the bodice and sleeve panels apart. If you sew or know anything about clothing construction, you will note that the collarless jacket above has traditional sleeves that start at the top of the shoulder, whereas this coat has modified "raglan" style sleeves that originate at the neck. This is why you NEED TO STUDY your garments BEFORE attempting something like this to make sure that you definitely have enough fabric to work with when you make huge modifications like this!
You will also note that I as I cut my coat apart, I kept the lining intact with each corresponding panel of leather. I still wanted my new jacket to have lining. Reasons for lining: (1) gives the garment body and shape (2) feels more comfortable against the skin (3) easier to spot-clean than the raw suede of the "wrong" side of leather.
So, skipping ahead a bit. . .If you know how I usually pattern things using other garments. . .Well, that's what I did here too.
Then, I sewed all the bodice pieces together at the shoulders.
(Actually, before that, I sewed just the lining and leather right sides together just at the collar seams and then top stitched around the collar. I forgot to take a picture of that step. Sorry.)
Okay, this is the part that you should NOT speed through: Fitting. It's easy to read a blog post and think, "Oh. That person didn't really do much work and 'Voila!' a finished garment!" No. Fitting takes a while. And even though my dress form is meant to reflect my dimensions, I'm still a bit different from it. Different enough that when I note where a seam line falls on the dress form, I still need to take the garment off the form and try it on myself to make sure it fits me. A lot of trimming and whittling happened at this stage. Don't speed through this part or you will be angry at the end!
Then I sewed the sleeves on. (Again, take your time with sleeves. They need to be eased in to fit right.)
Same piece just folded into more of a jacket-like shape.
Again with the clamping.
Okay, at this point, the outside was looking great, but as you can see the inside was a mess of raw edges.


So I grabbed some thrifted seam binding. (Note: Binding your seams may seem pointless as no one is going to see the inside, right? And normally, I would agree with you. On a shirt, dress, pants, or skirt, I may either leave the raw edges alone or I might zig-zag over them to keep them at bay--I really need a serger!!!--but on a jacket. . .You gotta think: Once you put a regular garment on, you keep it on all day, right? But a jacket goes on and off. That means there is extra friction happening on the seams, so if they were a mess to start with, then the added friction doesn't help! Plus. . .depending on where your jacket hangs when it's off, the seams are open to public viewing, and. . .if you are going to put all this time and work into making a jacket look good on the outside, why not make it look good on the inside too? Plus. . .Binding your seams is a great way to avoid judge-y eye rolls from your dry cleaner.)
Rant over.
Getting binding started is always the trickiest part. You need to tuck the edge over before you place it on your seam. Then you have to really hold it tightly as you stick it under your sewing machine foot or it will all fall apart. Once you can get your needle down into it and are able to back stitch a little to get started, the rest is almost a piece of cake! (Almost.)
One shoulder seam bound.
Okay, so. . .here are a couple of picture of how to bind a seam up close:
Make sure to encase only a couple of inches of the seam at a time. Any more than that and your feed dogs and machine foot will try to push the binding off the seam as you sew. You need to be really "handsy" and go very slowly with this step to make sure it all works out perfectly.
And this is how much binding I had left! Whew! I made it!
The bound seams.
Okay, it's looking pretty good! But. . .I don't like to wear gold, so the button needed to go.
I'm not 100% sold on this silver button, but for now it's better than the other one.
Plus, the regal seal on it gives the jacket a kind of "Londoneque" Burberry sorta look.
Okay, so one more step! See how the back of the jacket puckers and hangs like a brown paper sack? Ick. Dart time!
Okay, before the darts, I just want to point out the really cool top-stitched seam that is going down each sleeve. As I cut the sleeves, I made sure to turn these seams forward a bit. I think it gives the jacket a more Euro-style feel. Like. . .Should I be driving an Aston Martin? Yes.
The answer is always: Yes.
I say that to say this: If you want to do a project like this, look and see what features the garment already has that you can slightly change, but yet showcase. Does the hemline have a nice top-stitching? Or is there a cool zipper on it? Turn that into something. You know? Use what you have.
Okay, now it's really dart time. To make darts, turn your garment inside out. Then start pinning (or in this case--clamping). This is another step where you need to try the actual garment on, check in a mirror, repin, check, plan, check, plan, etc.. . .And it's EVEN more important that you spend a little time on this step if you are sewing leather. Why? Because once you sew a seam into leather, it's there permanently! Even if you take the thread out, you can't get rid of the stitch holes! So be mindful.
Another headache with darts is the fact that you can always plan the first one perfectly, but the second one is always a hassle. Symmetry ain't easy! Take your time.
Worth it!
It fits so much better now.
In case you are wondering, I'm not planning to wear these two pieces together! Leather on leather is a little. . .much. Anyways! I'm happy with them and they will definitely add a new level of chic to my Fall/Winter wardrobe.
And here is the "Before and After."
The End!