Saturday, November 23, 2013

Alloy Inspired - Heather Blue Sweatsirt With Black Silk Sleeves


II have been trying to make this shirt from Alloy Magazine for awhile. 


Today after making the DKNY shirt, I had a "Eureka" moment. The whole process took an hour--patterning and construction. 


 The End!


DNKY Inspired - Oversized Colorblock Sweater

I like this DNKY fall/winter sweater.


I just don't have any leopard print jersey, so I color locked it instead. I also added pockets. 


The End!

UPDATE: Okay, since making this, I decided that I hated the sleeves, because they were too long and always fell down. I felt like I was an orphan in this shirt...so I made the sleeves thinner. It helps to balance out the gigantic-ness of the shirt:


Friday, November 22, 2013

Two More Fendi Inspired Colorblock Knit Dresses - Teal, Tan, and Grey - Blood Orange, Plaid, Brown, Grey, and Tan

I love this Fendi dress. . .


. . .So I decided to make two more!


I don't know if you can tell from these pictures, but I took a little time to refine the shoulders/sleeves pattern and I brought the drop waist up a little from my last endeavor. I still like the first dress, but these ones are just a little more comfortable and fit just a little better. Once I was happy with my pattern, I simply cut out both dresses and sewed them together almost at the same time. This really cut down on construction time--doing two at once.


It's crazy how just changing the color scheme gives the dress a whole different look. I think these teal green/blues make the dress look sporty whereas my last one looked european.


This blood orange one looks bookish and Autumn-y.


The dark orange part isn't double knit. It's actually semi-stretchy faux suede. You use what you have!


The End!


Monday, November 18, 2013

Fendi Inspired - Colorblock Knit Dress - Salmon, Black, Tan, and Grey

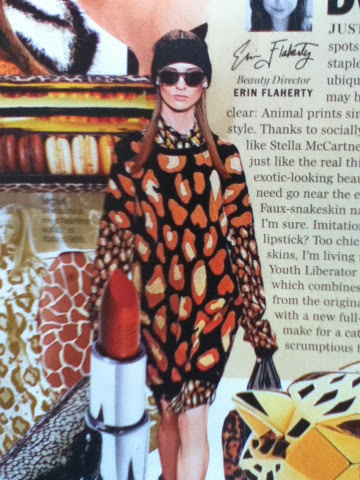
Whether or not you liked my Fendi Inspired outfit a few weeks ago, I haven't been able to stop thinking about the salmon, black, tan, and grey dress that I used as inspiration.

 You can see the front and back of this dress here.


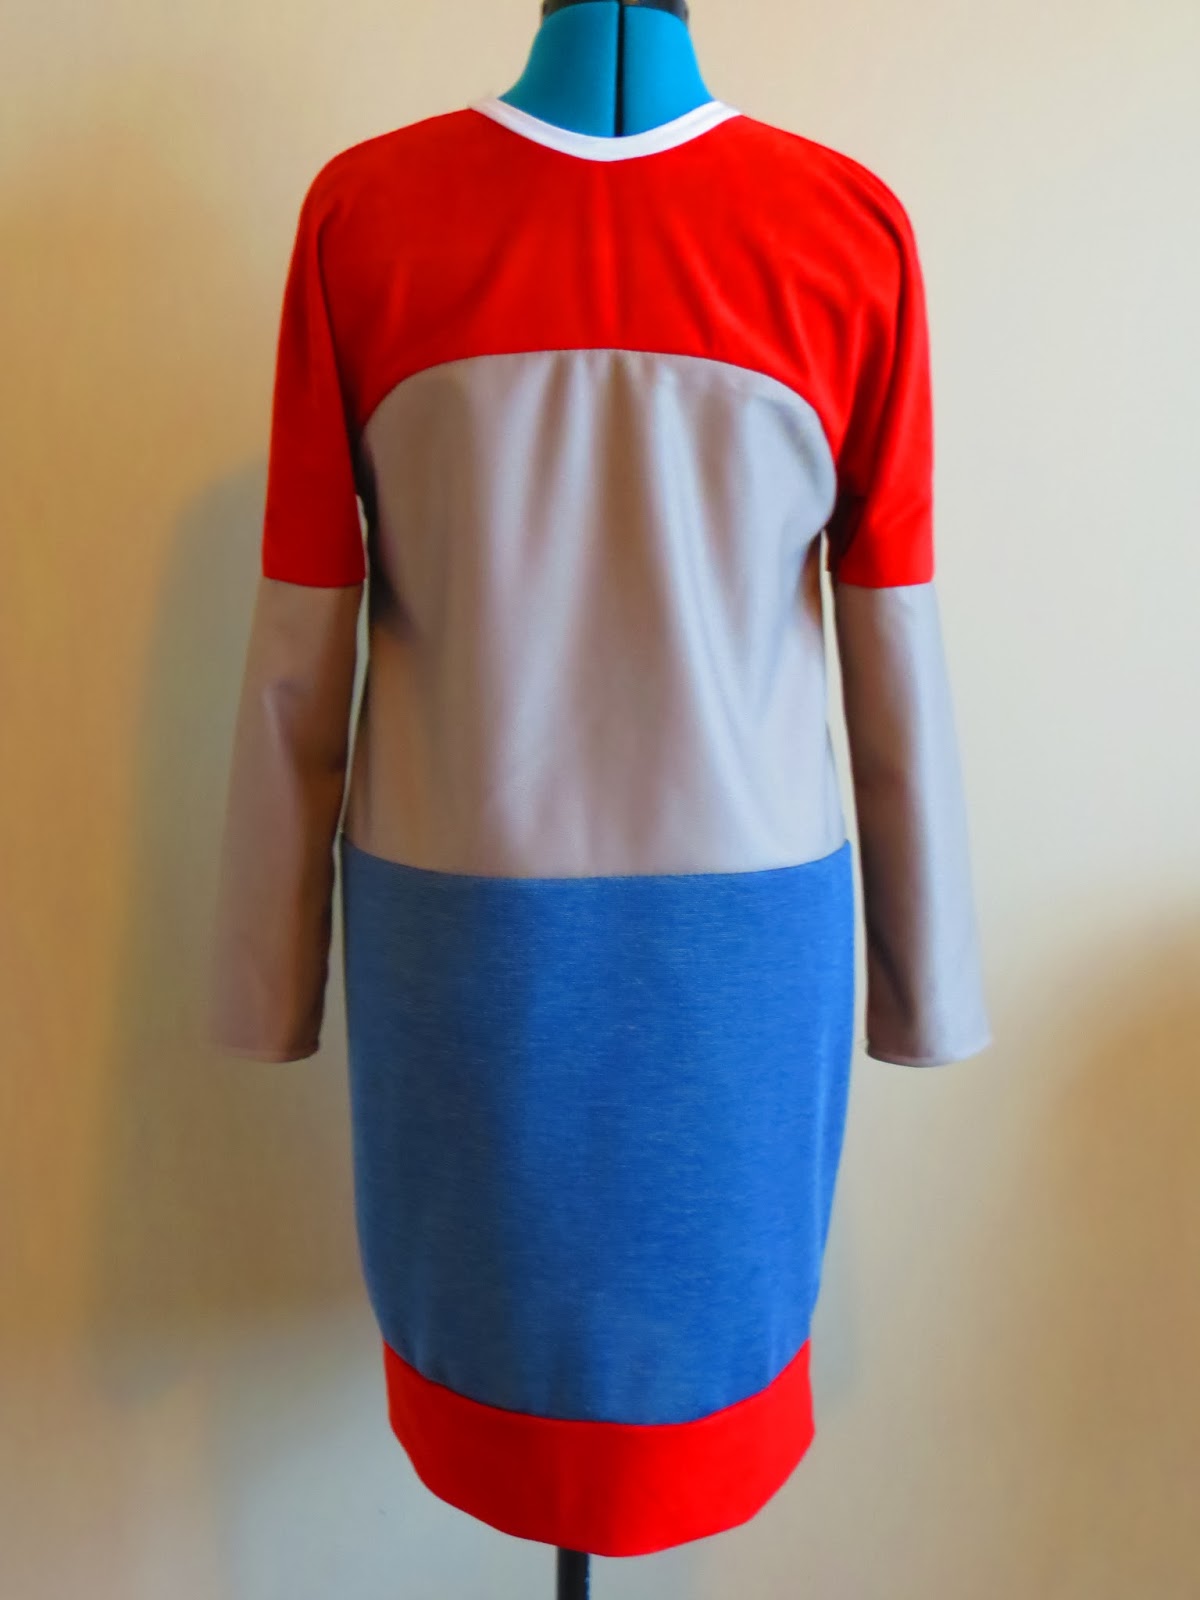
I went to a thrift store and found a bunch of different colors of double knit polyester and then realized I had the exact colors to make this same dress! The pattern isn't a traditional one and it's been baffling me, so I've been putting this one off for a few weeks to wrap my head around it. Then, husband and I didn't leave the house on Saturday, so I decided to make this dress. I have run out of the brown packing paper that I've been using to make patterns, so I taped some newspapers together for this one. It took several hours to figure out how, not only the dress is put together, but how to proportion it for my body--decidedly NOT model shape!

Anyways, skipping ahead several hours, here is the finished dress. Pretty good, huh? Actually, I found the salmon, tan, and grey in double knit, but I couldn't find any black jersey that was thick enough to support the thicknesses of the other fabrics. Fortunately, I found a thick black maternity skirt at another thrift store and just cut it apart.


 It's harder than you think to get the seams to match up. This fabric is really thick. If I didn't have a Husqvarna, I would have been dead in the water!


 You would be horrified if you saw how I put the collar in...I cut the white off a dress I was getting rid of...Anyways, you'd be horrified. I did it in like five minutes.


The sleeves were the hardest part to pattern because they didn't follow the traditional pattern. I don't think I got them quite right, but I will make another dress using this pattern and I will fix them then. They are good enough for this first try, though!


The End!


Tuesday, November 5, 2013

Make a Bag from an Old T-shirt in 10 Minutes or Less

I got back from my mission trip to Montana for which I packed here last Friday. Anyways, the missionaries we helped used to have big youth camps at their mission called "Four Winds." As a result, they had a bunch of old child-sized T-shirts. I decided to turn one into a bag. Actually, I was almost done making it when I realized I hadn't taken any pictures of how to do it, so hopefully, you can figure it out from the pictures below.


The strap is made from cutting the bottom of the shirt off.


The main part of the bag is made from cutting the sleeves and neck/shoulder part off and then, using a jersey/surger stitch, sewing the bottom and the arm holes together, and then just hemming the raw edges. Easy! The whole thing takes about 10 minutes.


The End!!!