Showing posts with label jersey. Show all posts

Thursday, June 22, 2017

Refashioning: T-Shirts into a Quilt

Making T-Shirts into a quilt was really popular a few years ago. Everyone was making them and it was revolutionary. Well. . .I may be a day late and a dollar short, but I still had a bunch of T-Shirts that I wasn't wearing, yet didn't want to get rid of, so. . .whether it's in vogue or not, I still did this project! I did do it a tad differently than the norm, so read on to find out how.


I work for my church in the office. Sometimes, I have to make these booklets with plastic binding. Well, I accidentally messed up two of the bindings, so instead of throwing them away, I took them home, taped them together to make a square, and used them as my quilt pattern.

This is how I cut my shirts out: I laid the pattern on top of the emblem of each T-Shirt, and just cut around it--all the way through each shirt--through the front and back at once. This made two pieces per shirt.


I kept cutting until I had cut thirty shirts. I had sixty squares when I was done.


Instead of throwing away the back pieces of the shirts, I actually kept them with their corresponding fronts as I sewed all the pieces together. Why did I do this? Two reasons: (1) Not all shirts were the same stretchy-ness. Some of the shirts stretched a lot more than others. Keeping an extra layer with every piece sewn added some body and heft which gave the whole project more uniformity. In fact, I actually traded around the backing squares on some of the stretchiest T-Shirts. (2) the extra layer added an extra level of warmness. (It also made the finished blanket 25-30% heavier, so if you want a lighter-weight blanket, don't do this. However, if you skip this step, make sure all your T-Shirts have the same stretchy-ness.) You can see my layers in the picture below. I used a simple zig-zag stitch with a wideness of 3 and a closeness of 1.5. The reason I waited so long to do this project was because I was hoping to have had a serger by now. Oh well, I don't. Anyways, the zig-zag stitch worked just fine!


I sewed them in five columns of six squares. Then I sewed the six squares together. I didn't use pins because they were all the same size squares. However, I only sewed a few inches at a time and made sure that all my seams matched up as I went along. Slow and steady wins the race!


I chose this baby blue/green jersey for the backing, simply because that was the only jersey I had that was wide enough. If you do this, make sure you use a jersey backing cloth as well. It will look and feel really weird if you use a woven cloth, that doesn't stretch, behind T-Shirts that do stretch. If all you have is woven, then you will need to iron on some non-stretch interfacing behind each of your T-Shirt pieces before you sew them all together, or at least before you sew all the layers together.

 Skipping ahead. I laid my backing cloth down first, then put my batting down, then laid the quilt top down over that. I trimmed the batting and then folded the backing cloth over the batting and connected it to the top layer with pins--pinning through all the layers at once. You can't really see it in this picture, but if you zoom in, you can see all the pins around the outside.


Once I sewed all around the quilt (and mitered the corners), I pinned through all the layers at the intersections of each T-Shirt piece. You can see what I'm talking about below. See how the pin goes through the corners of the white, yellow, green, and orange shirts? I then rolled it all up, and with the roll starting in my lap, I started feeding all these intersections through my machine, back tacking at just the intersections. This is a very necessary step because it keeps your batting (and everything really) in place. Little known fact: This is actually the act of quilting--when you sew through all the layers of a blanket to add warmth to a blanket, and to keep all the layers in place. (Some people think that quilting is when you sew a bunch of pieces together, but that is actually called "piecing" to make a quilt top.)


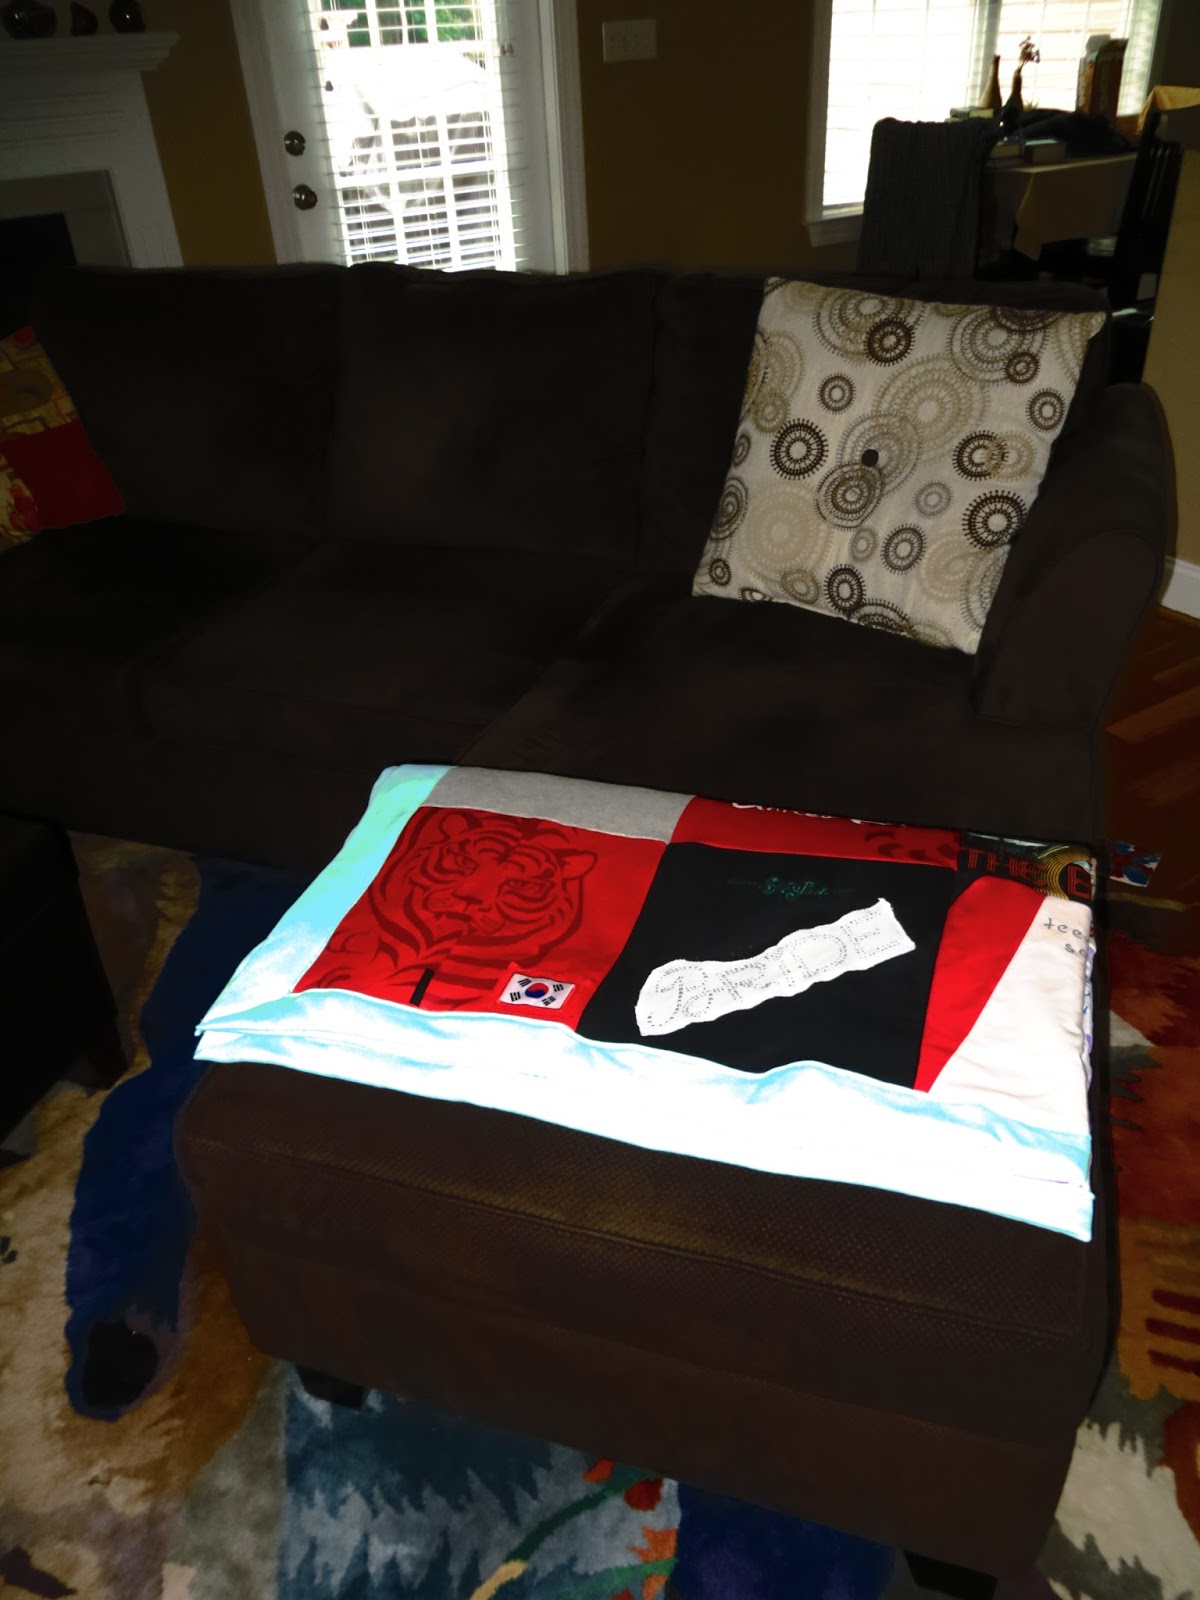
The finished quilt. Now I can keep all my sentimental T-Shirts that I never wear without them cluttering my drawers!


The finished quilt on my couch.


The End!


Thursday, May 7, 2015

Turning a Prom Dress into a Maxi Skirt

I bought this dress at a Goodwill. It's 100% silk, so I couldn't pass it up! I got it home and the top of it was too tight and the bow on the back was OBNOXIOUS, so I decided to make it into a maxi skirt. If you want to do this project, all I added was a piece of medium weight stretchy jersey that was an inch or two smaller than my waist but could stretch over my hips. I didn't even add elastic!

Tuesday, February 24, 2015

Black Harem Pants

If you have a really good memory, you may well remember these weird pants I made about a year ago. The problem I had with them was that they were grey, and soon after making them, I learned I was T4. I wondered why I hated the pictures of me at the end of that post. Now, it all makes sense. Anyways, I really wanted to remake them in black. So, I did.

I used the same pink shorts as last time as my main pattern pieces. I love this shiny black jersey material. Really edgy and great for this project.


I also used a pair of sweat pants to use as a reference for the length of the pants. I cut around them.


I did something different at the ankles, though. I curved them in slightly. This will make the pants drape differently around the ankles. I think it looks really modern.


After cutting all the pieces out, the first step was to fold the pockets in half and stitch the bottom of them.


Then, I pinned and sewed the pockets to the top of the front pieces.


Next, I pinned pleats into the sides of the front pieces.


Then, I pinned the front and back pieces together and sewed the outer seam of each leg.


This is what the seam I just talked about looks like from the right side.


Next, I pinned and sewed the "crotchal region."


Then, I sewed the inseams together in one big, long seam.


Last step: sewing on the waist and ankle bands. Notice how the ankles curve in here, and notice that effect on the last few pictures. It's subtle, but it's a neat effect.


The End.


Wednesday, February 4, 2015

Cartoon Colorblock Shirt

Here is a quickie I did one day. 

I bought this shirt from Rue 21. It's a really simple, stylish, easily copied design.


I had some stretchy fabric with "Blondie" cartoons all over it. Actually, it is fabric used to make school book covers, but I really like it and want to wear it.


Before I cut around it, I folded about 1 1/2 inches down from the top of the shoulder and folded a triangle portion in from the bottom of the side seam. If you saw my post about making a jacket, you will understand why I did this.


I cut around it.


I had some left over silver fabric from another shirt I refashioned from an old lady shirt, but I forgot to post it. Anyways, this is the left over part.


For the back, I cut out some black polyester jersey. Notice that I added the portions I stole from the front onto the shoulder and bottom seam area.


Here is the completed shirt....sideways, because that's how Blogger does it sometimes.


The End!


Tuesday, June 3, 2014

3 Yards of Jersey Fabric Becomes Yoga Pants and a Maxi Dress!

I am a Type 4 with a secondary 1. My least present type is Type 3; however, it does show up in two ways: shopping savvy, and practical efficiency. This blog post is an example of that efficiency. I decided to post it in case it helps someone else think through their sewing planning.


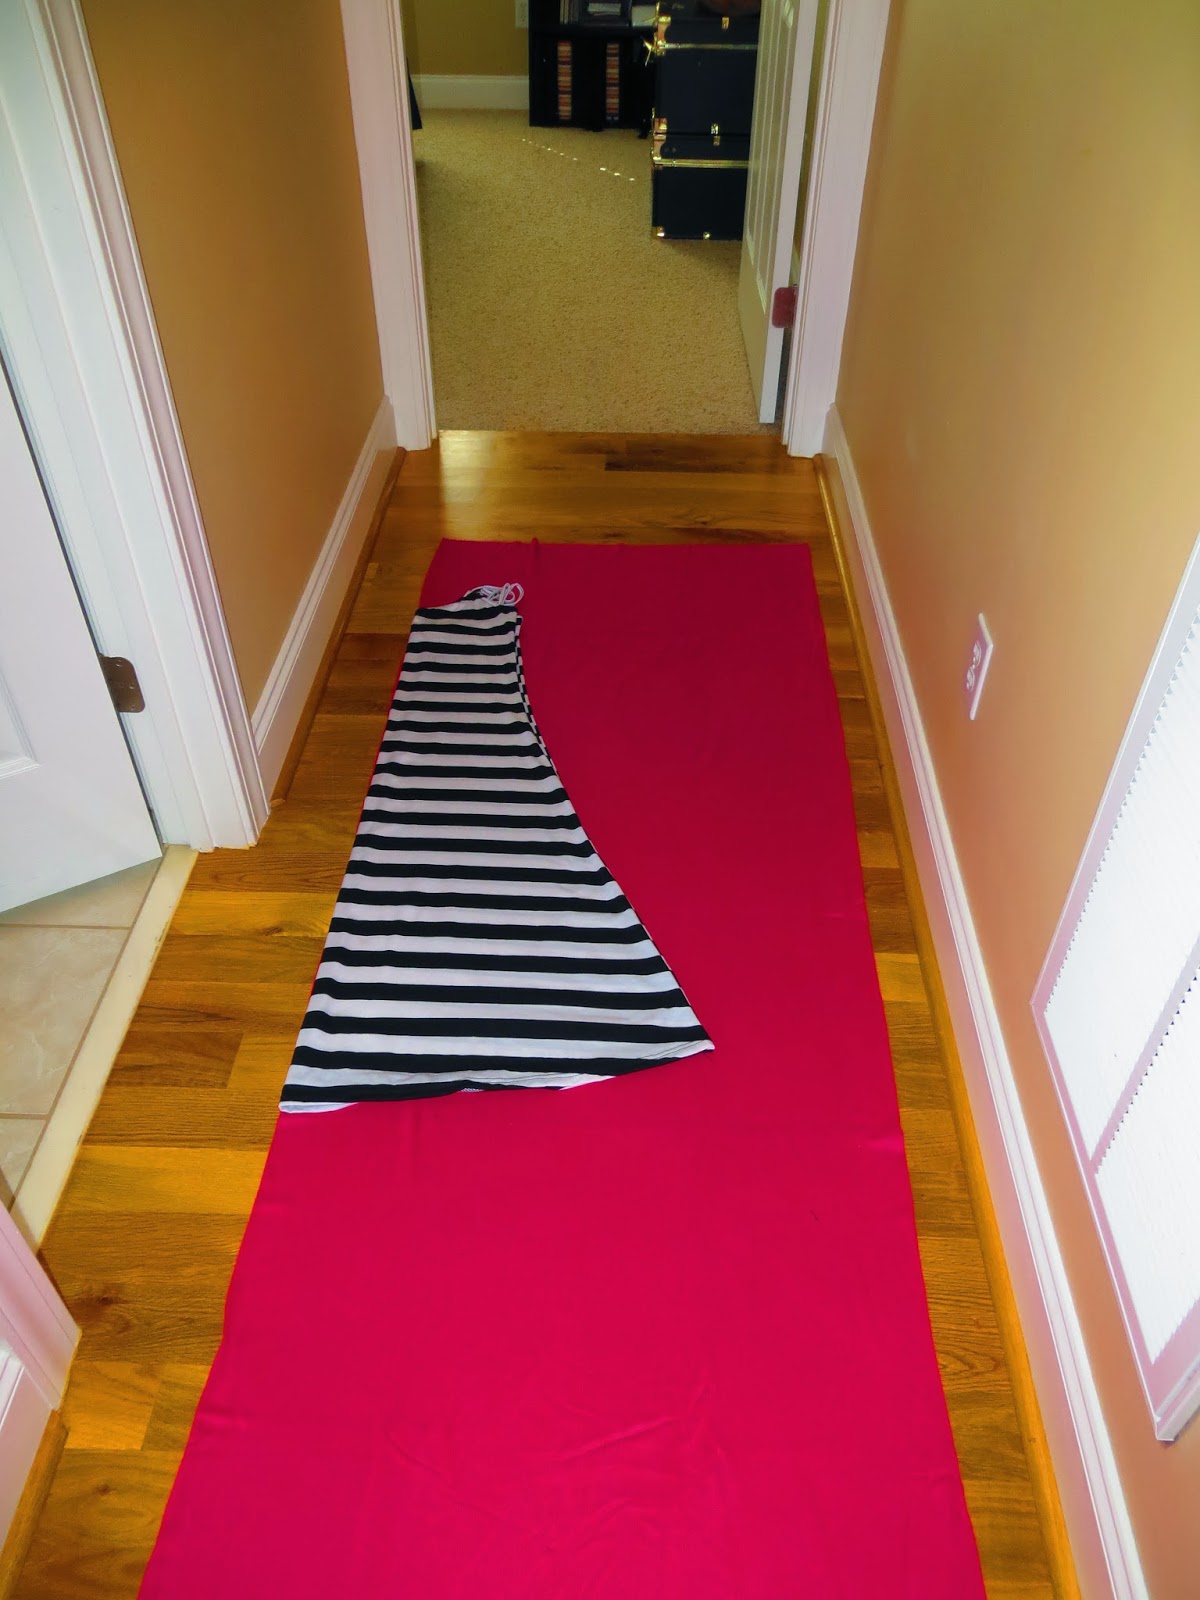
The first thing I made was a maxi dress. I laid down a maxi dress from my closet and cut around it. An advantage to doing this is that you don't have to pin anything. Fabric is much heavier and more flexible than paper patterns that need to be pinned. If you notice the empty fabric right next to the dress is the same sort of triangle shape, so I flipped the maxi dress over and laid it down going the other way. I was really lucky with this fabric because it's a giant tube, so both sides of the fabric are a fold. This means I didn't have to sew a seam up the back of the dress. A back seam isn't the end of the world, so if that's what you have to work with, do it. I made the straps out of scraps.


Then with the bottom half, I folded it in half vertically and laid some yoga pants on it. I cut around those as well. I made the top waist band out of extra scraps.
**NOTE** If you do this, make sure to unfold both pieces and cut the waist hem lower in the front on both legs. This keep the waist higher in the back to allow for your butt, and keeps the pants comfortable in the crotch when sitting.


Here is the dress. 56" long.


And here are the pants. 37" inches long.


The End!


Thursday, May 22, 2014

Two Skater Dresses

It has come to my attention that a former student of mine enjoys reading these posts, so. . .a shout out to you, Lindsey! I miss you! A little bird told me your freshman year went well. . .(That little bird is your mother. I literally almost ran into her at Walmart. Literally.)

Speaking of Walmart, I found this neon yellow sporty jersey fabric at Walmart for $1.50 a yard and so I bought four yards. 


I had no idea what to do with it, so I thought I would start with a skater dress. I did my "lay another dress on top and cut around it" pattern system that I've been using lately.       It's really easy, Guys. Way easier than paper patterns that you have to pin. You should try it.


Maybe this picture will show you how easy it is. You just have to make sure you cut a seam allowance around whatever you cut. You can see here that I extended the torso down a few inches from the original dress. That's because I don't like when waists are just a tiny bit too high.


The piece I cut up there was the back piece with a higher collar. Here is how I cut the front. I used the cut piece as my pattern.


Then, I just cut around it.


But I stopped at the collar.


Then I replaced the original dress on top the piece I was cutting just now.


I tucked the back collar part in. . .


and cut around the front collar. 


To cut the skirt part, I just folded the bodice half of the dress in and laid the skirt part on top of my yellow fabric like this.


Then, I cut around it. You can play with these measurements, you know. For instance, I made the skirt 1/2 an inch longer.


When it came to sewing, I had to choose which side of the fabric I wanted to be the good side. This is athletic fabric, so usually this is the side that shows:


But that was a little too much texture for me and found that the back side was actually more solid.


Skipping ahead. I sewed the dress together but when it came to hemming, I hemmed the front middle bottom hem up 1/2" more than the hem I did the rest of the way around. This allowed for "butt lift." If you don't know what I'm talking about, skip it. I just hate when dress hems hang just a tiny bit higher in the back. Drives me nuts.


Here is a closer picture to show what I'm talking about. I trimmed that edge after taking this picture, just so you know.


The end! All in all this dress only took 1-2 hours. I wasn't really paying attention.


Okay, I know this hem is kinda tacky. Usually, you are supposed to double fold before you hem, do a lining, or use bias tape, but I didn't do any of that for two reasons: (1) If I double folded the collar and sleeves which are curved, then they would have bunched up funny. (2) The only reason to double fold, lining, or bias tape is because you are afraid of the fabric fraying. Since this fabric doesn't fray, I didn't worry about it. You can't tell from the outside and that's the only side that matters. Back in the day when women only had like five dresses, it mattered. Nowadays when most women have tens if not hundreds of dresses, there is no reason to make them last through an apocalypse.


Okay, that dress went so fast that I decided to make another dress with fabric I already had. Before I sewed the yellow dress together, I traced the pieces onto paper. Then I drew a raglan line from the collar bone to the arm pit and cut the pattern along that line. That's what I used to make this raglan skater dress:


I saw a dress on eBay where the raglan line didn't end directly at the armpit, but rather ended just below it. I thought that was unusual, so I did the same thing.


I made a waist band on this one.


I was going to use just the pink chiffon for the shoulders, but it was a tad flimsy, so I backed it with the navy jersey as you can see here:


Also, to reinforce the waistband, I grabbed a strip of scrap jersey out of my scrap box. This is why you should save scraps.


The End!