Showing posts with label colorblock. Show all posts

Tuesday, February 17, 2015

Colorblock Black and White Striped Tunic with Pockets: McCall's M6565

I made this shirt the other day. It took about eight hours, because there was tons of planning, and I had to re-fashion the original pattern due to the fact that I have zero torso. I think it's super cute, though. It's another "bought pattern" one, so I am just going to cover details and not the process.


I bought this pattern from a thrift store over a year ago, and I've been dying to make all of the designs below, but. . .as you can tell, I started with "D." The only problem with it was that the pattern for the inner front lining was missing, so I had to make a new one based on the other pieces. 

This is one of those projects that you go, "This is obviously for sewing women to make themselves and/or only their closest friends/relatives as gifts, because no one would want to actually pay for the amount of work that goes into something like this." I mean, it's not a wedding dress, and no one is going to want to pay $160 for a shirt when they can buy clothes off the Walmart sales rack for $2! (That was my rant for the day.)


Notice the gathers on either side of the bust. Also, notice how the stripes start horizontal at the shoulders, but because of the design and gathering, the stripes start to slant toward the hips. Kind of interesting. 


This wasn't in the directions, but I top-stitched the middle panel because it wasn't laying right. The pattern called for non-stretchy fabric, but. . .I love jersey, so I ignored those directions and top-stitched the middle panel.


Pockets!


The original patterned sleeves stuck out too much, so I folded them and stitched them in a bit.


I hand-tacked the folded part down underneath.


Back darts. They were actually more complicated than I'm used to, but they turned out nicely.


Side view.


Okay, this is why this shirt took so long: The entire thing is fully lined. This is the front lining.


Back lining.


Even the sleeves are doubled. The advantage to completely lining the entire thing is to keep it stable from underneath and to keep from seeing any top-stitching on the outside (other than the stuff I did on purpose that I showed you earlier). It just looks cleaner that way, but. . .I mean. . .It's not like I'm going to meet the queen in this, you know? I probably won't take all these measures in the future for just a shirt!

Here you can see the folding and tacking of the sleeve from the inside.


The black line is the top-stitching from earlier and the other vertical seam is a dart in the lining.


Both the sleeve holes and the neckline I understitched.


I think I am going to try a scaled-down version of this sometime using my "lay it down and cut around it" method and see if I can make nearly the same thing in less time. Still, besides the fact that it took so long, it is really cute. . .and well made, if I do say so myself!


The End!


Wednesday, February 4, 2015

Cartoon Colorblock Shirt

Here is a quickie I did one day. 

I bought this shirt from Rue 21. It's a really simple, stylish, easily copied design.


I had some stretchy fabric with "Blondie" cartoons all over it. Actually, it is fabric used to make school book covers, but I really like it and want to wear it.


Before I cut around it, I folded about 1 1/2 inches down from the top of the shoulder and folded a triangle portion in from the bottom of the side seam. If you saw my post about making a jacket, you will understand why I did this.


I cut around it.


I had some left over silver fabric from another shirt I refashioned from an old lady shirt, but I forgot to post it. Anyways, this is the left over part.


For the back, I cut out some black polyester jersey. Notice that I added the portions I stole from the front onto the shoulder and bottom seam area.


Here is the completed shirt....sideways, because that's how Blogger does it sometimes.


The End!


Saturday, November 23, 2013

DNKY Inspired - Oversized Colorblock Sweater

I like this DNKY fall/winter sweater.


I just don't have any leopard print jersey, so I color locked it instead. I also added pockets. 


The End!

UPDATE: Okay, since making this, I decided that I hated the sleeves, because they were too long and always fell down. I felt like I was an orphan in this shirt...so I made the sleeves thinner. It helps to balance out the gigantic-ness of the shirt:


Friday, November 22, 2013

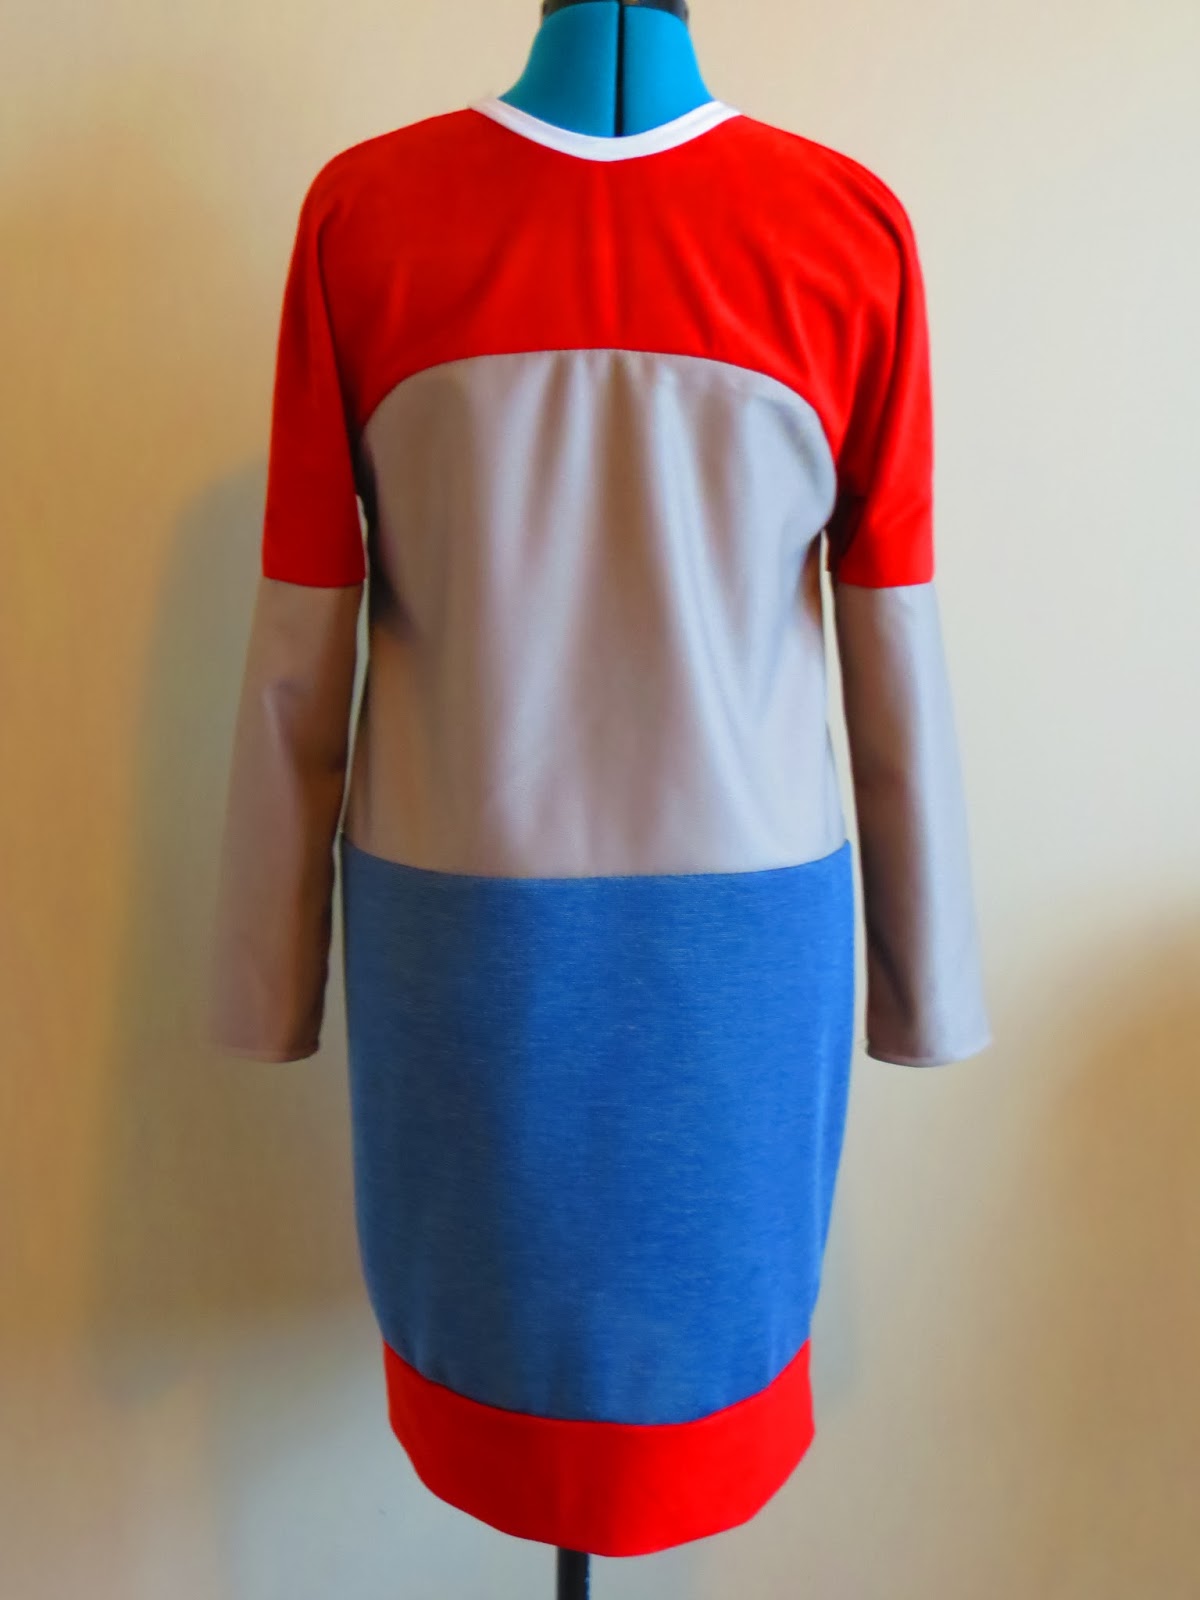
Two More Fendi Inspired Colorblock Knit Dresses - Teal, Tan, and Grey - Blood Orange, Plaid, Brown, Grey, and Tan

I love this Fendi dress. . .


. . .So I decided to make two more!


I don't know if you can tell from these pictures, but I took a little time to refine the shoulders/sleeves pattern and I brought the drop waist up a little from my last endeavor. I still like the first dress, but these ones are just a little more comfortable and fit just a little better. Once I was happy with my pattern, I simply cut out both dresses and sewed them together almost at the same time. This really cut down on construction time--doing two at once.


It's crazy how just changing the color scheme gives the dress a whole different look. I think these teal green/blues make the dress look sporty whereas my last one looked european.


This blood orange one looks bookish and Autumn-y.


The dark orange part isn't double knit. It's actually semi-stretchy faux suede. You use what you have!


The End!


Monday, November 18, 2013

Fendi Inspired - Colorblock Knit Dress - Salmon, Black, Tan, and Grey

Whether or not you liked my Fendi Inspired outfit a few weeks ago, I haven't been able to stop thinking about the salmon, black, tan, and grey dress that I used as inspiration.

 You can see the front and back of this dress here.


I went to a thrift store and found a bunch of different colors of double knit polyester and then realized I had the exact colors to make this same dress! The pattern isn't a traditional one and it's been baffling me, so I've been putting this one off for a few weeks to wrap my head around it. Then, husband and I didn't leave the house on Saturday, so I decided to make this dress. I have run out of the brown packing paper that I've been using to make patterns, so I taped some newspapers together for this one. It took several hours to figure out how, not only the dress is put together, but how to proportion it for my body--decidedly NOT model shape!

Anyways, skipping ahead several hours, here is the finished dress. Pretty good, huh? Actually, I found the salmon, tan, and grey in double knit, but I couldn't find any black jersey that was thick enough to support the thicknesses of the other fabrics. Fortunately, I found a thick black maternity skirt at another thrift store and just cut it apart.


 It's harder than you think to get the seams to match up. This fabric is really thick. If I didn't have a Husqvarna, I would have been dead in the water!


 You would be horrified if you saw how I put the collar in...I cut the white off a dress I was getting rid of...Anyways, you'd be horrified. I did it in like five minutes.


The sleeves were the hardest part to pattern because they didn't follow the traditional pattern. I don't think I got them quite right, but I will make another dress using this pattern and I will fix them then. They are good enough for this first try, though!


The End!