Showing posts with label grey. Show all posts

Saturday, April 23, 2016

Making Leather Jewelry - Necklace and Earrings

I've been addicted to "leather jewelry" lists on Pinterest, and a friend had a birthday recently, so I thought I'd try my hand at making some.

So. . .like some of my projects, I forget to photographically document until I'm already well into the project, so. . .let me catch you up.

I used my dressform as a scale model for drafting a paper pattern.


So. . .this is where there are pictures missing. I traced the pattern onto leather using disappearing ink (which. . .a word about disappearing ink: It disappears REALLY quickly! So make sure you don't use it and then go get something to drink, because it WILL be gone!) 

Then, I cut it out with scissors, and then I cut the fringe part with a rotary cutter and a ruler. (You can see I'd already finished the fringe in the picture below, but this was my attempt at going backwards and photo documenting. You're welcome.)


This picture is when I actually realized I needed to take pictures, so I'm trying to give you the basic idea with this picture.


I cut a reinforcement piece for the top of the necklace and then glued it on.

1. 


2.


3.


While that was drying, I started on the earrings.


Those little strips are reinforcement pieces I glued to the tops.


See?


Back to the necklace. I gathered some jewelry pieces to use to attach the necklace together.


Using a leather punch, I punched two holes at the top of the necklace.


And magically, I have already attached the hardware! (This took a lot longer than it seems.)


Then, as further embellishment, I took a flower. . .


 . . .and sewed a safety pin to the back of it.


Then, I attached the flower to the necklace. I used a safety pin in case my friend didn't want to have a flower on the necklace. . .and she can use the flower by itself as well.


Then, I punched two holes at the tops of both earrings.


The hardware for the earrings.


A finished earring.


The finished set.


And without the flower attached.

(Don't you wish you were nicer to me so I would make you these things too? Ha!)


The back. (It's adjustable.)


And I even made the bag (out of a perfume ad in a magazine)!

I'm so crafty!


The End!


Tuesday, February 24, 2015

Harem Pants

February 2014

So about a year ago I ordered a metric ton of these "Harem Style" Capri pants. I was really excited because they were only like $4.00 each (from China) and had really cool pockets, and so I got them in like...every color. Anyways, they ended up being paper thin and pretty much see-through. Not cool, China. Not cool.


Anyways, the pattern of them was so unique, that before giving them all to Goodwill, I cut one apart to use for my own pattern. Because the pockets are so unusual, I knew I'd probably forget how to construct them later, so I numbered the seams in the order they should be sewn. Any pre-planning you can conquer early helps to cut your construction time into a fraction of the normal time!


Skipping ahead in time: The only difference I added was to lengthen the legs so they are now sort of really fashionable sweatpants.


The End!


Friday, November 22, 2013

Two More Fendi Inspired Colorblock Knit Dresses - Teal, Tan, and Grey - Blood Orange, Plaid, Brown, Grey, and Tan

I love this Fendi dress. . .


. . .So I decided to make two more!


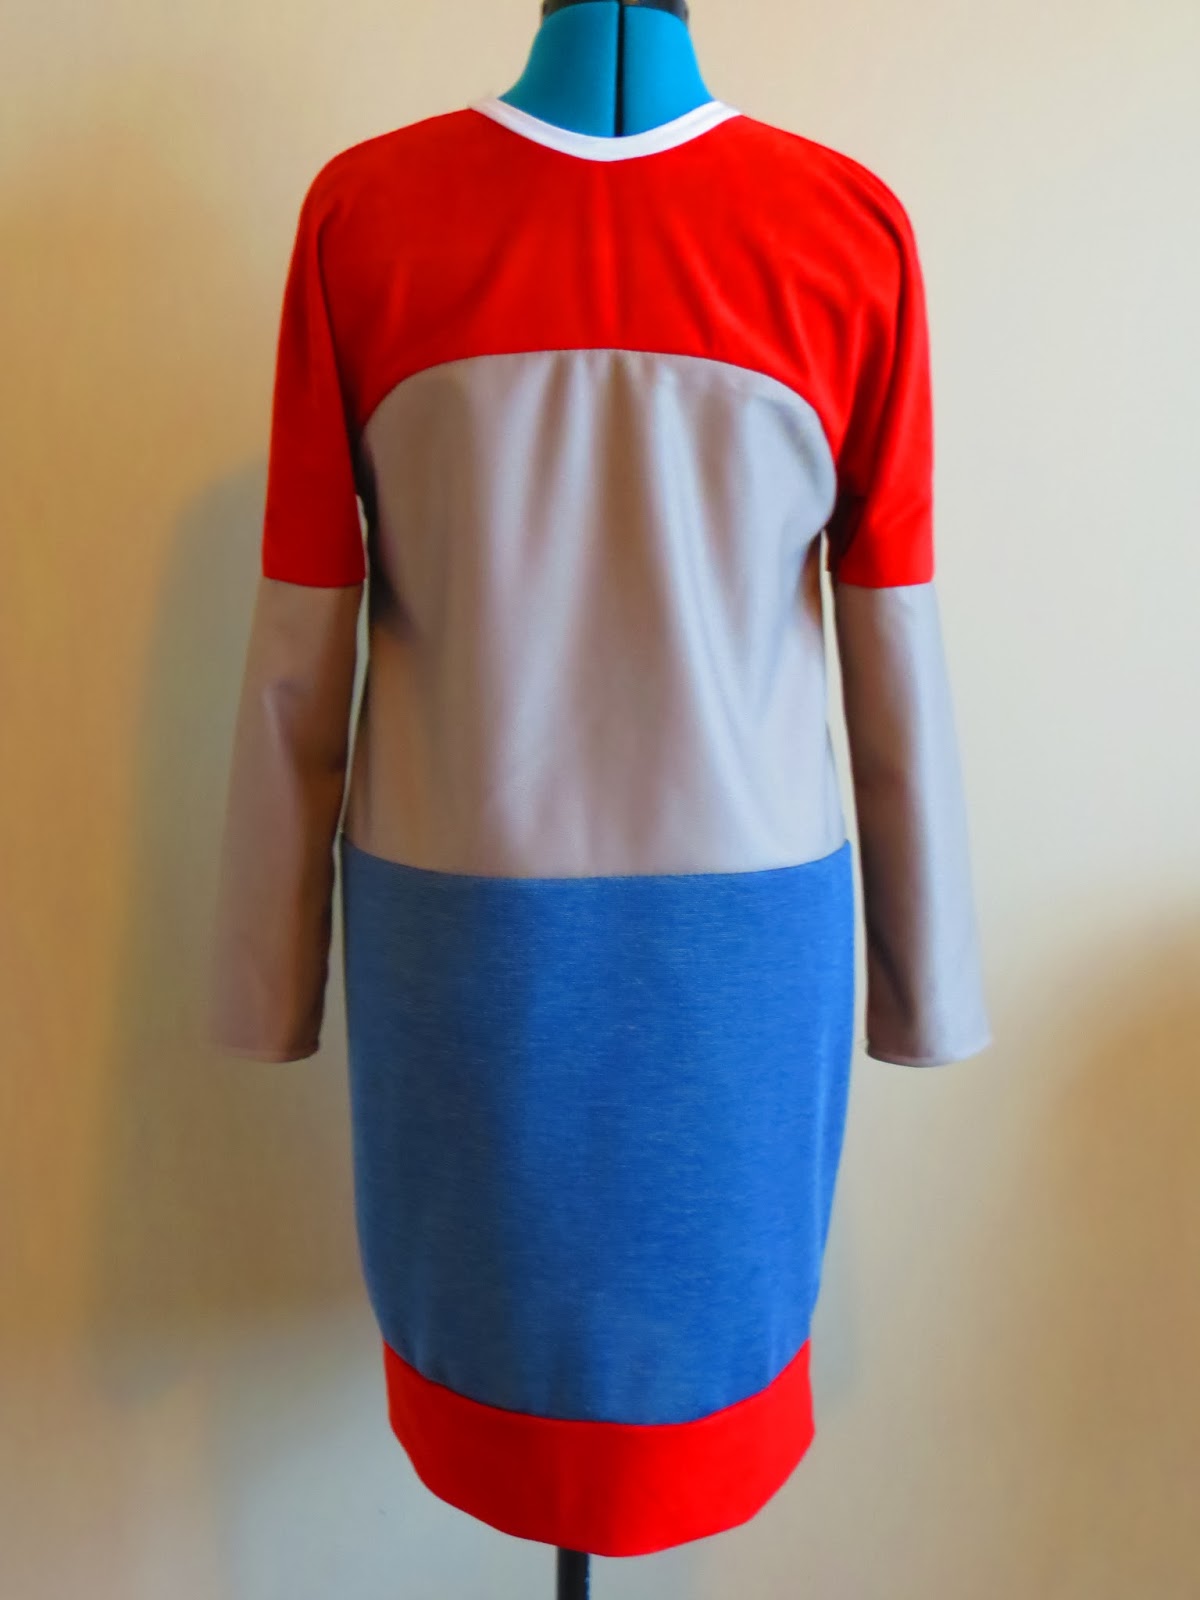
I don't know if you can tell from these pictures, but I took a little time to refine the shoulders/sleeves pattern and I brought the drop waist up a little from my last endeavor. I still like the first dress, but these ones are just a little more comfortable and fit just a little better. Once I was happy with my pattern, I simply cut out both dresses and sewed them together almost at the same time. This really cut down on construction time--doing two at once.


It's crazy how just changing the color scheme gives the dress a whole different look. I think these teal green/blues make the dress look sporty whereas my last one looked european.


This blood orange one looks bookish and Autumn-y.


The dark orange part isn't double knit. It's actually semi-stretchy faux suede. You use what you have!


The End!


Monday, November 18, 2013

Fendi Inspired - Colorblock Knit Dress - Salmon, Black, Tan, and Grey

Whether or not you liked my Fendi Inspired outfit a few weeks ago, I haven't been able to stop thinking about the salmon, black, tan, and grey dress that I used as inspiration.

 You can see the front and back of this dress here.


I went to a thrift store and found a bunch of different colors of double knit polyester and then realized I had the exact colors to make this same dress! The pattern isn't a traditional one and it's been baffling me, so I've been putting this one off for a few weeks to wrap my head around it. Then, husband and I didn't leave the house on Saturday, so I decided to make this dress. I have run out of the brown packing paper that I've been using to make patterns, so I taped some newspapers together for this one. It took several hours to figure out how, not only the dress is put together, but how to proportion it for my body--decidedly NOT model shape!

Anyways, skipping ahead several hours, here is the finished dress. Pretty good, huh? Actually, I found the salmon, tan, and grey in double knit, but I couldn't find any black jersey that was thick enough to support the thicknesses of the other fabrics. Fortunately, I found a thick black maternity skirt at another thrift store and just cut it apart.


 It's harder than you think to get the seams to match up. This fabric is really thick. If I didn't have a Husqvarna, I would have been dead in the water!


 You would be horrified if you saw how I put the collar in...I cut the white off a dress I was getting rid of...Anyways, you'd be horrified. I did it in like five minutes.


The sleeves were the hardest part to pattern because they didn't follow the traditional pattern. I don't think I got them quite right, but I will make another dress using this pattern and I will fix them then. They are good enough for this first try, though!


The End!