Showing posts with label flower. Show all posts

Sunday, November 10, 2019

Refashioning: A 70s Floral Dress into a Tailored Slit Dress (Over Skinny Jeans)

When I'm bored, I scour Pinterest for ideas.

So, lately, I've been getting looks like these in my main feed:


I dunno...I've seen the maxi-dress-over-pants look before, and largely ignored it. However, something about it intrigued me this time. So...I kept an eye out at Goodwill for a maxi dress to play with.

A few weeks later, I found this little 70s Flower Child number:


You can see it's way too big--even dragging on the floor. I hate ruffle sleeves on me. And the V-neck is way too low. 

Still, I really liked the print and the polyester jersey fabrication, so I paid my $1.00 and took it home!

If you would like to try this, you don't have to follow these exact directions, but maybe it'll give you some ideas!


First order of "bid-ness" was to cut the horrible sleeves off.


Now...realize this: When you want to shorten a dress, you actually have TWO options. Yes, you can hem it from the bottom--which is the usual way. But I know a much easier way--especially when the neckline is way too low.

This is what you do: You pinch an inch or so at the shoulder seam. Now...I realize that this is going to move the shoulder seam forward. In other words, it will no longer sit at the top of your shoulder. However, a forward-ed shoulder seam is sorta "in" right now, so I find this to be an adequate adjustment. I'm gonna show you a few pictures of this, because it's kind of hard to see in this print.


So then, all you do is cut off the excess. I use pinking shears.
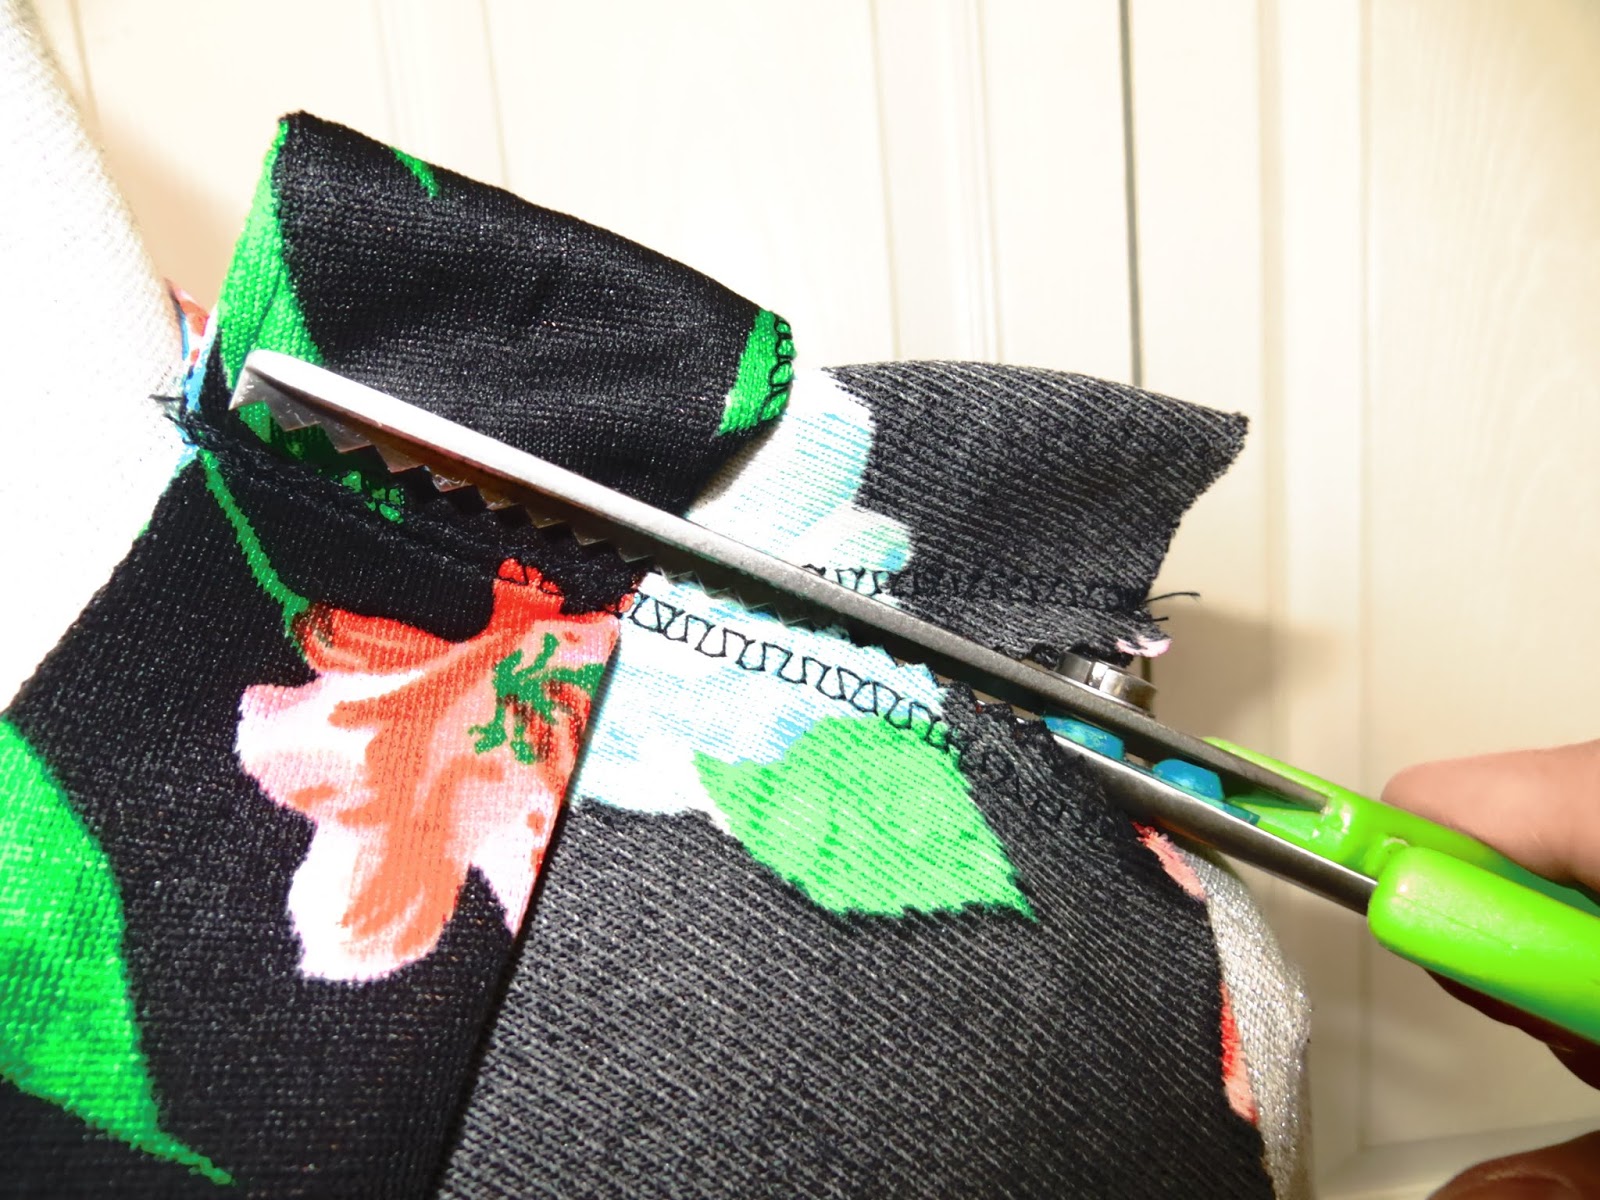


Okay, so...I really wanted sleeves. Trying to finagle the ruffle sleeves into a more fitted sleeve was...not easy. The fabric was a really weird shape. Still, you gotta use what you got. I laid another shirt on top of the ruffle sleeves as a pattern.


So, next I eased and pinned the sleeves back onto the dress.


So you can see here how big the dress is; however, notice how much nicer the V-neck sits from before. 


So, the next step was pinning down the sides to take off the excess sizing.


I sewed the side seams all the way down from the armpit to the floor to keep the shape uniform. It's now beginning to look really nice! I could have stopped here...but it's getting colder, so I wanted longer sleeves.

Notice how much shorter the dress is now. I didn't hem it. This just goes to show you that if a dress is too big, try taking the length away from the top and the sides first. Then see how long it is. 
Don't ever hem as your first alteration!!!


I added a piece of faux leather jersey to give an edgy look. But notice that now it looks sorta incomplete.


So, I added a bit more of the floral fabric. I had precious little left from the ruffle sleeves, but it was just enough to create a more uniform finished-looking sleeve.


Okay...I could have stopped there...(and maybe some of you think I definitely should have!)...but I have a million dresses...and the purpose of buying this one was to put it over pants...

so....

I laid it down on the floor...

and cut a big ol' chunk out of the front!


Not gonna lie...I was like, "What have I just done???"

But then I took it to the sewing machine and finished the slit's seam.


Here's how it looks over jeans.


And because we all love "Before and After"s:


The End!


Sunday, December 4, 2016

Refashioning: Fixing a Tear and a Hole in a Jean/Pleather Jacket

This one might give you a few ideas in case you have or come across a perfectly good jacket with a hole or tear!

I found this jacket on the Goodwill dollar rack (as is my wont). I don't normally like jean jackets, but this one fit great, had silver metal, and I really liked the black pleather sleeves. . .


Except!. . .


And. . .(I guess someone's dog got to it!)


So, this is a way to fix both problems. First of all, with the sleeves, I cut out a shape like this from the bottom of each of them.


I used those shapes as a pattern for some black jersey that I folded over. (I also added about 3/4" of seam allowance.)


Then, I pinned the jersey to the cut outs.


This is what a sleeve looked like from the right side after the sewing.


The sleeves looked pretty good! But I wasn't finished.


I top-stitched both pieces to add a little Euro-styling to them.


I just think it looks more polished.


So for the hole in the sleeve. . .First, I took off the free arm of my machine and finagled the sleeve onto it. I zigzag stitched the hole up as best I could.


This was just to keep it from shifting and/or tearing more.


Then, I took some scrap paper (just happens to be an extra children's Sunday School paper), and sprayed adhesive to the back of a flower patch that my friend, Tiffany Nix, gave me a million years ago!


Then, I stuck it on the sleeve.


The spray adhesive held the patch in place as I hand-stitched around it.


Looks pretty good! And pretty current, since designers are all attaching all kinds of odds and ends to garments these days.


I think it looks pretty dang good!


The End!


Saturday, April 23, 2016

Making Leather Jewelry - Necklace and Earrings

I've been addicted to "leather jewelry" lists on Pinterest, and a friend had a birthday recently, so I thought I'd try my hand at making some.

So. . .like some of my projects, I forget to photographically document until I'm already well into the project, so. . .let me catch you up.

I used my dressform as a scale model for drafting a paper pattern.


So. . .this is where there are pictures missing. I traced the pattern onto leather using disappearing ink (which. . .a word about disappearing ink: It disappears REALLY quickly! So make sure you don't use it and then go get something to drink, because it WILL be gone!) 

Then, I cut it out with scissors, and then I cut the fringe part with a rotary cutter and a ruler. (You can see I'd already finished the fringe in the picture below, but this was my attempt at going backwards and photo documenting. You're welcome.)


This picture is when I actually realized I needed to take pictures, so I'm trying to give you the basic idea with this picture.


I cut a reinforcement piece for the top of the necklace and then glued it on.

1. 


2.


3.


While that was drying, I started on the earrings.


Those little strips are reinforcement pieces I glued to the tops.


See?


Back to the necklace. I gathered some jewelry pieces to use to attach the necklace together.


Using a leather punch, I punched two holes at the top of the necklace.


And magically, I have already attached the hardware! (This took a lot longer than it seems.)


Then, as further embellishment, I took a flower. . .


 . . .and sewed a safety pin to the back of it.


Then, I attached the flower to the necklace. I used a safety pin in case my friend didn't want to have a flower on the necklace. . .and she can use the flower by itself as well.


Then, I punched two holes at the tops of both earrings.


The hardware for the earrings.


A finished earring.


The finished set.


And without the flower attached.

(Don't you wish you were nicer to me so I would make you these things too? Ha!)


The back. (It's adjustable.)


And I even made the bag (out of a perfume ad in a magazine)!

I'm so crafty!


The End!