Showing posts with label over. Show all posts

Sunday, November 10, 2019

Refashioning: A 70s Floral Dress into a Tailored Slit Dress (Over Skinny Jeans)

When I'm bored, I scour Pinterest for ideas.

So, lately, I've been getting looks like these in my main feed:


I dunno...I've seen the maxi-dress-over-pants look before, and largely ignored it. However, something about it intrigued me this time. So...I kept an eye out at Goodwill for a maxi dress to play with.

A few weeks later, I found this little 70s Flower Child number:


You can see it's way too big--even dragging on the floor. I hate ruffle sleeves on me. And the V-neck is way too low. 

Still, I really liked the print and the polyester jersey fabrication, so I paid my $1.00 and took it home!

If you would like to try this, you don't have to follow these exact directions, but maybe it'll give you some ideas!


First order of "bid-ness" was to cut the horrible sleeves off.


Now...realize this: When you want to shorten a dress, you actually have TWO options. Yes, you can hem it from the bottom--which is the usual way. But I know a much easier way--especially when the neckline is way too low.

This is what you do: You pinch an inch or so at the shoulder seam. Now...I realize that this is going to move the shoulder seam forward. In other words, it will no longer sit at the top of your shoulder. However, a forward-ed shoulder seam is sorta "in" right now, so I find this to be an adequate adjustment. I'm gonna show you a few pictures of this, because it's kind of hard to see in this print.


So then, all you do is cut off the excess. I use pinking shears.
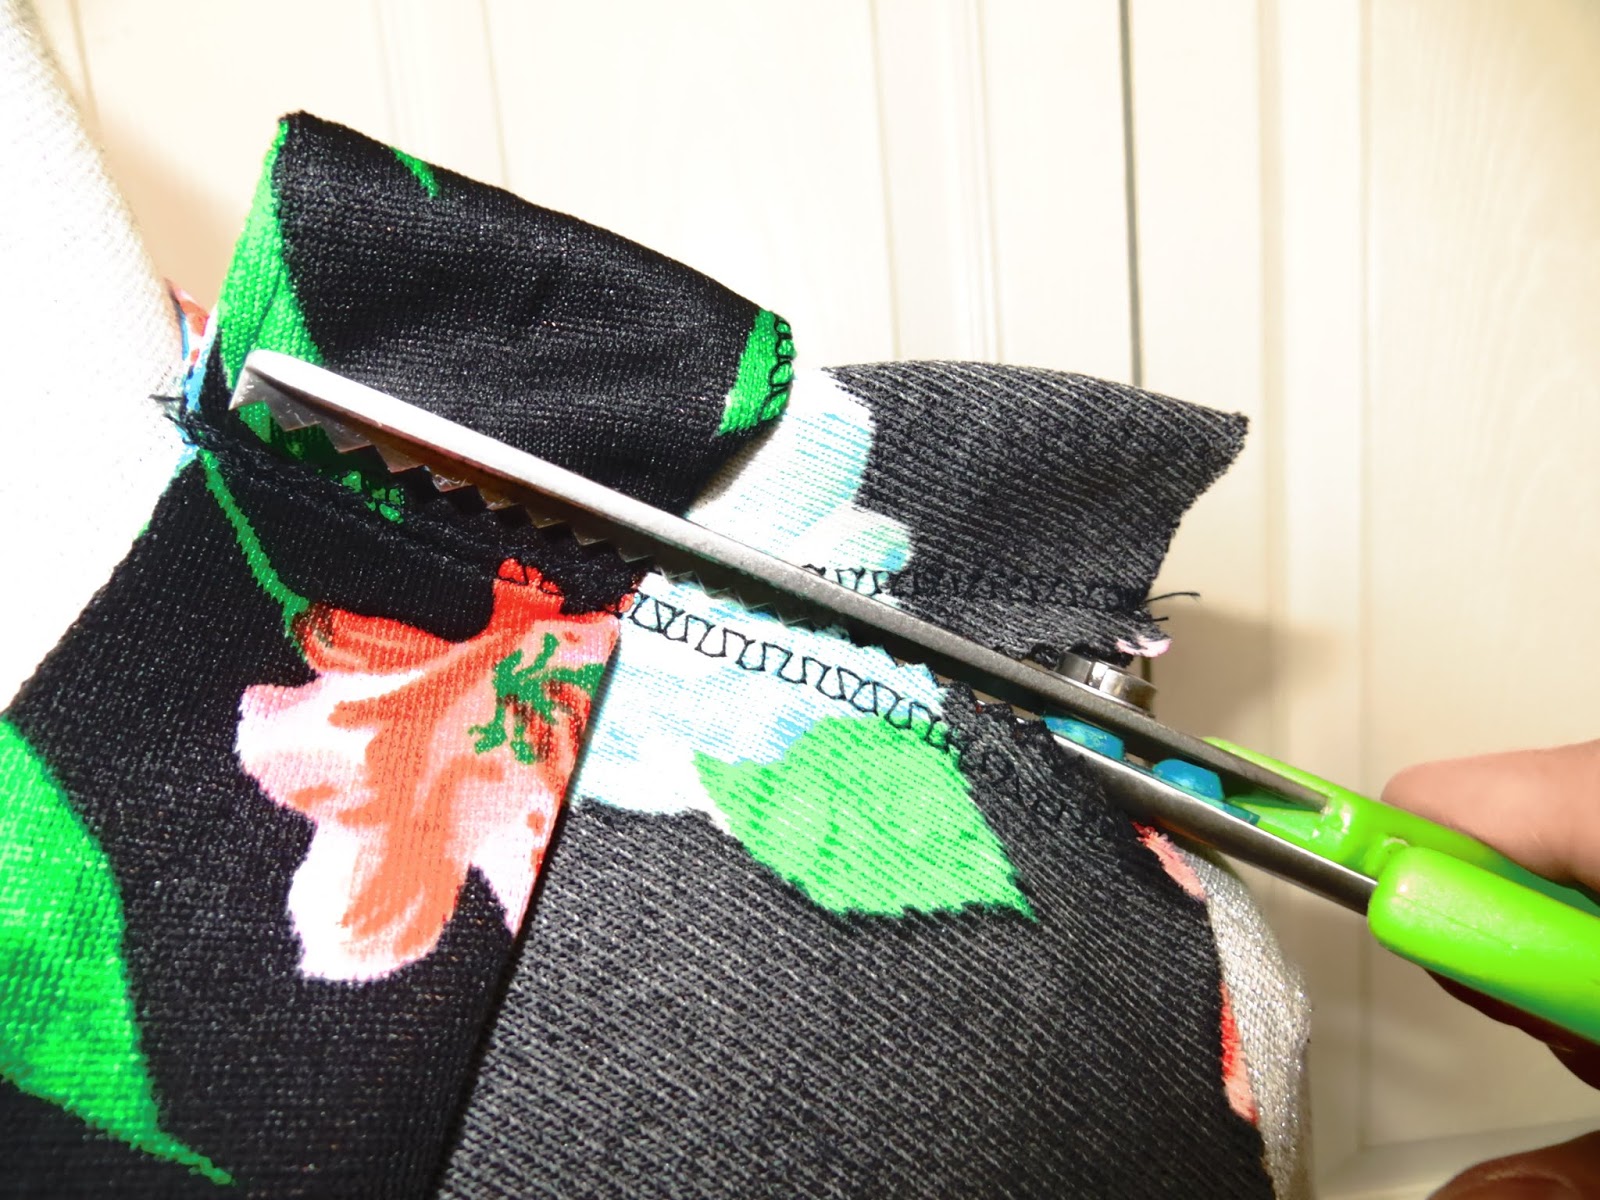


Okay, so...I really wanted sleeves. Trying to finagle the ruffle sleeves into a more fitted sleeve was...not easy. The fabric was a really weird shape. Still, you gotta use what you got. I laid another shirt on top of the ruffle sleeves as a pattern.


So, next I eased and pinned the sleeves back onto the dress.


So you can see here how big the dress is; however, notice how much nicer the V-neck sits from before. 


So, the next step was pinning down the sides to take off the excess sizing.


I sewed the side seams all the way down from the armpit to the floor to keep the shape uniform. It's now beginning to look really nice! I could have stopped here...but it's getting colder, so I wanted longer sleeves.

Notice how much shorter the dress is now. I didn't hem it. This just goes to show you that if a dress is too big, try taking the length away from the top and the sides first. Then see how long it is. 
Don't ever hem as your first alteration!!!


I added a piece of faux leather jersey to give an edgy look. But notice that now it looks sorta incomplete.


So, I added a bit more of the floral fabric. I had precious little left from the ruffle sleeves, but it was just enough to create a more uniform finished-looking sleeve.


Okay...I could have stopped there...(and maybe some of you think I definitely should have!)...but I have a million dresses...and the purpose of buying this one was to put it over pants...

so....

I laid it down on the floor...

and cut a big ol' chunk out of the front!


Not gonna lie...I was like, "What have I just done???"

But then I took it to the sewing machine and finished the slit's seam.


Here's how it looks over jeans.


And because we all love "Before and After"s:


The End!


Friday, February 24, 2017

Tailoring a Pair of Over-the-Knee Boots (It's easier than it sounds!!!)

So one of the biggest trends this past fall/winter (and looks like will still continue into the spring) is OTK (Over-the-knee) boots. They look great worn with shorter dresses and they keep your legs nice and warm. . .not that we have really needed that this past winter. . .Wait. . .Was there a winter?

Anyways.


They really do look super current and they help with coverage for those of us who don't like our legs so much. However, if you have a pair, I'm wondering if you have run into this same problem: They tend to "bust a sag." See how saggy and wrinkly? Not very pretty. I thought about buying a thinner pair and donating these. . .But if you know me, you know that I don't give things up without a fight! I would try to fix them first. . . Aaaaand you can probably guess that my fix was a success, because now I'm passing the info along to you!


So, my first step was to determine from where the sag was originating. I realized that if I pinched the fabric on either side of my knees, the rest of the boot lined up fairly nicely.


If I owned a boot factory, I would have turned the boot inside out and taken the back seam in about an inch. However, due to their construction--and the fact that I don't own an industrial facility--I could only get the top 1/3 of the boots turned inside out. But. . .the seam needed to go all the way down to the ankle! 

No matter. It's not as hard of a fix as all that!


My second step was to use these stickers to denote the places I pinched. To be exact, these stickers denote the area about two inches below the knee. Why two inches below? Stay tuned. I'll explain in a bit.


I grabbed some elastic and some wide ribbon. (If you do this, the ribbon needs to be wider than the elastic.)


I pinned a piece of ribbon between each sticker on the inside of each boot. (This is from the outside.)


This is from the inside.


And a close up of the outside.


As I said before, it was impossible to get these boots turned completely inside out, but I COULD get my sewing machine into the boots far enough to sew this ribbon in place.


This looks harder than it is. What you have to remember is to sew the line on the left from top to bottom first. Cut the strings, and then sew the line to the right from top to bottom again. In other words, keep the bulk of the boot to your left at all times. You are creating two parallel lines, not a box.


Here, you can see the parallel lines from the outside. 


Then, I took my bodkin (or you could use a safety pin) and attached it to a piece of elastic and fed it through my "ribbon tube."


I pulled the elastic all the way through and held the end of it flush with the tucked-in end of the ribbon.


Then, I stitched it all in place.


Then, I pulled the elastic so that it gathered up enough to fit my legs tightly.


I cut the elastic off, folded the ribbon under, and pinned everything. Then, I stitched it all in place.


And this is what each boot looks like from the back now. It actually looks pretty good like it was done in a factory, I think!


And here is why I put the elastic two inches below the knee: Because that is where the "fat" part of my calf starts. So, essentially what I'm doing is using my "fat" to counteract gravity! As I walk, gravity wants to pull the boots down; however, now the elastic hits my calf and the boots stay up now!


Before (left) and After (right)!


The End!