Showing posts with label 70s. Show all posts

Sunday, November 10, 2019

Refashioning: A 70s Floral Dress into a Tailored Slit Dress (Over Skinny Jeans)

When I'm bored, I scour Pinterest for ideas.

So, lately, I've been getting looks like these in my main feed:


I dunno...I've seen the maxi-dress-over-pants look before, and largely ignored it. However, something about it intrigued me this time. So...I kept an eye out at Goodwill for a maxi dress to play with.

A few weeks later, I found this little 70s Flower Child number:


You can see it's way too big--even dragging on the floor. I hate ruffle sleeves on me. And the V-neck is way too low. 

Still, I really liked the print and the polyester jersey fabrication, so I paid my $1.00 and took it home!

If you would like to try this, you don't have to follow these exact directions, but maybe it'll give you some ideas!


First order of "bid-ness" was to cut the horrible sleeves off.


Now...realize this: When you want to shorten a dress, you actually have TWO options. Yes, you can hem it from the bottom--which is the usual way. But I know a much easier way--especially when the neckline is way too low.

This is what you do: You pinch an inch or so at the shoulder seam. Now...I realize that this is going to move the shoulder seam forward. In other words, it will no longer sit at the top of your shoulder. However, a forward-ed shoulder seam is sorta "in" right now, so I find this to be an adequate adjustment. I'm gonna show you a few pictures of this, because it's kind of hard to see in this print.


So then, all you do is cut off the excess. I use pinking shears.
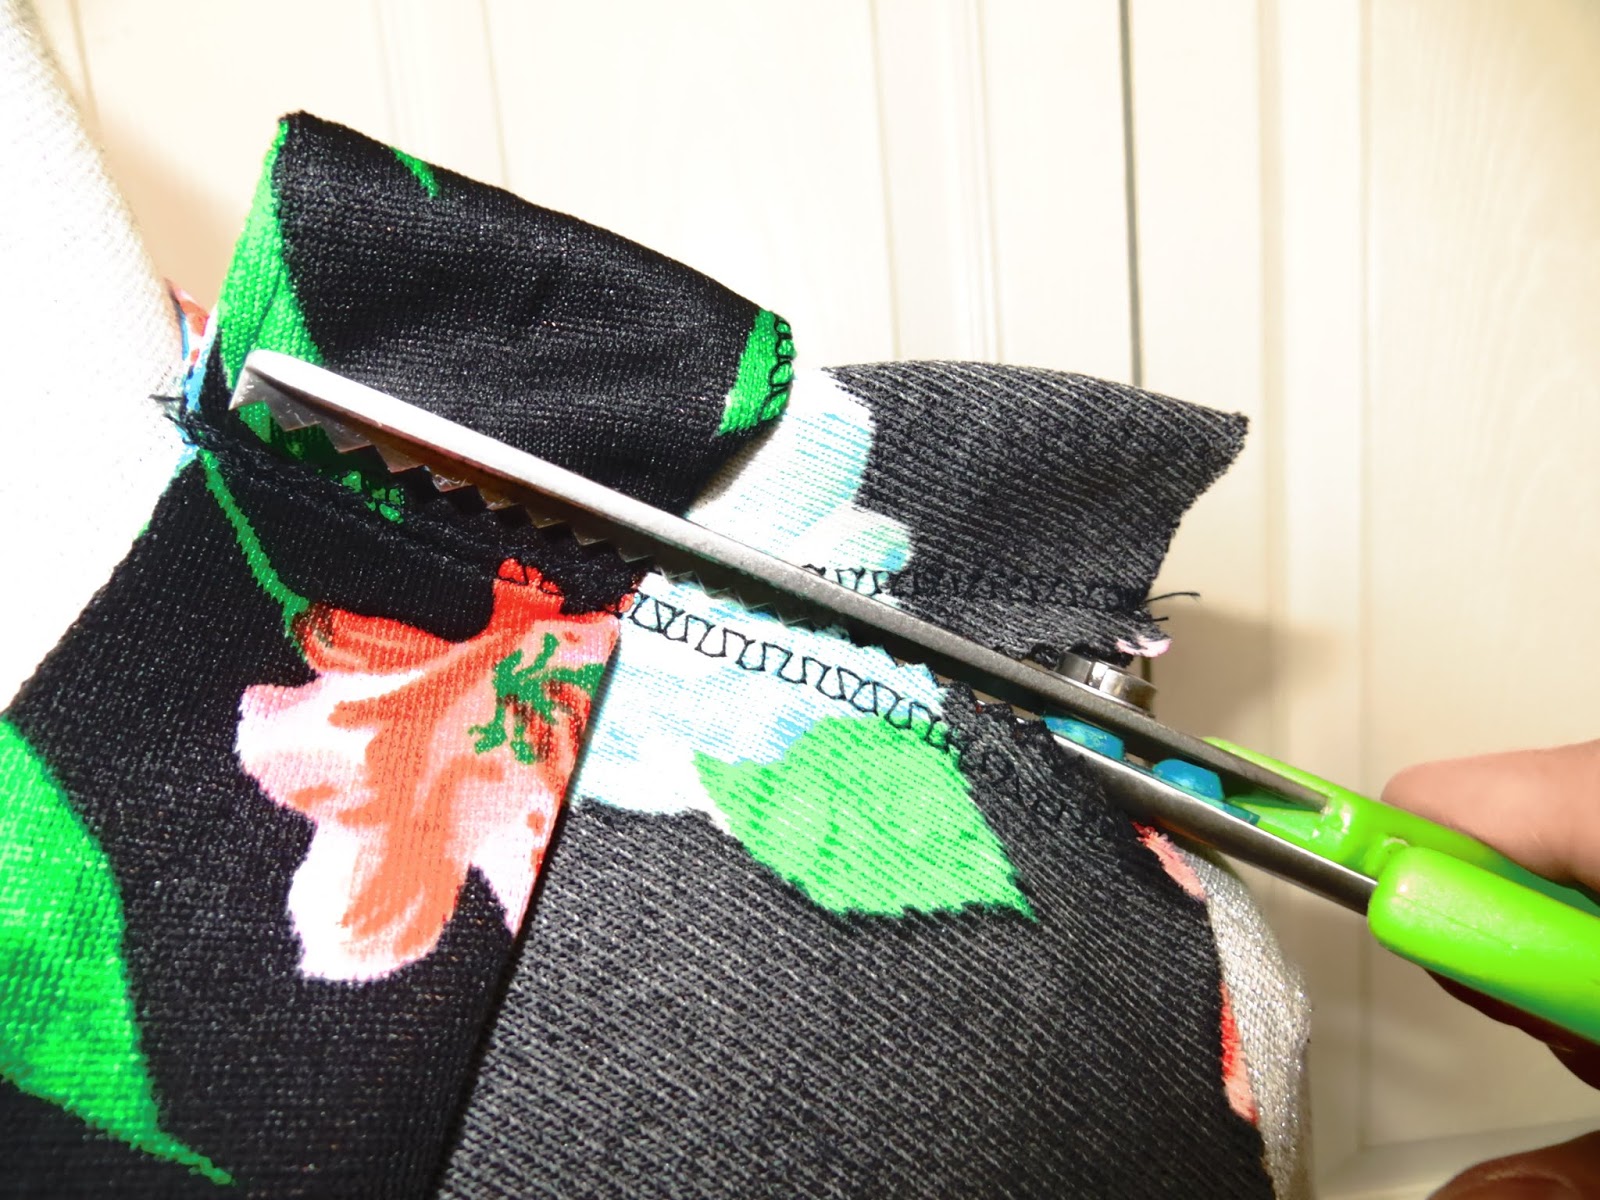


Okay, so...I really wanted sleeves. Trying to finagle the ruffle sleeves into a more fitted sleeve was...not easy. The fabric was a really weird shape. Still, you gotta use what you got. I laid another shirt on top of the ruffle sleeves as a pattern.


So, next I eased and pinned the sleeves back onto the dress.


So you can see here how big the dress is; however, notice how much nicer the V-neck sits from before. 


So, the next step was pinning down the sides to take off the excess sizing.


I sewed the side seams all the way down from the armpit to the floor to keep the shape uniform. It's now beginning to look really nice! I could have stopped here...but it's getting colder, so I wanted longer sleeves.

Notice how much shorter the dress is now. I didn't hem it. This just goes to show you that if a dress is too big, try taking the length away from the top and the sides first. Then see how long it is. 
Don't ever hem as your first alteration!!!


I added a piece of faux leather jersey to give an edgy look. But notice that now it looks sorta incomplete.


So, I added a bit more of the floral fabric. I had precious little left from the ruffle sleeves, but it was just enough to create a more uniform finished-looking sleeve.


Okay...I could have stopped there...(and maybe some of you think I definitely should have!)...but I have a million dresses...and the purpose of buying this one was to put it over pants...

so....

I laid it down on the floor...

and cut a big ol' chunk out of the front!


Not gonna lie...I was like, "What have I just done???"

But then I took it to the sewing machine and finished the slit's seam.


Here's how it looks over jeans.


And because we all love "Before and After"s:


The End!


Thursday, February 2, 2017

Refashioning: Updating a Long-Sleeve Bow Tie Blouse - Tailoring and Creating a Keyhole

The bow tie blouse was an office staple in the 60s, 70s, and 80s, but then it died off for about 25 or so years. Anyways, it's back, Baby! That means you can raid those dated thrift store racks versus going out to buy a brand new one! All you need is two simple sewing steps and you have a stylish, updated blouse!


So, here is one that I found last week on a thrifting adventure. It is a bonafide vintage blouse from the 70s. I loved the color, and since it is polyester, it will NEVER die! :) However, you can see it's WAY too "blouse-y" for current trends.


The first thing to do is to turn the blouse inside out. Make sure the shoulders fit. A lot of vintage blouses have HUGE shoulders, and some of them are even padded. If you run across this issue, you will have to take in the shoulders. Anyways, these shoulders were just at my acceptable limit, so I left them where they were.


Then, I pinned all down the inside seams of the sleeves from the base of the cuff (I left the cuff itself alone), up to the armpit, and then down the side of the bodice. I did that on both sides.


And here is the second really important "current trend" step: Creating a keyhole under the bow. All I did was fold the button placket back from the base of the bow ties to the second button, stitch that part down, and then cut off the top button. That's how easy making a keyhole is! This picture is showing you the pinned keyhole from the wrong side.


And here is the "Before" on the left and the "After" on the right!

Super easy!


The End!


Tuesday, January 31, 2017

How to Fix a Sagging Wrap Dress

The "Wrap Dress" is an iconic classic that nearly every woman has had in her wardrobe ever since Diane Von Furstenberg first created it in the 1970s. Anyways, I don't wear a lot of them, but I was given this dress from a friend, and I love it, but I haven't ever worn it, because it had a little problem. You can see in this picture here, it's not a true wrap dress--especially from the front. It just looks like a "fit'n'flare" dress.


The "wrap" part is in the back. Basically "wrap" just means that there are two pieces to the front (or in this case, back) bodice that, instead of being connected with buttons, zippers, or other closure, are simply crossed one over the other. However, depending on how often a dress is worn or how it is cut, a "faux" wrap dress like this one can easily have a fatal flaw....


Here you can see what I'm talking about. Now, if this were a true wrap dress, this gaping could be alleviated by simply pulling the crossed part over a tad more and tying the dress a bit tighter. However, when the "wrap" is stationary and sewn in place, you are at the mercy of the cut of the garment and this gaping tends to happen. I noticed this in the mirror any time I tried it on. Any time I rolled my shoulders back and down in order to sit up straight, this gaping would happen. When I hunched over, it went away....I wasn't going to wear this pretty dress and hunch over! So...something needed to be done.


Another view of the gaping.

Don't worry. There is an easy fix!


All you need is either elastic thread or stretchy beading cord like this one:


I simply threaded enough beading cord to go from the waistline to the shoulder of the dress.


I started at the waistband and found the seam that ran up across the back to the shoulder.


Here you can see from the right side of the dress what I'm talking about. See what my fingers are pinching? That's the needle that I'm feeding up from the waistband.


Now look where the cord is coming out. That is the seam I'm talking about. I just kept fishing the needle up through that seam to the shoulder. I did have to wear a thimble to push the needle. I also had to wear two rubber finger covers to get a good grip on the needle as I fed it up the seam.


And here I've fed it all the way up the seam to the shoulder seam. I pulled the elastic just a little tighter than the dress needed to lie flat because elastic always stretches a little more than you think it will.


I tied the cord off into the shoulder seam.


I did that same thing to the seam on the other crossed side.


And now I've put the "Before" picture on the left and the "After" picture on the right so you can see the difference! All fixed!


The End!


Friday, January 30, 2015

Valentine's Day Special: Colorblock Western Shirt with Owls

Remember last year when I made this for my baby?

My friend, Tina, recently gave me a bunch of fabric and notions, so I was going through my current inventory to make room, when I came across this little gem in my pattern repertoire. I had forgotten that I've been wanting to make my husband a western shirt for ages. He likes that retro look, so this shirt was a perfect choice for him. I know it's like. . .two weeks early from Valentine's Day, but. . .I wanted to make sure that I got it done during a time when I wasn't busy, and. . .this gives him time to get me a good present. (Mmmmuhahahaha...)


Here it is! I'm not blogging the process because. . .it's just a pattern, and that's boring. Plus, the whole shirt took me about 12 hours from start to finish and this blog would be a book. I will, however, go over some details. First off, see how the plaids on either side of the buttons match up? Also, my husband is super skinny and tall. (He is so tall and skinny that the daughter of some friends of ours calls him "Tree.") Anyways, he can never find shirts with sleeves that are long enough, because apparently skinny means that you have short arms in the fashion industry, so that was something I considered when cutting out the patterns.


I found the owls on www.embroiderydesigns.com. My husband also loves owls, but as he is a man, I needed to find an owl that wasn't obnoxious and girly.


Most embroidery machines have the capability of flipping the design.


This butterfly collar is for REAL, y'all. I was able to use the last piece of iron-on interfacing that I had for this collar, but when it came to reinforcing the button strip and the cuffs, I ended up just using an extra piece of fabric inside. (By the way, if a pattern calls for iron-on interfacing and you don't feel like running to the store, you can always just use a piece of slightly stiffer fabric. Just make sure you pin it well [or stay-stitch, which I never do because it's a waste of time] before sewing so it doesn't move around. That's the advantage of iron-on.)


I made sure that all the buttons were sewn on with the crown design at the top.


In retrospect, I should have made the button holes vertical instead of horizontal, but they still do their job. I love my Husqvarna machine. It does perfect button holes. (Blogger won't let me center this picture, that's why it's off to the side.)


For some reason, Blogger won't let me type above this picture, so. . .Anyways, here's the cuff! Isn't it great?! 


I learned a new seaming technique: flat fell. The pattern called for it along the shoulder to armpit seam. It's a little crooked because I had to top stitch it from the inside. It bothers me, but not enough to take it out.


This is what a flat felled seam looks like on the inside. It's nice and clean. You are supposed to do this technique on seams that see a lot of wear. In fact, the inside seams of jeans have this stitch.


Here is the inside of the shirt.


This is the seam along the sides of the shirt. It was supposed to be flat felled too, but I got lazy and just did my "surger" stitch that I typically do on jersey. Actually, I didn't want to have top stitching down the sides. I felt like that would be overkill.


The back.


I wish I would have had those pearl button snaps that you find on most western shirts, but I didn't. Anyways, I tried to nod to them at least by putting a smaller button at the collar.


The End!