Showing posts with label update. Show all posts

Tuesday, July 30, 2019

De-Fashioning: Updating a Moto Jacket DIY

I haven't done a post in a while. This doesn't mean I have been sewing. It just means that I don't think to take pictures as I'm sewing!

So...I made sure to document this one.

Anyways....

You know how moto jackets used to look like this a few years ago? The double collar was huge. Not so much any more. Especially on this red jacket. I have small shoulders and the points and angles were just way too overwhelming.


So decided that I would tone it down a bit by taking out the neck part of the collar. I just went into the seam and ripped the whole seam out along the neck.


I took the neck collar out.


Then, I just pinned the neck seam back together and sewed it down.


Because the front flaps were top-stitched, I went ahead and top-stitched around the whole neck seam to make it uniform.


And, there you go! Really easy. I have to say the collar lays a lot better now, besides the fact that this is a more modern silhouette. 

Try this on that jacket that you have in your "give away" pile and see if it works for you! (Depending on how your jacket is constructed, you may be able to just cut the neck part out without taking the whole thing apart and resewing it!)


The End!


Saturday, July 8, 2017

Refashioning: Kenzo Inspired Eye Shirt...How to Iron On Sequin Patches (Large)

I am also a fan of the French fashion house "Kenzo." Kenzo is well-known for being graphic and sporty. This is one of their most sold items: The Eye T-Shirt.


These also retail around $100.


I just showed you in my last post how I iron on small patches. This time, I will show you how I do not only larger patches, but also ones with sequins.

I found this really great blouse at Goodwill. I like that the black lines almost give it a pop-art "drawn" sort of look--almost like the wearer is a cartoon character.


I found this huge sequin eye iron-on patch on eBay for just over $1.00.


Okay, as I've already said, the best way to get a patch to adhere is to iron it from the wrong side of the clothing item. However, it's nigh to impossible to get the placement correct if you start ironing from the back side initially. So you need to make sure that your patch sticks to the front well enough so that you can turn the shirt inside out without it falling off.

With a larger patch, this becomes REALLY challenging--especially when dealing with sequins that could potentially melt if the iron is hot enough!

What to do? Well, this is how I do it.

First, I place my patch exactly where I want it on the front of the clothing item. Then, I carefully place a T-Shirt over top the patch and begin ironing the T-Shirt.


Then, VERY CAREFULLY AND LIGHTLY, I hit several key points directly on the patch itself from the top. Don't hold the iron on too long! Really important! Just barely get the patch to adhere so you can turn the shirt inside out!

IF THIS DOESN'T WORK: You can also use spray adhesive to get your patch to stick, but be warned: (1) Spray adhesive kinda gets everywhere if you're not careful and makes your hands (and surrounding surfaces) really annoyingly sticky for a long time. (2) Too much spray adhesive could react with the patch's adhesive and make it less likely to melt properly. (3) It's much easier to place the patch down where you want it and get it to stick there with an iron, versus holding a huge patch up in the air, spraying it, and then trying to place it properly without it folding and sticking to itself--especially with larger patches!


Once the shirt is inside out, then you can iron the heck out of it.


Leave the iron on one location for up to five seconds, then move it to another location. (You can leave the iron on up to ten seconds if the fabric is cotton. This shirt is polyester, so I didn't want it to melt.) You may need to repeat this several times to get the stubborn adhesive to melt and stick enough. 

Once that is down, let the shirt cool a few seconds and bend the fabric away from the sides of the patch to make sure you have a good enough seal. If you don't, hit that particular place from the wrong side for a few seconds more.


Done! I'm not 100% thrilled with the overlap of the patch and button placket, but. . .the eye wasn't perfectly symmetrical, so this was actually the best and straightest placement for it.

Anyways...I like it! Looks really modern!


(As always, turn the clothing item inside out when you wash it and line dry it--even if it says you can tumble dry it.)

The End!


Thursday, April 20, 2017

Refashioning: Trend Update - Make Your Own DIY Guitar Strap for Your Purse

If you haven't heard, the latest style is to carry a purse with a guitar strap. It was actually a Fall trend, but it seems to be carrying over into Spring/Summer.


Different designers had their models carrying these bags on various runways. 


Even though it's a designer sort of thing, the look really harkens back to art and crafts and DIY, so I guess this post has come full circle! I'm going to show you how to make a strap for your current purse, so you don't need to spend a lot of money for this trend (that will probably last all of five minutes)!


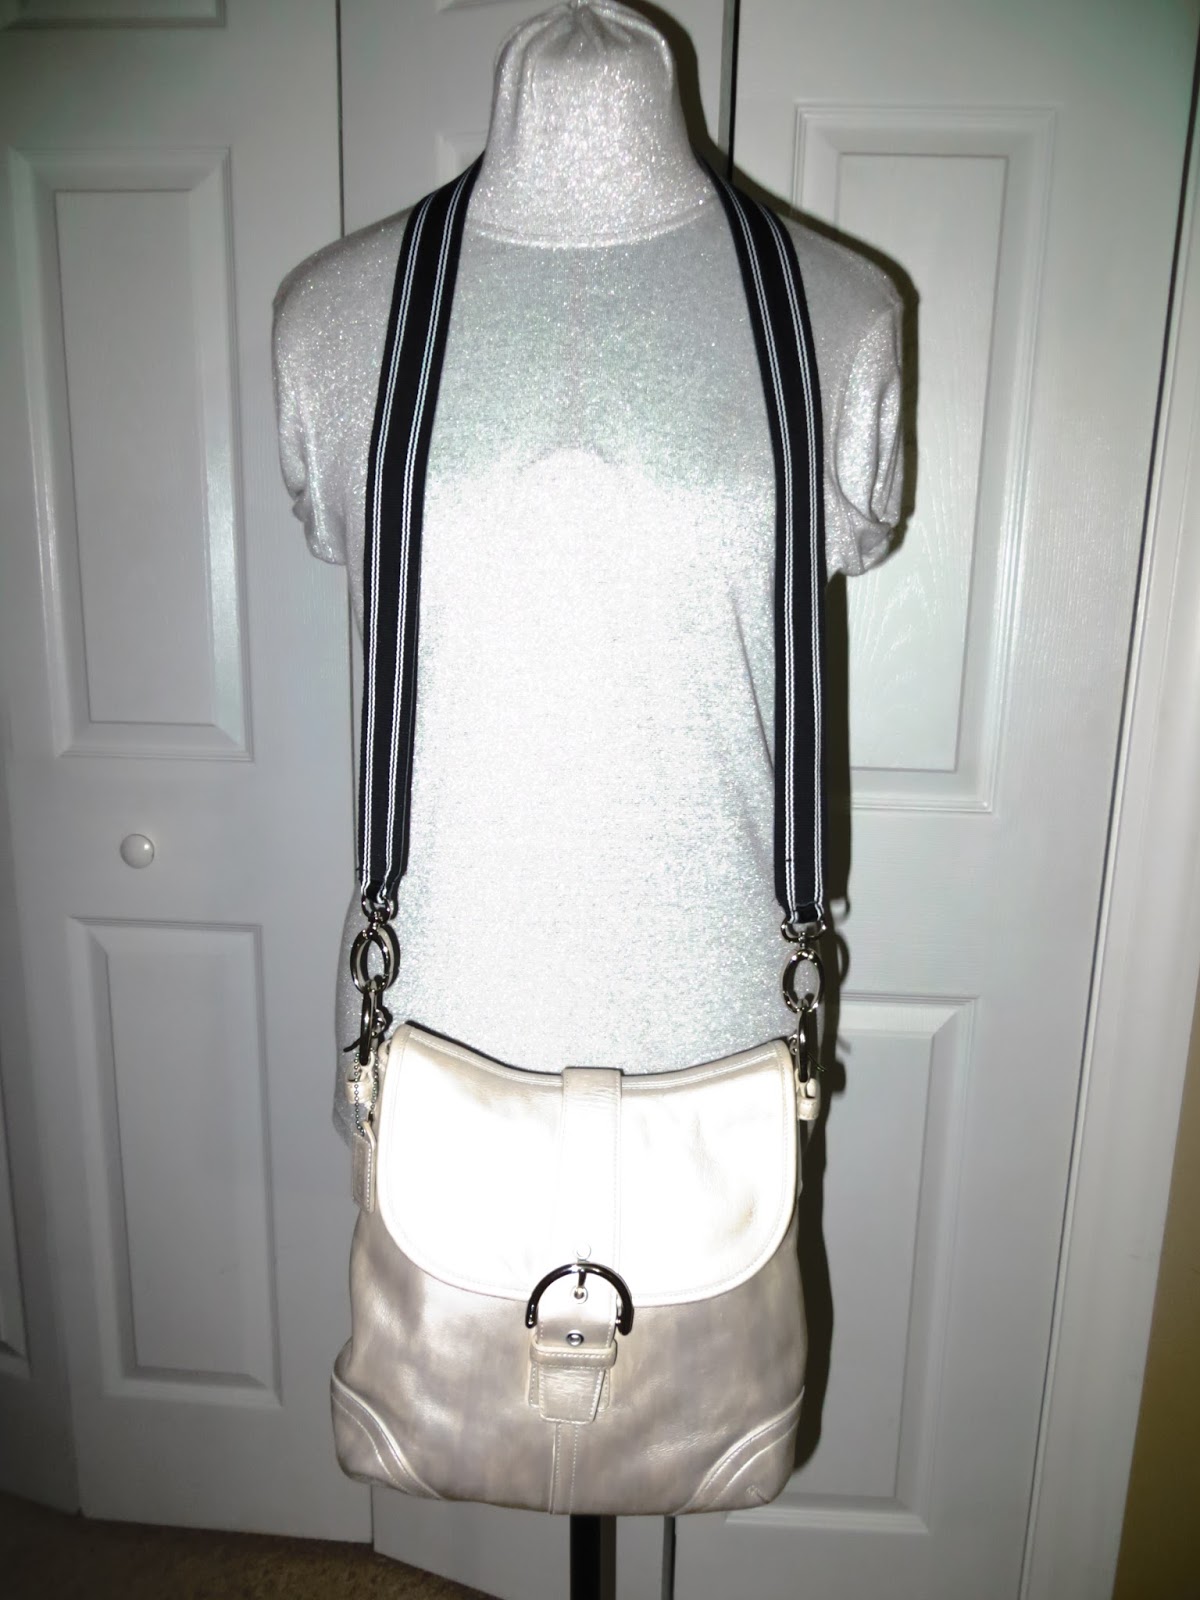
You may remember a few years ago when I dyed this Coach purse silver. (If not, click here for a refresher.) I like it. It's still in good condition, and I don't feel like buying a new purse right now. The first step to this project was unbuckling and removing the current strap.


After that, I just used a belt I liked and an old crappy purse, that I hated, that had detachable straps. If you don't have either one, that's why God made thift stores! Buying an old belt or an old crappy purse costs far less than buying the them from a craft store.


I also used an old thrifted black leather jacket, because I wanted to add some substance to the belt. You don't have to do this. (The following directions are for adding leather to the belt, so if you aren't adding leather, you can just attach the hardware to either end of the belt and you're done!) 

But if you would like to add leather, read on.


First, I took the hardware off the belt.


Then, I ironed both ends flat.


Then, I ironed both ends into points.


Then, I cut a panel out of the back of the leather jacket.


Then, I cut this panel into two pieces.


Then, I sewed two of the short ends of the leather together--right sides together--to make one long piece.


Then, I folded the belt in half and marked the halfway point with a pin.


Then, I placed the pin on top of the seam I'd made in the leather.


Starting at the pin/seam point, I sewed down the middle of the belt.


The trick when you are sewing leather on a standard machine is to hold both layers as tightly as possible and guide the whole thing through with both hands. Otherwise, the stitches get really tight and the whole project looks bunchy.


I sewed all the way down to the base of the point I'd ironed on the end of the belt. 

Then, I did the same thing on the other end, starting from the pin/seam point and sewing down the base of the other point.


After the middle was stitched in place, I sewed along the sides of the belt, starting and ending at the edge of the belt's points.


Then, I cut two of the purse strap clasps off the old purse.


Then, I bent one of the belt points around the base of the clasp and hand-stitched it in place.


This is what it looked like from the other side of the belt point.


After securing the clasp to the belt, I began hand-stitching through the belt and the leather to secure the layers together.


I found these rubber finger tips really helped.


After that, I cut a strip from the edge of the leather up to the belt.


Then, I flipped this strip through the loop of the base of the clasp.


At this point, if you can add a grommet, this project would probably look a lot nicer. I don't have a grommet, so I just stitched through the leather and belt. The trick is to stitch as close to the clasp as possible so that the belt/leather is nice and tight against the metal.


Once that was done, I cut the point free from the leather. . .


And tied the thread off and cut it.


Then I cut the belt free from the leather.


So, why didn't I cut the leather to fit the belt in the first step? Because, leather stretches and shifts during sewing and I wanted the leather to be as flush to the belt as possible. Doing this project by cutting the leather at the end, saves a lot of headache at the beginning and middle!


The finished strap:


This is how to wear it cross-body. The nice thing about guitar straps is that they are thicker and distribute weight more comfortably than thinner straps.


Another advantage to the guitar strap is that you can flip it over to the other side for a different look.


If the strap is too long for you, here are two ways to wear the strap shorter.

First, put a knot in the side:


Or feed the strap through a side loop of the purse and, with the strap now folded in half, clasp both clasps on the same side. 


The End!