Showing posts with label Bag. Show all posts

Friday, January 31, 2020

Refashioning: Paint it Black: A $1600 Louis Vuitton Handbag for $80!

I admit it. I love high end fashion. But I’m also way cheaper than anyone else I know. So...when that is your fate, you either need to get fearlessly creative, or act like a victim and get massively in-debt.

I opt for the former.

Here’s how you can too!

About a year ago, I started searching the internet for second-hand investment bags from Chanel, LV, Hermès, etc.

I found this Louis Vuitton Vernis Houston handbag on eBay for $80. Brand new, this bag sells for a cool $1600!


Now, listen. I did my homework on this one. There were several of the same bag selling for around the same price—some under, some over. But I had a specific criteria that I searched for: a decent interior, no major rips or scuffs, intact handles, and working zippers. I had to search for a few months,  sell a few of my own items on eBay to get the money, and finally found one that fit the bill.


I know, $80 is a lot for a self-proclaimed cheapskate to spend on one bag, but. . .considering that it retails for $1600, my thought was: I can dye that sucker, and when I get tired of it, I can flip it for at least more than I paid for it. Plus, how many ladies throw away $100+ at the local mall for a subpar Michael Kors bag. I don’t think $80 was a bad spend.

If this sounds crazy, remember that I am the woman who dyed a pair of Chanel shoes a few years ago (and then everyone started doing it). Those shoes look as great today as they did back then, so I was up for this challenge.

If you click the words “Chanel shoes” above, it will take you to my post that shows you how to dye your shoes so that they look excellent and not like a hack job. From that post, and when I dyed a Coach bag silver, I learned that Tarrago dye is really good for this kind of project, so I bought another set in “shiny” black. It costs around $10 on eBay.


Inside is a leather conditioner/prepper, leather dye, small brush, and applicator sponge.


I’m just going to tell you right now, that if you attempt this project—even if you buy the supposedly “patent leather”/shiny version of Tarrago dye....it doesn’t work on this bag! This bag is way too shiny.

I spent a while prepping the bag and then painting the bottom. A few hours later after it was dry, the bottom looked super messy, with tons of brushstrokes and uneven dull spots all over it. That is probably because Tarrago is actually leather paint. Same thing with Angelus. If your leather is super shiny, don’t buy either of those. You need an actual dye, not a paint. Instead, do this....


I happened to have an old bottle of Fiebings black leather dye. It’s only like...$5 or something on Amazon, eBay, or your local shoe repair shop.


So...I’m sorry there are pictures missing in this post, but...this is a really messy process, and it’s hard to take pictures while doing it!

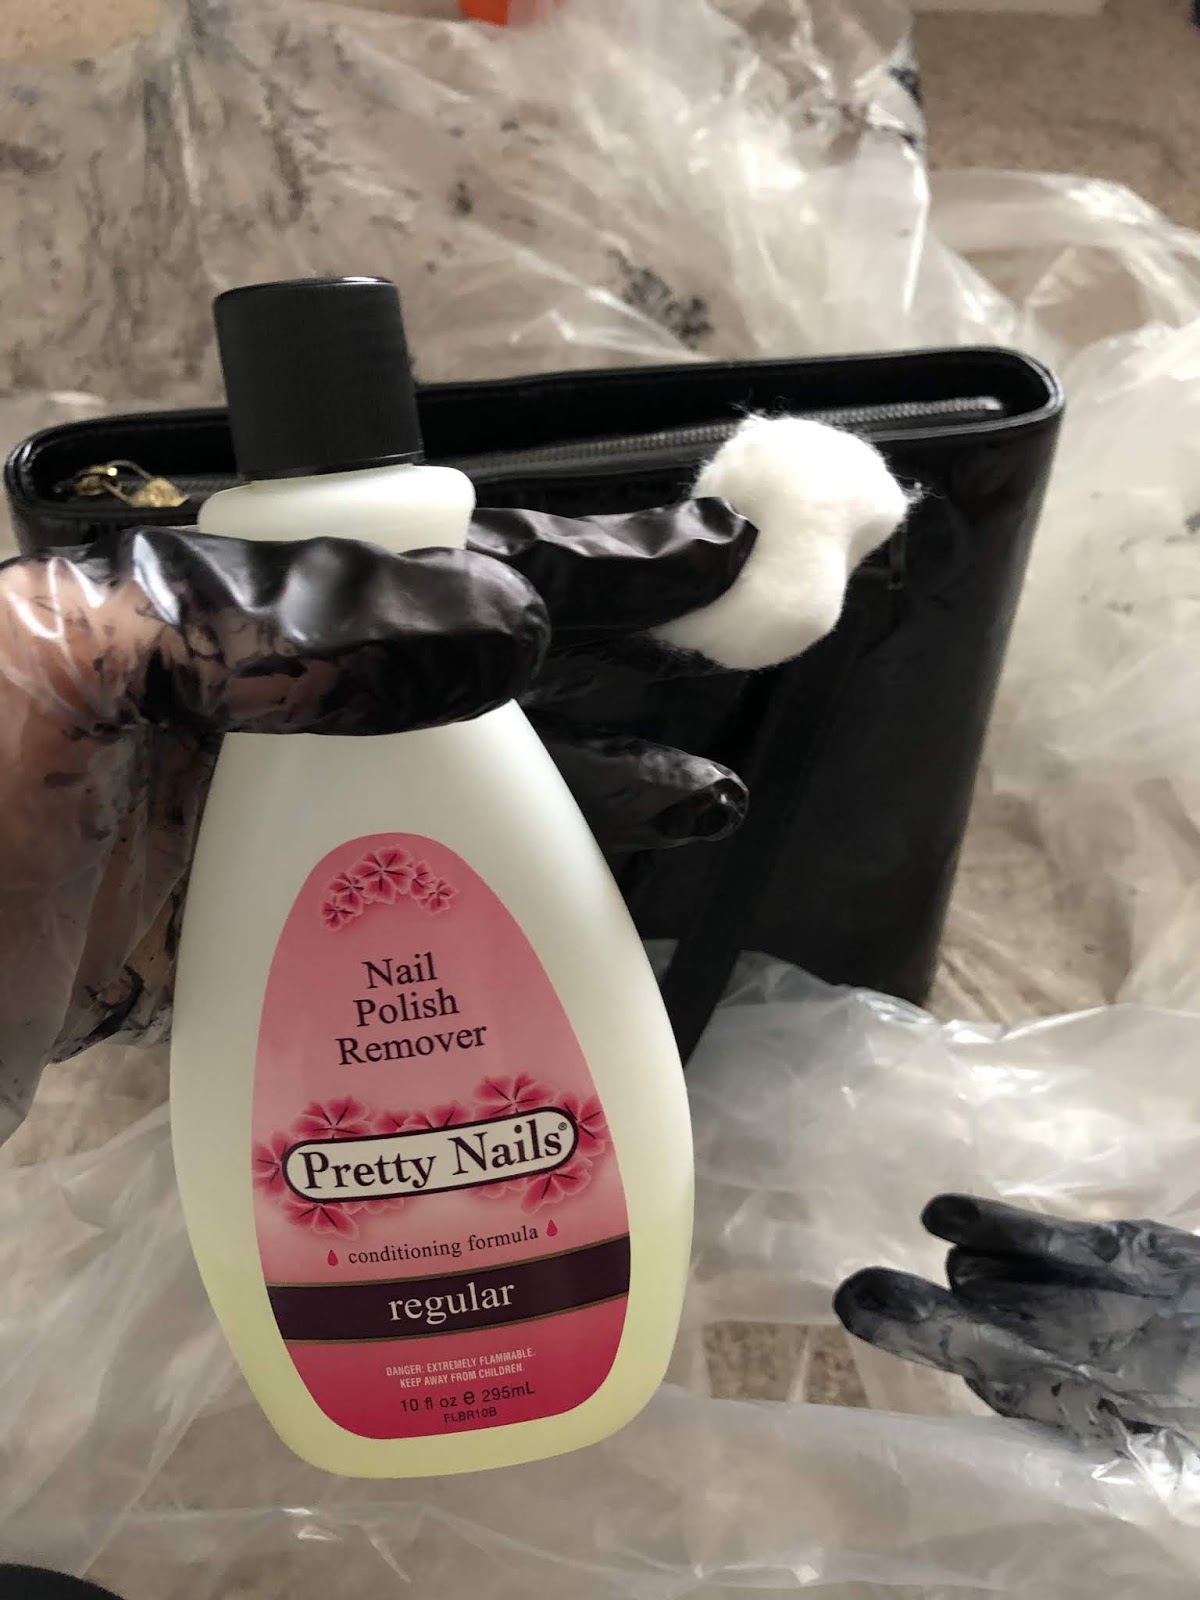
Anyways, do this: Using a cotton ball and nail polish remover, rub all over the bag, the hardware, and the handles. Do this a few times to make sure you remove any residue and “break the seal” over the leather and patent leather. 

Then, using a cotton ball, sponge, and/or smaller brush, paint over all the surfaces that you want dyed. Don’t worry about the hardware. Just paint over that too. You need to get into all the nooks and crannies.


Then, you need to let it dry somewhere like a garage or basement, but make sure it’s well-ventilated because the dye is really fume-y and can give you a headache. 
(I hung my bag on a camera stand in my garage.)


Now, I know this is unorthodox, and I’m sure there are people who think I’m crazy, but. . .

After it’s dry (give it a few days), go over the whole thing with nail polish remover and a cotton ball. I discovered this by trial and error. I’m sure there are many DIYers who would say never to do this. But this is really the only way to take off the excess and assure that your color won’t rub off onto your clothes. This is also the best way to get the color off your hardware so that it looks like the dye job was professionally done. You could ostensibly use a mild soap and a rag, but. . .I wanted to make sure that the color wasn’t going anywhere. Also, acetone dries super quickly, whereas water takes time to dry and can soak your leather. If some of the color comes off during this step, then you can reapply color and let it dry again. Do this cycle as many times as you need to make sure the color is permanent. It works. I’m telling you.


Look how nice and shiny!


(I did buy some Fiebings Resolene—from Amazon—in case I need it. A lot of sources suggested using Resolene (acrylic sealer) to keep the color from fading and rubbing off onto other surfaces. I plan to use it eventually, but I want to make sure all the surfaces are exactly perfectly black before I go sealing anything. That means I will need to use this bag and monitor it for a few weeks yet. And...I many not even need the Resolene. Plus, I’m a little worried that it might dull the shine...Anyways, I’ll update this post and let you know.)


Because I kept the zipper closed, the interior is clean and neat.


I’m not a huge fan of gold hardware, but. . .if I resell it, other people like gold and black, so I can retain a lot of value by keeping the hardware gold. It’s not obnoxious, so I can live with it.


Looks brand new!


The End!


Wednesday, February 21, 2018

Sunday School Craft - David's Five Stones (with verse tag)

This is like. . .my third David vs. Goliath craft (actually. . .maybe my fourth). Anyways, it's because the same little kids are still in the class when I started making these and I don't want them to make the same craft twice! (We keep teaching kids from 2-4 the same select stories from the whole Bible in order, over and over, until they get to the next level. In case you were wondering!)

Today's craft: David's Five Stones


You will need: brown fabric (I used a roll of wreath burlap), jute (or regular string or yarn), stones (make sure your kids are at least three years old and won't put them in their mouths), scissors, cardstock, and single hole punch.


First, cut out your fabric (or wreath burlap) into squares. (You can do circles, but they take longer).


Print out the template at the end and cut the tags apart.


Punch the top corner of each tag.


Cut the string into however many pieces.


Let the kids select five stones and put them in the middle of each square.


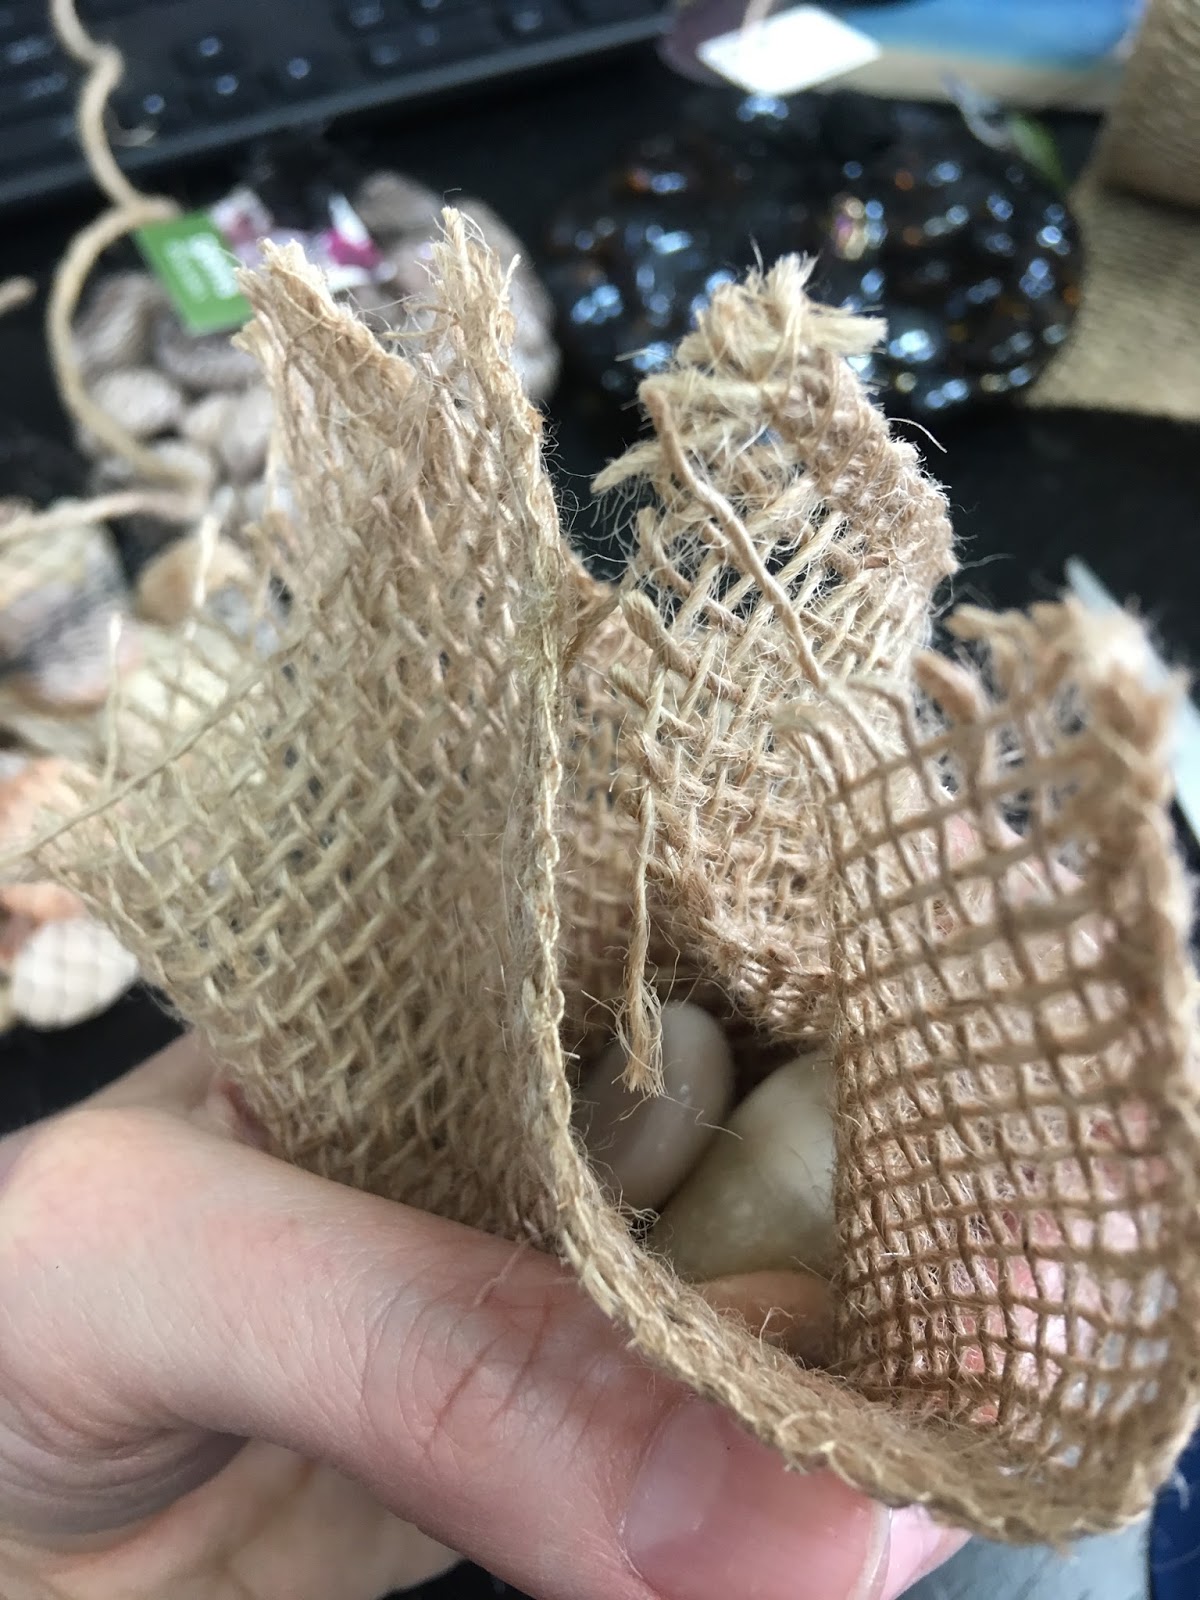
Pull up the corners around the rocks.


Put a tag on a piece of string.


Tie the string around the little square of fabric! (Those stones are for photo aesthetics. . .There are five others inside the fabric! . . .Obviously!)


Template:


The End!


Wednesday, August 9, 2017

Sunday School Craft - Daniel in the Lion's Den Lion Paper Bag Puppet

I realized that most of my Sunday School crafts only work if you have a printer, so I decided to do one that you could do completely free-hand.


You will need: Paper lunch bags, orange and yellow tissue or construction paper, black marker, and crayons.

I did print out the verse and glue that at the bottom, but it's optional. If you want it, I have the template at the end.

First, I drew a lion face on the bag so that it's mouth was split at the fold as you can see below.


Then, I opened the folded part and drew an oval with teeth and a tongue.


Then, I took one sheet of yellow and orange tissue paper.


I folded them up.


Then, I cut them like this: In threes with the middle part twice as long as the outside pieces. (This is because the outside pieces are folded. This will make all three sections the same width.)


Then, I stacked the three sections and cut them into strips.


Then, I started gluing the pieces around the lion's head.


That's it! Now you can make the lion shut his mouth like the verse says!


Thursday, April 20, 2017

Refashioning: Trend Update - Make Your Own DIY Guitar Strap for Your Purse

If you haven't heard, the latest style is to carry a purse with a guitar strap. It was actually a Fall trend, but it seems to be carrying over into Spring/Summer.


Different designers had their models carrying these bags on various runways. 


Even though it's a designer sort of thing, the look really harkens back to art and crafts and DIY, so I guess this post has come full circle! I'm going to show you how to make a strap for your current purse, so you don't need to spend a lot of money for this trend (that will probably last all of five minutes)!


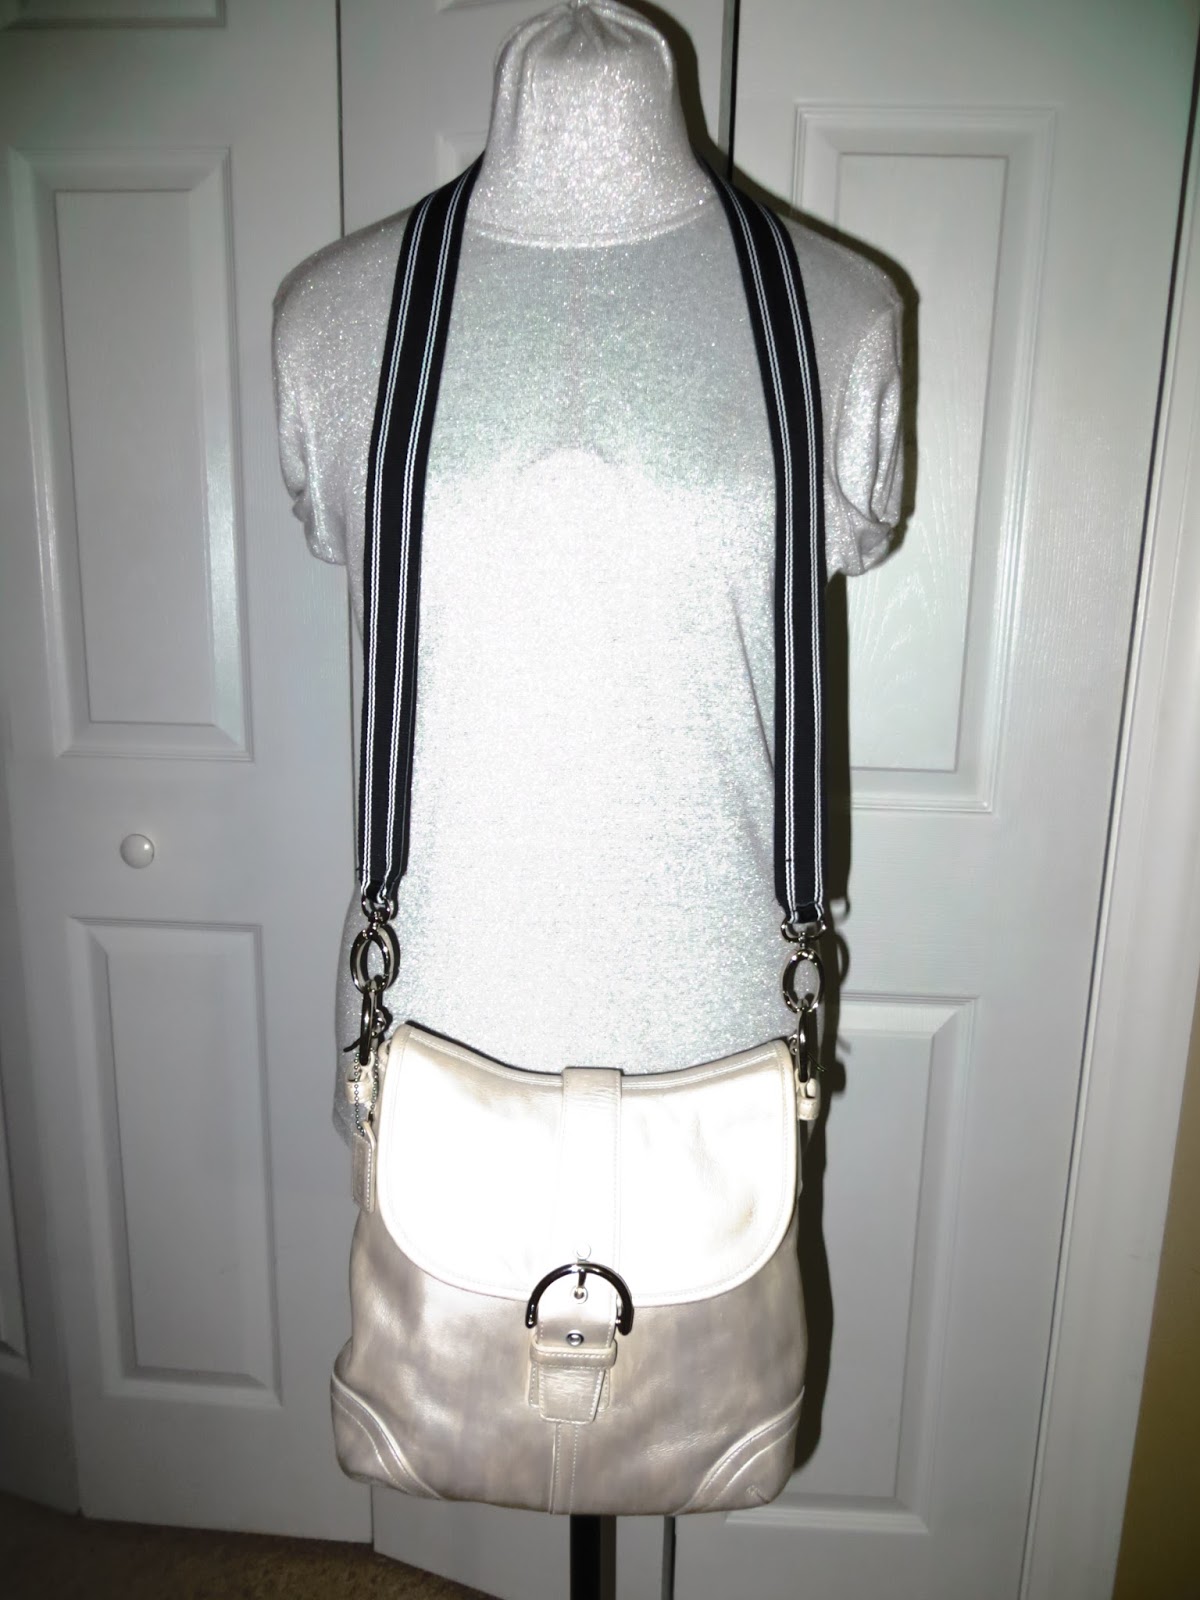
You may remember a few years ago when I dyed this Coach purse silver. (If not, click here for a refresher.) I like it. It's still in good condition, and I don't feel like buying a new purse right now. The first step to this project was unbuckling and removing the current strap.


After that, I just used a belt I liked and an old crappy purse, that I hated, that had detachable straps. If you don't have either one, that's why God made thift stores! Buying an old belt or an old crappy purse costs far less than buying the them from a craft store.


I also used an old thrifted black leather jacket, because I wanted to add some substance to the belt. You don't have to do this. (The following directions are for adding leather to the belt, so if you aren't adding leather, you can just attach the hardware to either end of the belt and you're done!) 

But if you would like to add leather, read on.


First, I took the hardware off the belt.


Then, I ironed both ends flat.


Then, I ironed both ends into points.


Then, I cut a panel out of the back of the leather jacket.


Then, I cut this panel into two pieces.


Then, I sewed two of the short ends of the leather together--right sides together--to make one long piece.


Then, I folded the belt in half and marked the halfway point with a pin.


Then, I placed the pin on top of the seam I'd made in the leather.


Starting at the pin/seam point, I sewed down the middle of the belt.


The trick when you are sewing leather on a standard machine is to hold both layers as tightly as possible and guide the whole thing through with both hands. Otherwise, the stitches get really tight and the whole project looks bunchy.


I sewed all the way down to the base of the point I'd ironed on the end of the belt. 

Then, I did the same thing on the other end, starting from the pin/seam point and sewing down the base of the other point.


After the middle was stitched in place, I sewed along the sides of the belt, starting and ending at the edge of the belt's points.


Then, I cut two of the purse strap clasps off the old purse.


Then, I bent one of the belt points around the base of the clasp and hand-stitched it in place.


This is what it looked like from the other side of the belt point.


After securing the clasp to the belt, I began hand-stitching through the belt and the leather to secure the layers together.


I found these rubber finger tips really helped.


After that, I cut a strip from the edge of the leather up to the belt.


Then, I flipped this strip through the loop of the base of the clasp.


At this point, if you can add a grommet, this project would probably look a lot nicer. I don't have a grommet, so I just stitched through the leather and belt. The trick is to stitch as close to the clasp as possible so that the belt/leather is nice and tight against the metal.


Once that was done, I cut the point free from the leather. . .


And tied the thread off and cut it.


Then I cut the belt free from the leather.


So, why didn't I cut the leather to fit the belt in the first step? Because, leather stretches and shifts during sewing and I wanted the leather to be as flush to the belt as possible. Doing this project by cutting the leather at the end, saves a lot of headache at the beginning and middle!


The finished strap:


This is how to wear it cross-body. The nice thing about guitar straps is that they are thicker and distribute weight more comfortably than thinner straps.


Another advantage to the guitar strap is that you can flip it over to the other side for a different look.


If the strap is too long for you, here are two ways to wear the strap shorter.

First, put a knot in the side:


Or feed the strap through a side loop of the purse and, with the strap now folded in half, clasp both clasps on the same side. 


The End!