Showing posts with label yellow. Show all posts

Wednesday, August 9, 2017

Sunday School Craft - Daniel in the Lion's Den Lion Paper Bag Puppet

I realized that most of my Sunday School crafts only work if you have a printer, so I decided to do one that you could do completely free-hand.


You will need: Paper lunch bags, orange and yellow tissue or construction paper, black marker, and crayons.

I did print out the verse and glue that at the bottom, but it's optional. If you want it, I have the template at the end.

First, I drew a lion face on the bag so that it's mouth was split at the fold as you can see below.


Then, I opened the folded part and drew an oval with teeth and a tongue.


Then, I took one sheet of yellow and orange tissue paper.


I folded them up.


Then, I cut them like this: In threes with the middle part twice as long as the outside pieces. (This is because the outside pieces are folded. This will make all three sections the same width.)


Then, I stacked the three sections and cut them into strips.


Then, I started gluing the pieces around the lion's head.


That's it! Now you can make the lion shut his mouth like the verse says!


Saturday, February 6, 2016

Refashioning: NO SEW! Making Clothing More Functional - Dress into Skirt

Here is a "no sew" version of my last blog post about turning hard-to-wear clothing into more functional pieces. 

(Before I begin, I need to mention that you can do the same method as the aforementioned post if you peel off one side of iron-on adhesive tape and--after cutting the bodice off--iron the tape onto the inside of the top of your waist hem. Then, remove rest of the backing off the tape, fold the hem down once, and then iron the fold. The only problem will be around the zipper if your dress has one, you may have to take the old sewing needle and thread to that part to tack it down.)


Here is a second method and it requires no tool skills except cutting with scissors! The only thing is that it can only be done on dresses with elastic waist bands and no zippers.


For this type of dress, the waist band is not only already cinched in with elastic, but also, the band has been finished on both sides, so all we need to do to turn it into a skirt is to cut the bodice away from the skirt. Cut as closely to the waist band as you can with out cutting into the waist band.


Hopefully this picture is clearer.


A close up of the waist band. You can barely tell that anything was cut because the waist band is already finished!


Finished skirt! It took less than five minutes!


The End!


Saturday, July 25, 2015

Refashioning: Capris into Ankle Pants

I got these awesome yellow capris from my friend, Sandy, but. . .and I'm not sure you can tell in the picture, but the left leg was just a hair tighter than the right leg (maybe it's not the pants, but maybe my legs are different sizes!) and I knew that would bother me if I wore them anywhere. They just made a rule at my work that we can no longer wear capris, but we can wear ankle pants. (Also, capris kind of make me look like a hobbit sometimes because my ankles are thin, but my calves are HUGE.)
(See picture for all these details.)


Therefore, I was determined to turn these into ankle pants. First, I cut the cuff seam and lowered the cuff. (See picture below.)


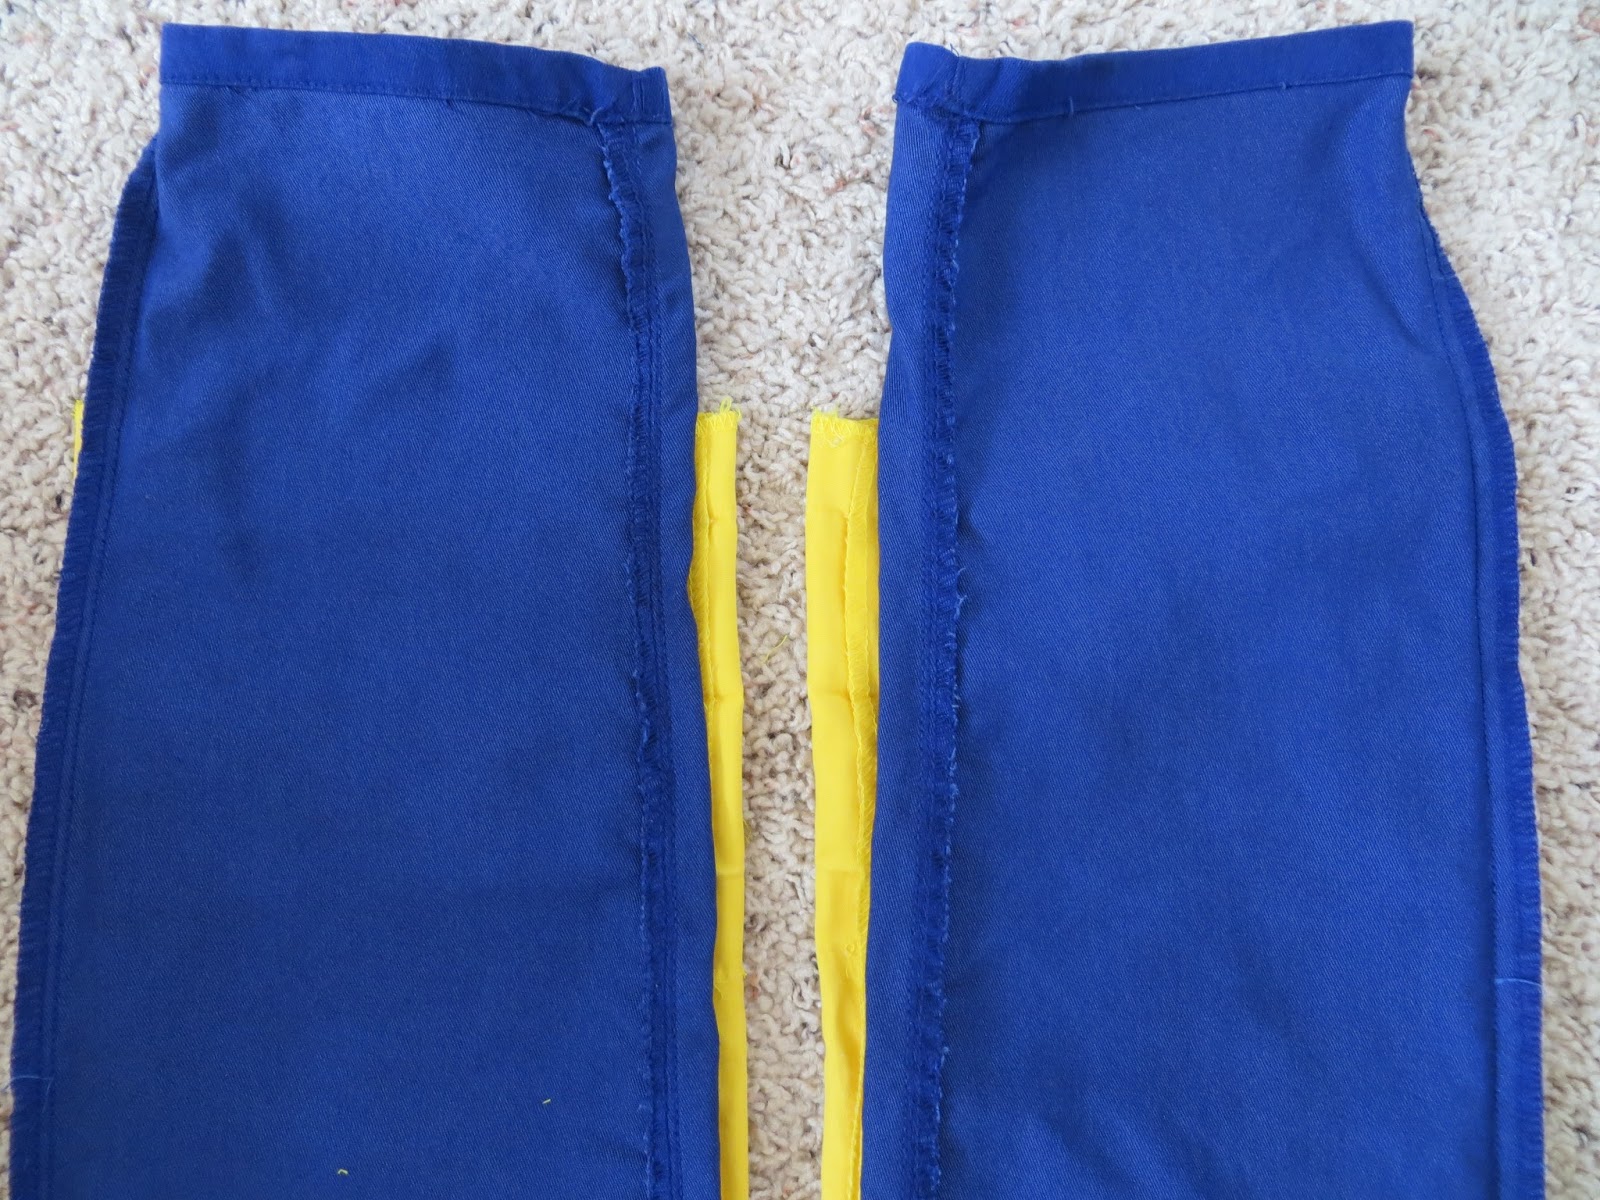
Then, I cut the entire bottom hems out and unfolded them.


Then, I laid some skinny pants on top of them to get an idea of how much to narrow the calves. You can see that the one on the right sticks out a bit more.


I pinned both sides of each calf so that they were the same size before stitching.


Then, I sewed a straight stitch along the bottom hems. (I know I should have done a blind stitch, but. . .I didn't feel like it.)


Then, I ironed them.


Not too shabby.


The End!


Thursday, May 22, 2014

Two Skater Dresses

It has come to my attention that a former student of mine enjoys reading these posts, so. . .a shout out to you, Lindsey! I miss you! A little bird told me your freshman year went well. . .(That little bird is your mother. I literally almost ran into her at Walmart. Literally.)

Speaking of Walmart, I found this neon yellow sporty jersey fabric at Walmart for $1.50 a yard and so I bought four yards. 


I had no idea what to do with it, so I thought I would start with a skater dress. I did my "lay another dress on top and cut around it" pattern system that I've been using lately.       It's really easy, Guys. Way easier than paper patterns that you have to pin. You should try it.


Maybe this picture will show you how easy it is. You just have to make sure you cut a seam allowance around whatever you cut. You can see here that I extended the torso down a few inches from the original dress. That's because I don't like when waists are just a tiny bit too high.


The piece I cut up there was the back piece with a higher collar. Here is how I cut the front. I used the cut piece as my pattern.


Then, I just cut around it.


But I stopped at the collar.


Then I replaced the original dress on top the piece I was cutting just now.


I tucked the back collar part in. . .


and cut around the front collar. 


To cut the skirt part, I just folded the bodice half of the dress in and laid the skirt part on top of my yellow fabric like this.


Then, I cut around it. You can play with these measurements, you know. For instance, I made the skirt 1/2 an inch longer.


When it came to sewing, I had to choose which side of the fabric I wanted to be the good side. This is athletic fabric, so usually this is the side that shows:


But that was a little too much texture for me and found that the back side was actually more solid.


Skipping ahead. I sewed the dress together but when it came to hemming, I hemmed the front middle bottom hem up 1/2" more than the hem I did the rest of the way around. This allowed for "butt lift." If you don't know what I'm talking about, skip it. I just hate when dress hems hang just a tiny bit higher in the back. Drives me nuts.


Here is a closer picture to show what I'm talking about. I trimmed that edge after taking this picture, just so you know.


The end! All in all this dress only took 1-2 hours. I wasn't really paying attention.


Okay, I know this hem is kinda tacky. Usually, you are supposed to double fold before you hem, do a lining, or use bias tape, but I didn't do any of that for two reasons: (1) If I double folded the collar and sleeves which are curved, then they would have bunched up funny. (2) The only reason to double fold, lining, or bias tape is because you are afraid of the fabric fraying. Since this fabric doesn't fray, I didn't worry about it. You can't tell from the outside and that's the only side that matters. Back in the day when women only had like five dresses, it mattered. Nowadays when most women have tens if not hundreds of dresses, there is no reason to make them last through an apocalypse.


Okay, that dress went so fast that I decided to make another dress with fabric I already had. Before I sewed the yellow dress together, I traced the pieces onto paper. Then I drew a raglan line from the collar bone to the arm pit and cut the pattern along that line. That's what I used to make this raglan skater dress:


I saw a dress on eBay where the raglan line didn't end directly at the armpit, but rather ended just below it. I thought that was unusual, so I did the same thing.


I made a waist band on this one.


I was going to use just the pink chiffon for the shoulders, but it was a tad flimsy, so I backed it with the navy jersey as you can see here:


Also, to reinforce the waistband, I grabbed a strip of scrap jersey out of my scrap box. This is why you should save scraps.


The End!