Showing posts with label vintage. Show all posts

Friday, January 31, 2020

Refashioning: How to transfer a vintage hood and fur to a jacket and a coat.

Here’s a quickie. This is one of my posts that isn’t quite a “follow these exact rules.” It’s more like, “hopefully, this one gives you an idea.”

So, I go to Goodwill every week. On one of my searchings, I came across this old worn-out coat with a hood attached. What got my attention was the genuine fur trim on the hood. Whatever your moral standing on real versus fake fur, I think you would agree with me that it would be better to reuse vintage fur, rather than throwing it in a landfill, right? So I bought this coat and took it home and then thought about what to do with it.

The coat was pretty gross, and you gotta think about how hoods go on your head. Right? Head lice is a thing, People! Therefore, I detached the hood from the coat and threw it in the washer and hung it to dry. 

(Little secret: You can actually machine wash most treated genuine leather and fur with regular detergent, as long as you hang it to dry and reshape it while it’s drying! Manufacturers don’t like you to know this trick, but you learn these kinds of things when you invest only a dollar in Goodwill finds! Note: doesn’t always work on suede.)


So what I noticed once I got it home was that both the fur and the hood itself were removable with buttons and button holes. This gave me an idea!


I live in South Carolina, and winter barely ever gets below freezing. As a result, I usually end up wearing this leather jacket all winter. I thought....Wouldn’t it be nice if it had a hood in case I’m out and about and the temperature drops suddenly?


I examined the collar to see where the best placement would be to sew on some buttons. I opted for right in the seam and under the collar. That way, they would be unnoticeable when I took the hood off, and easily removable if I ever get tired of having buttons on my jacket. (Read: In the seam, the holes wouldn’t puncture the leather.)


Fortunately, I had five matching black buttons in my inventory.


Here is a view from the outside of the coat. I started by finding the middle back seam for the first button, and then measured the other four buttons out from the middle.


When sewing leather, you should probably have thimble close by. 
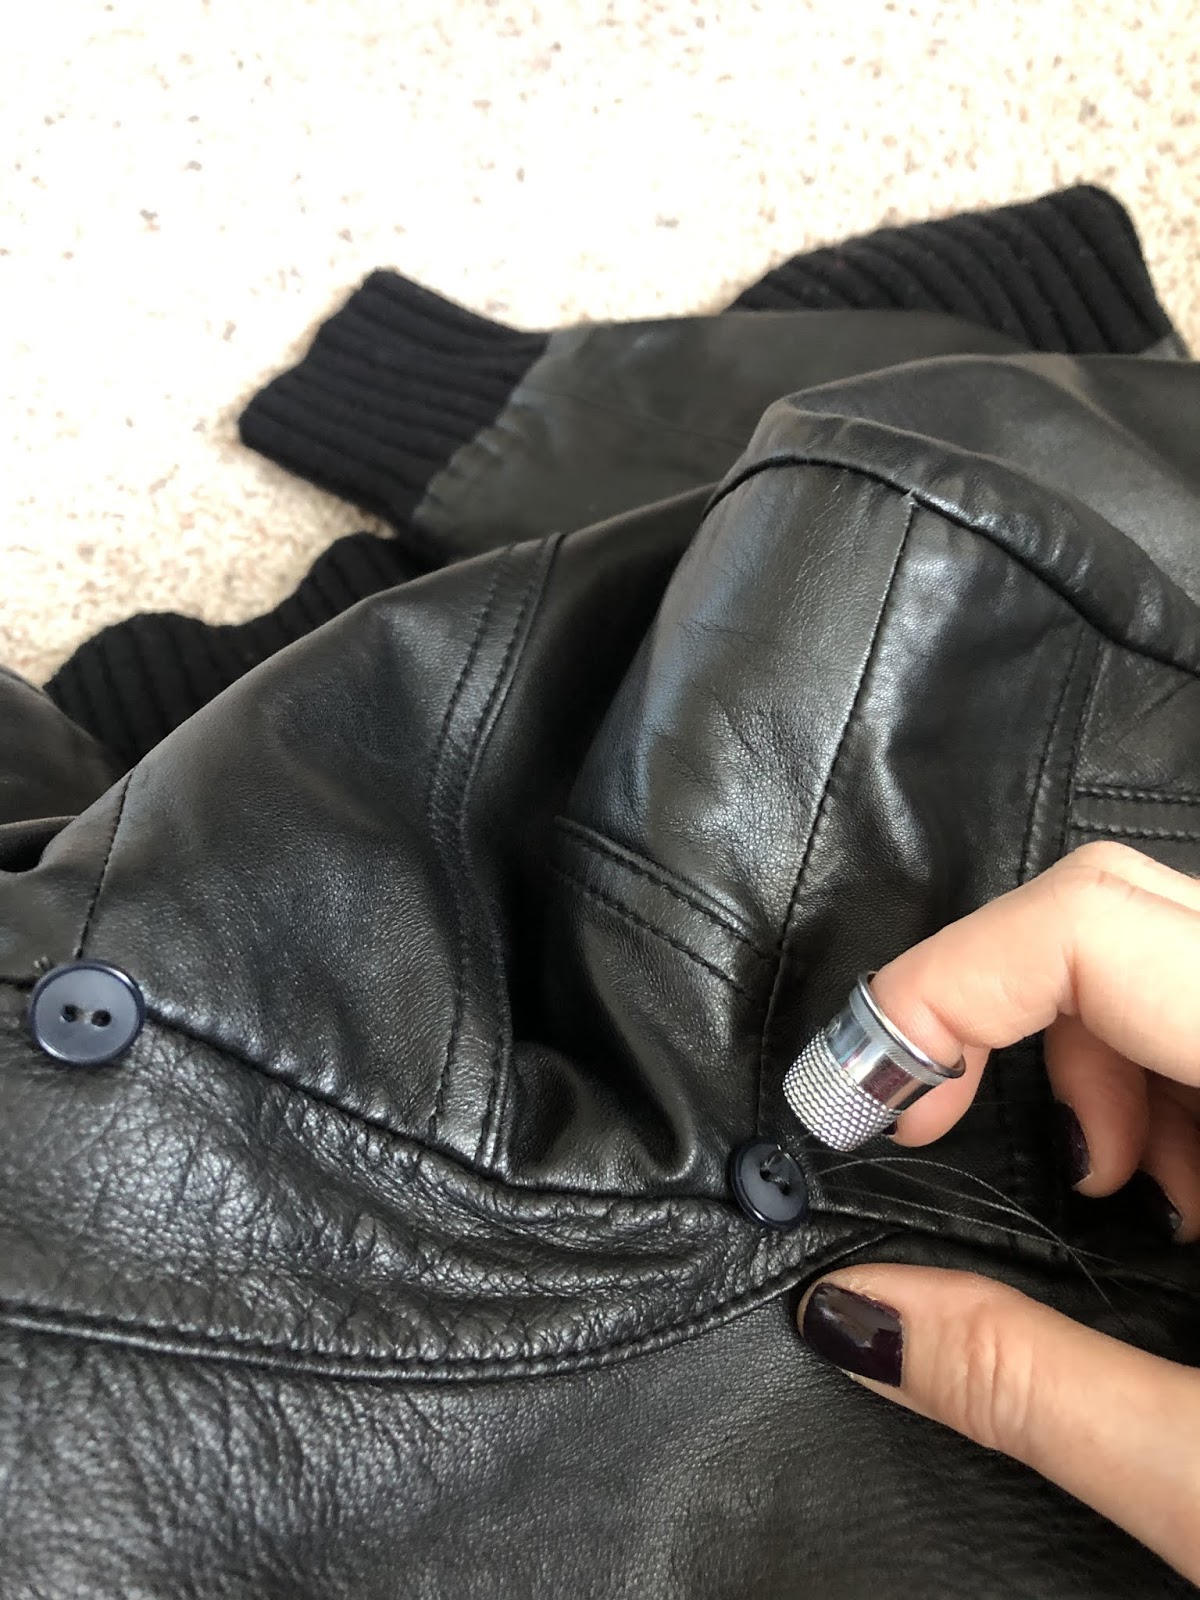


Here are the buttons sewn onto the second jacket.


And here is the hood with fur trim attached to the second jacket. Looks like it was made that way, doesn’t it?


_________________________________________________________________
Second Idea: Fur trim on an existing coat.

So...just so that I could get the most out of the luxurious fox fur trim, I decided to make it “addable” to a dressier coat that I have. I really really like this coat and wear it a lot—especially with dresses. I had a feeling that adding fur trim would take it up a notch! 
(I was right! Scroll down!)


So, to keep the buttons discreet (for the times I don’t want trim), I sewed black buttons into the black part of the hood. This view is from the front.


And this is from the back. I can easily take these buttons off if I ever get tired of them without damaging the coat.


Look how lovely!


Super cute and cozy!


Now, go raid your Goodwills!

The End!


Thursday, February 26, 2015

To Tommy from Zooey...by Jessica...Navy and Red Cable Knit Dress

Zooey Deschanel has been sporting dresses from her Tommy Hilfiger "To Tommy from Zooey" line lately on her show "New Girl," and I really like the dress below:

Honestly, the main part I like is the red belt, but apparently it's not even part of the original dress as you can see from the picture below.

I still like the dress, but I don't have much of a torso and this shape of dress really does nothing for me. It was time for me to make a similar dress but to my specifications.


I did my "cut around it" method. For the bodice, I copied a V-neck sweater that I really like. 


For the sleeves, I copied a dress I made a few months ago, but never posted on my blog. I don't actually post everything I make! Hard to believe, I know. . .


These are all the pieces I would use and then sew together.


I sewed the shoulders together first.


Then sewed the sleeves on.


Then, sewed down the side seams of just the bodice.


Added the ribbing to the sleeve cuffs.


Added ribbing to the collar. (This was tricky to get it to V nicely.)


Then, sewed the waistband onto the bodice. If you notice, I reinforced the waistband with pink ribbing on the inside of the red.


For the skirt, I cut one long piece and sewed the two sides together.


Normally, you would baste the entire skirt portion, but instead, I skipped that step and just stretched and sewed the elastic directly onto the top of the skirt. Also, I learned a trick from the fashion design course I'm taking: To make sure your elastic stays under the needle, pull it up through the foot at the beginning. Great trick!


The skirt.


Then I sewed the bodice waistband to the skirt. Actually, I sewed over the elastic band again doing this. This assures the waistband will stay put and reinforces that area.


Then, I hemmed my skirt. I don't know if you can tell, but when I fold the hem under to the wrong side, I pin on the opposite side--the right side. I do this, because I much prefer being able to see where I'm stitching the hem vs. guessing and hoping that it looks okay on the reverse side when I'm done. It's a little tricky the first time or so when you attempt this, but I believe it is well-worth the effort.


I just used a basic straight stitch to hem. I know the fabric is stretchy, but this part of the hem isn't going to stretch since the fabric for the skirt is gathered so much. Also, a straight stitch is lower profile than a stretchy zigzag. Hopefully, from this picture you can see how I'm stitching the hem from the right side. This keeps you from being at the mercy of your feed dogs that like to jam and pucker occasionally.


The finished dress. I didn't like that extra white stripe on the original dress, so that's why I just used red.


I like the cable knit of this fabric. Gives it a classy retro look.


The End!


Friday, January 30, 2015

Valentine's Day Special: Colorblock Western Shirt with Owls

Remember last year when I made this for my baby?

My friend, Tina, recently gave me a bunch of fabric and notions, so I was going through my current inventory to make room, when I came across this little gem in my pattern repertoire. I had forgotten that I've been wanting to make my husband a western shirt for ages. He likes that retro look, so this shirt was a perfect choice for him. I know it's like. . .two weeks early from Valentine's Day, but. . .I wanted to make sure that I got it done during a time when I wasn't busy, and. . .this gives him time to get me a good present. (Mmmmuhahahaha...)


Here it is! I'm not blogging the process because. . .it's just a pattern, and that's boring. Plus, the whole shirt took me about 12 hours from start to finish and this blog would be a book. I will, however, go over some details. First off, see how the plaids on either side of the buttons match up? Also, my husband is super skinny and tall. (He is so tall and skinny that the daughter of some friends of ours calls him "Tree.") Anyways, he can never find shirts with sleeves that are long enough, because apparently skinny means that you have short arms in the fashion industry, so that was something I considered when cutting out the patterns.


I found the owls on www.embroiderydesigns.com. My husband also loves owls, but as he is a man, I needed to find an owl that wasn't obnoxious and girly.


Most embroidery machines have the capability of flipping the design.


This butterfly collar is for REAL, y'all. I was able to use the last piece of iron-on interfacing that I had for this collar, but when it came to reinforcing the button strip and the cuffs, I ended up just using an extra piece of fabric inside. (By the way, if a pattern calls for iron-on interfacing and you don't feel like running to the store, you can always just use a piece of slightly stiffer fabric. Just make sure you pin it well [or stay-stitch, which I never do because it's a waste of time] before sewing so it doesn't move around. That's the advantage of iron-on.)


I made sure that all the buttons were sewn on with the crown design at the top.


In retrospect, I should have made the button holes vertical instead of horizontal, but they still do their job. I love my Husqvarna machine. It does perfect button holes. (Blogger won't let me center this picture, that's why it's off to the side.)


For some reason, Blogger won't let me type above this picture, so. . .Anyways, here's the cuff! Isn't it great?! 


I learned a new seaming technique: flat fell. The pattern called for it along the shoulder to armpit seam. It's a little crooked because I had to top stitch it from the inside. It bothers me, but not enough to take it out.


This is what a flat felled seam looks like on the inside. It's nice and clean. You are supposed to do this technique on seams that see a lot of wear. In fact, the inside seams of jeans have this stitch.


Here is the inside of the shirt.


This is the seam along the sides of the shirt. It was supposed to be flat felled too, but I got lazy and just did my "surger" stitch that I typically do on jersey. Actually, I didn't want to have top stitching down the sides. I felt like that would be overkill.


The back.


I wish I would have had those pearl button snaps that you find on most western shirts, but I didn't. Anyways, I tried to nod to them at least by putting a smaller button at the collar.


The End!