Showing posts with label Hood. Show all posts

Friday, January 31, 2020

Refashioning: How to transfer a vintage hood and fur to a jacket and a coat.

Here’s a quickie. This is one of my posts that isn’t quite a “follow these exact rules.” It’s more like, “hopefully, this one gives you an idea.”

So, I go to Goodwill every week. On one of my searchings, I came across this old worn-out coat with a hood attached. What got my attention was the genuine fur trim on the hood. Whatever your moral standing on real versus fake fur, I think you would agree with me that it would be better to reuse vintage fur, rather than throwing it in a landfill, right? So I bought this coat and took it home and then thought about what to do with it.

The coat was pretty gross, and you gotta think about how hoods go on your head. Right? Head lice is a thing, People! Therefore, I detached the hood from the coat and threw it in the washer and hung it to dry. 

(Little secret: You can actually machine wash most treated genuine leather and fur with regular detergent, as long as you hang it to dry and reshape it while it’s drying! Manufacturers don’t like you to know this trick, but you learn these kinds of things when you invest only a dollar in Goodwill finds! Note: doesn’t always work on suede.)


So what I noticed once I got it home was that both the fur and the hood itself were removable with buttons and button holes. This gave me an idea!


I live in South Carolina, and winter barely ever gets below freezing. As a result, I usually end up wearing this leather jacket all winter. I thought....Wouldn’t it be nice if it had a hood in case I’m out and about and the temperature drops suddenly?


I examined the collar to see where the best placement would be to sew on some buttons. I opted for right in the seam and under the collar. That way, they would be unnoticeable when I took the hood off, and easily removable if I ever get tired of having buttons on my jacket. (Read: In the seam, the holes wouldn’t puncture the leather.)


Fortunately, I had five matching black buttons in my inventory.


Here is a view from the outside of the coat. I started by finding the middle back seam for the first button, and then measured the other four buttons out from the middle.


When sewing leather, you should probably have thimble close by. 
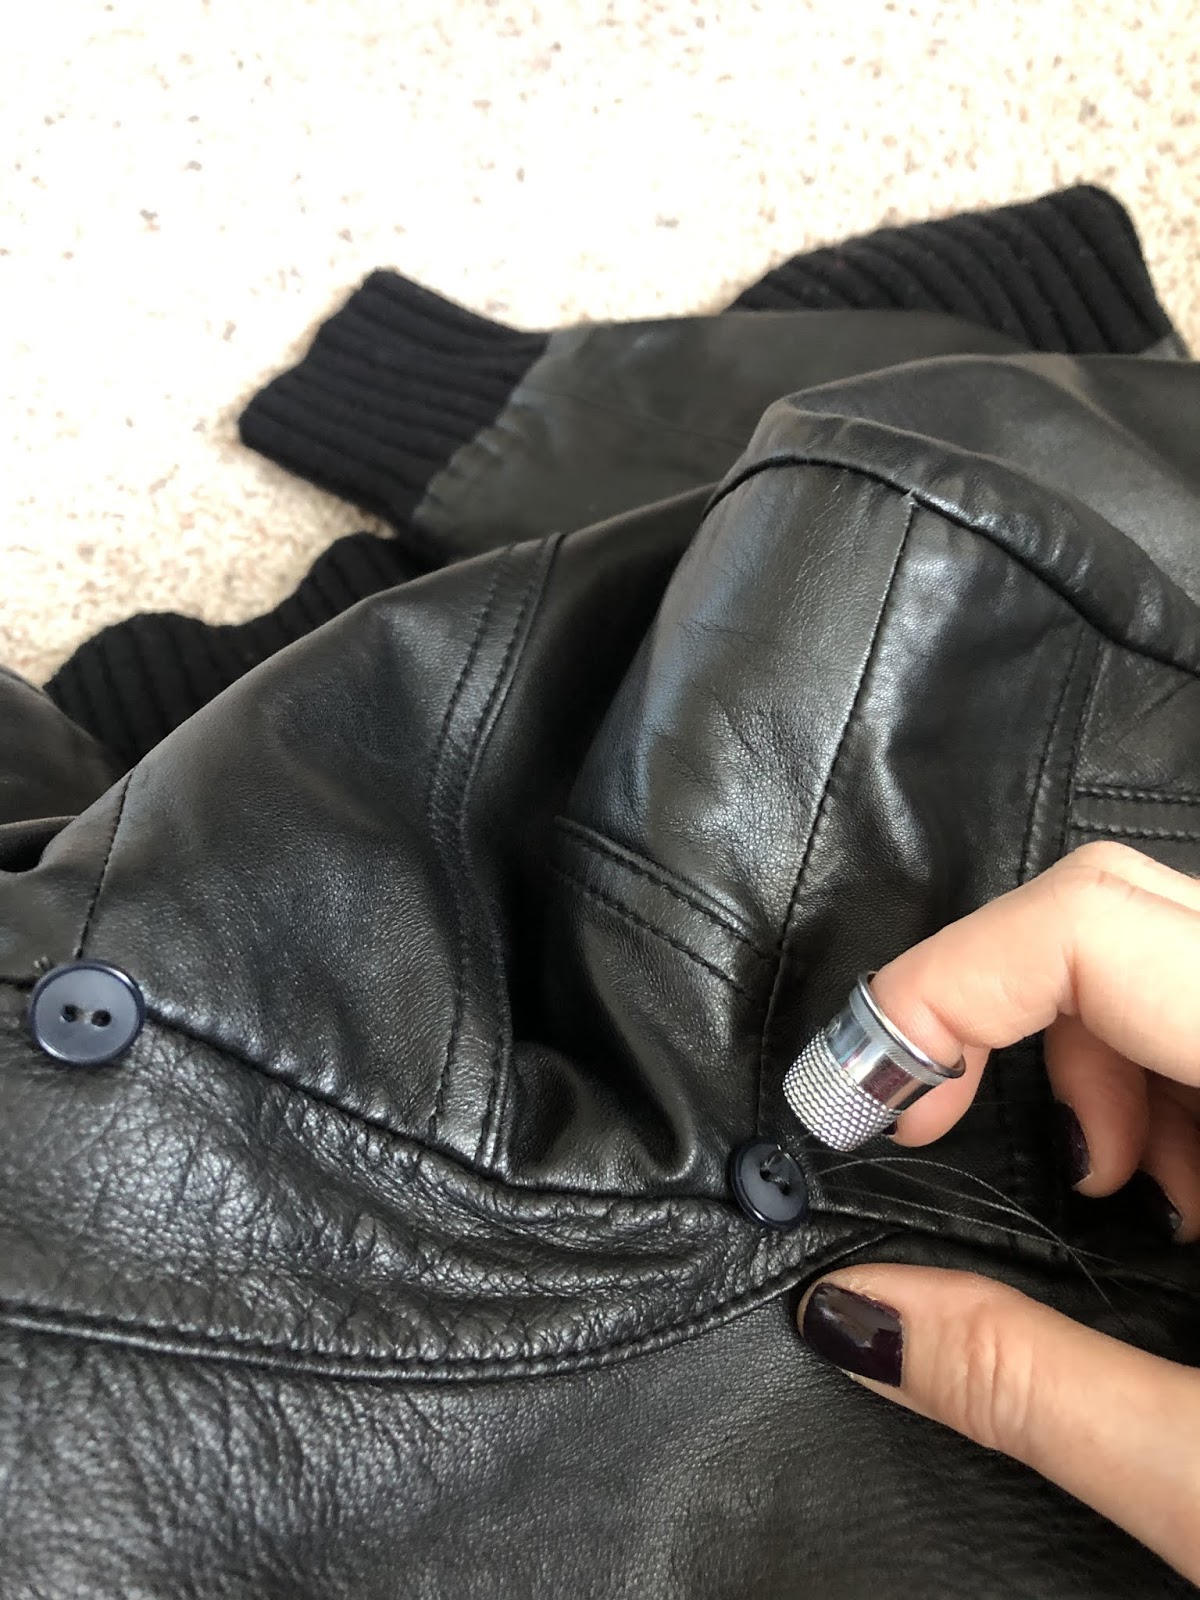


Here are the buttons sewn onto the second jacket.


And here is the hood with fur trim attached to the second jacket. Looks like it was made that way, doesn’t it?


_________________________________________________________________
Second Idea: Fur trim on an existing coat.

So...just so that I could get the most out of the luxurious fox fur trim, I decided to make it “addable” to a dressier coat that I have. I really really like this coat and wear it a lot—especially with dresses. I had a feeling that adding fur trim would take it up a notch! 
(I was right! Scroll down!)


So, to keep the buttons discreet (for the times I don’t want trim), I sewed black buttons into the black part of the hood. This view is from the front.


And this is from the back. I can easily take these buttons off if I ever get tired of them without damaging the coat.


Look how lovely!


Super cute and cozy!


Now, go raid your Goodwills!

The End!


Tuesday, April 29, 2014

Hobbit Cloak...or How to Make a Birthday Present for Your Type 2 Sister

If you know anything about "Dressing Your Truth" types (which you can learn about here), you will know that Type 2's are intensely sentimental. I don't mean that in a wishy-washy way, I mean that they have intense emotional connections to people, the past, the future, animals, points-of-view, etc. far more than the other types. My sister is such a person. Therefore, for her birthday I decided to hand make her a hobbit cloak because I knew it would remind her of when we were kids.


I found this awesome elvish/hobbit material at a thrift store which is where I got the initial idea for my sister's birthday. I looked up "hobbit cloak" blogs and found this really good one, but. . .you know me. I can't follow the rules entirely.


Up close you can really see how perfect it is. It looks like the same exact material as in the movies.


I wasn't going to be able to make a long cloak because the fabric was less than 2 yards long and a lot of that would be for making the droopy hood. I measured out 1 yard and decided that that's how long the cloak part would be. I used my cutting method that I've used before when making napkins. Simply cut a small cut where your measurement is, then move the tape measure up, and then cut from your first incision up to the tape measure. Keep doing that till you get to the end, and you are sure to have a straight line.


I set the cloak part aside and folded the remainder in half. I figured out that I wanted the hood to be 36" around the face to make it extra drapey, so I measured out 18" (half of 36") and cut up to the fold.


Here is the 18" part cut off.


Next I figured I wanted the part around the neck to be 22", so I measured out 11" (half of 22") and cut.


Here is a close up of the cut.


Then, I just connected the end of the "neck" cut to the point of the top of the hood and used my tape measure as a straight edge. This side of the hood will be the part that lies against the back from the nape of the neck down the back.


Here is the cut hood.


Then, in keeping with the elvish look, I used gold thread.


Here is the part I sewed.


Then, I folded the cloak part in half.


I took a flexible tape measure and measured a curve of 11" in a folded corner.


Then, holding the tape measure in place, I quickly followed the tape measure's curve with my scissors. This is a very unorthodox way of doing this, I realize, but it's super quick and it works!


This is the neck hole.


Before I opened the cloak up, I put a pin right in the top of the fold. After opening the cloak part up, I matched the back of the hood with the pin. You can see me pointing at the pin in this picture.


I first pinned the middle in place and then pinned the edges of the hood to the edges of the cloak. Then I filled in the rest of the length with other pins. This assured that I wouldn't run out of fabric on either side.


After sewing the hood in place, I folded the cloak in half again, eyeballed a curve, and cut the corners off.


Here is the finished cloak. (Incidentally, I got that dress from "Twice." To get a free dress, top, or bottom go here and sign up for $10. Then, download the Twice app to your iPad or iPhone for another $10. Then, go here to find a coupon and you can usually get an additional 15% off!)


(Later I reinforced the broach area with a zig zag stitch back and forth to keep the fabric from fraying from the tension.)


The End!


Tuesday, July 9, 2013

What Is It? A Bag or a Scarf?. . .It's Whatever You Want It to Be!

I am introducing a new item into my Etsy store: The Cambodian Scarf Bag. It can be used/worn many ways by men or women.

All of the following looks can be achieved with any of my scarf bags.

What way will you use yours?

Go to my store: here.


cross body bag with tassels


asymmetric scarf


pull through scarf


short over the shoulder hood


infinity scarf


cross body bag without tassels


over the shoulder scarf without tassels


large fairy tale hood with tasseled bib


ascot hood


one shoulder sleeve scarf


twisted beach bag


knotted short purse


twisted and knotted hanging scarf


assymetric twisted and knotted scarf


doubled over twisted hanging scarf


Scottish one shoulder sash bag with tassels


90s grunge hood


hipster scarf


inside out one shoulder sleeve bag


tasseled cape


small backpack (back)


small backpack (front)


cross body folded strap bag


twisted hanging scarf


doubled over and twisted ascot


small knotted hood


hollywood glamour handkerchief 


doo-rag


flapper headband


doll carrier


collegiate cape


semi twisted one shoulder beach bag


semi twisted hanging scarf


folded loose knot neckerchief


folded one shoulder neckercheif


grilling apron


barbeque bib


folded and knotted pirate belt


hip hugging sarong


large shawl


The. . .End?