Showing posts with label hack. Show all posts

Friday, January 31, 2020

Refashioning: How to transfer a vintage hood and fur to a jacket and a coat.

Here’s a quickie. This is one of my posts that isn’t quite a “follow these exact rules.” It’s more like, “hopefully, this one gives you an idea.”

So, I go to Goodwill every week. On one of my searchings, I came across this old worn-out coat with a hood attached. What got my attention was the genuine fur trim on the hood. Whatever your moral standing on real versus fake fur, I think you would agree with me that it would be better to reuse vintage fur, rather than throwing it in a landfill, right? So I bought this coat and took it home and then thought about what to do with it.

The coat was pretty gross, and you gotta think about how hoods go on your head. Right? Head lice is a thing, People! Therefore, I detached the hood from the coat and threw it in the washer and hung it to dry. 

(Little secret: You can actually machine wash most treated genuine leather and fur with regular detergent, as long as you hang it to dry and reshape it while it’s drying! Manufacturers don’t like you to know this trick, but you learn these kinds of things when you invest only a dollar in Goodwill finds! Note: doesn’t always work on suede.)


So what I noticed once I got it home was that both the fur and the hood itself were removable with buttons and button holes. This gave me an idea!


I live in South Carolina, and winter barely ever gets below freezing. As a result, I usually end up wearing this leather jacket all winter. I thought....Wouldn’t it be nice if it had a hood in case I’m out and about and the temperature drops suddenly?


I examined the collar to see where the best placement would be to sew on some buttons. I opted for right in the seam and under the collar. That way, they would be unnoticeable when I took the hood off, and easily removable if I ever get tired of having buttons on my jacket. (Read: In the seam, the holes wouldn’t puncture the leather.)


Fortunately, I had five matching black buttons in my inventory.


Here is a view from the outside of the coat. I started by finding the middle back seam for the first button, and then measured the other four buttons out from the middle.


When sewing leather, you should probably have thimble close by. 
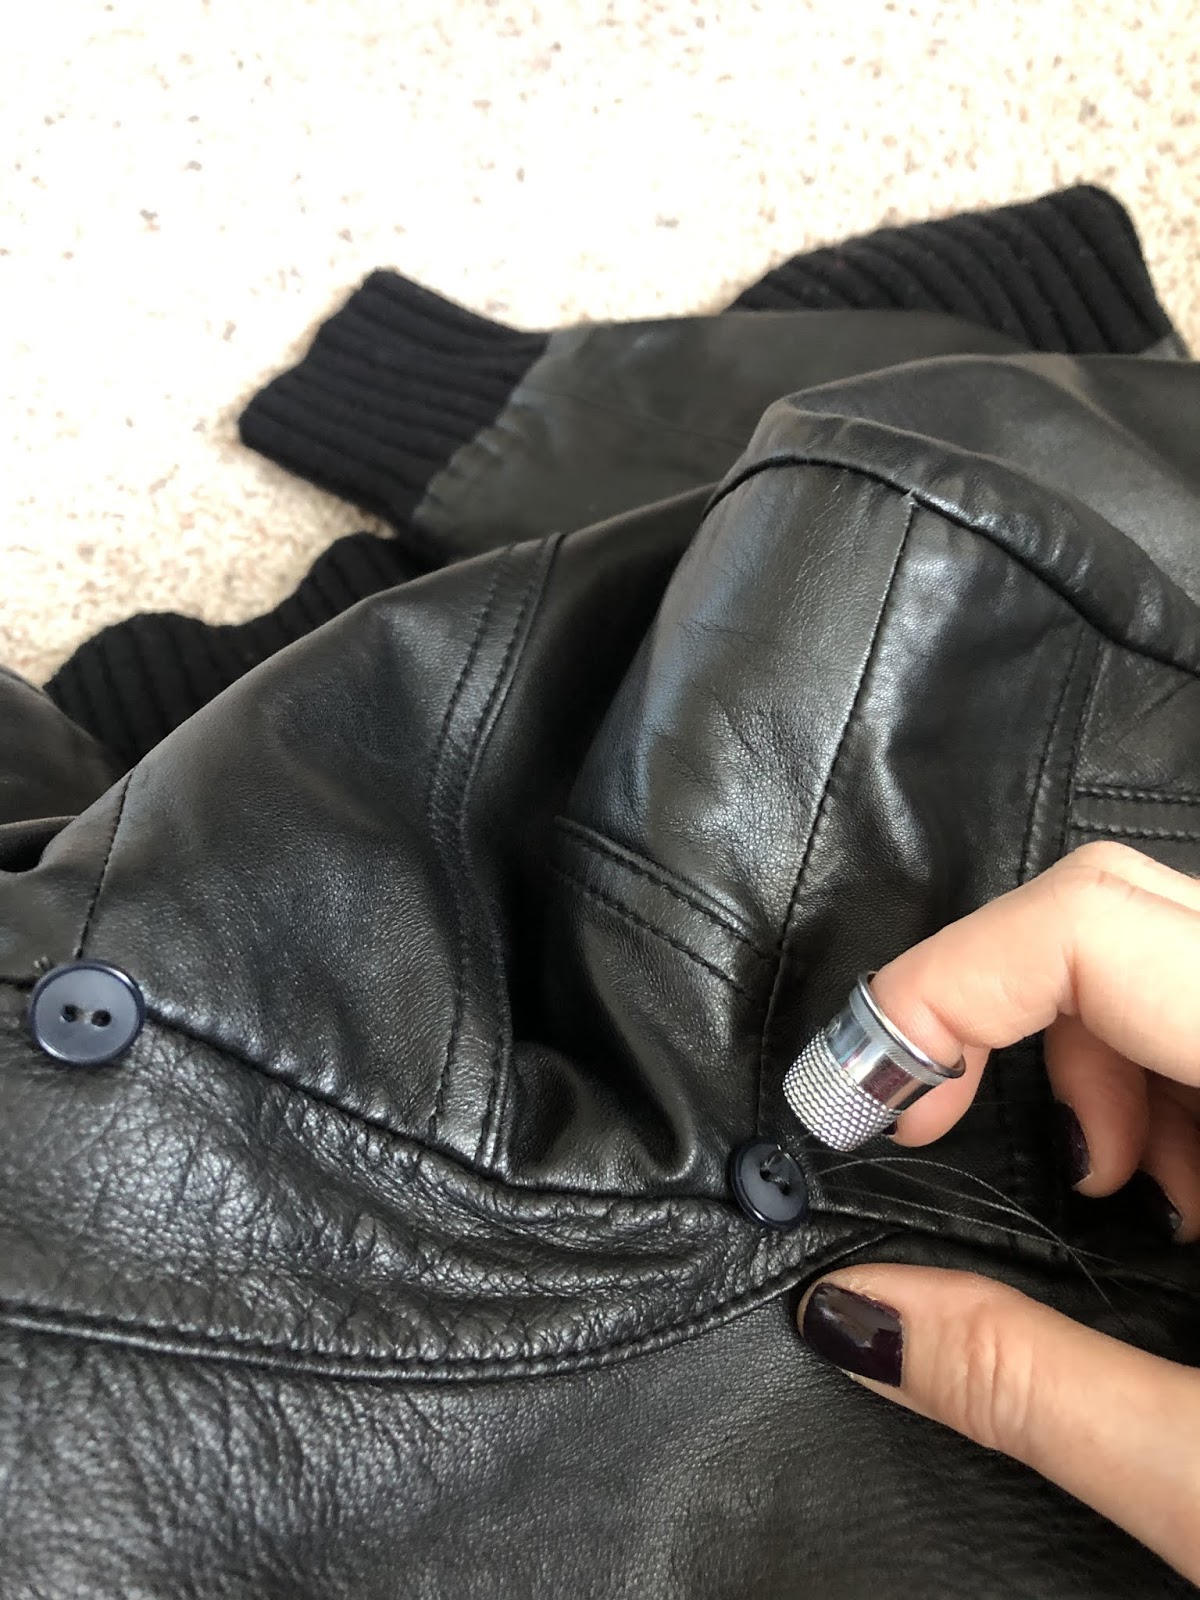


Here are the buttons sewn onto the second jacket.


And here is the hood with fur trim attached to the second jacket. Looks like it was made that way, doesn’t it?


_________________________________________________________________
Second Idea: Fur trim on an existing coat.

So...just so that I could get the most out of the luxurious fox fur trim, I decided to make it “addable” to a dressier coat that I have. I really really like this coat and wear it a lot—especially with dresses. I had a feeling that adding fur trim would take it up a notch! 
(I was right! Scroll down!)


So, to keep the buttons discreet (for the times I don’t want trim), I sewed black buttons into the black part of the hood. This view is from the front.


And this is from the back. I can easily take these buttons off if I ever get tired of them without damaging the coat.


Look how lovely!


Super cute and cozy!


Now, go raid your Goodwills!

The End!


Customize Your Glasses Frame’s Color! (Bonus Video: How to get glasses lenses back into their frames when they won’t fit!)

So I have a weirdly small face, and it's not easy for me to buy glasses at optician offices. I enjoy buying cheap glasses online from places like Zenni (click the link for $5 off) and Eyebuydirect (Click the link and enter: IFPGTPHSFC for $10 off!). You can find glasses for as little as $6.95 a pair including lenses!

(Many people complain that buying glasses online is too risky. All you need is a ruler that measures in centimeters to measure the width of your face, pupillary distance, and lense size. You also need your current prescription. Both of these websites let you virtually try on glasses before you buy.)

So...I have this thing...where I feel like I have to have everything in every color. So far, I have several pairs of glasses in several neutrals, red, blue, yellow, and purple. Then, I saw these orange ones on Eyebuydirect. On the site, they looked to be a very bold orange, but in reality they were more like a rusty brown:


You can see, they really read as brown when I wear them!


Well, that was disheartening, especially since I’d ordered two pairs!! (I work for VIPKid, and wanted orange glasses for teaching, and then one pair for wearing normally.) Well, since I’d ordered two pairs, I decided to search Pinterest for some ideas on how to change glasses frames’ colors. One blogger mentioned painting with nail polish. What a terrible idea!! The color was what I wanted, but look at all the terrible brush strokes!


Here you can see the brush strokes more clearly. Gross!


See how bad the nail polish looks on me? It just looks dirty. So annoying.


Okay, so the next part of the blog is some trial and error. If you are strapped for time, skip to the end. If you wanna see the entire thing, stick with me. (It won’t take long. Don’t worry.)


So, another blog suggested popping the lenses out and spray painting them. Okay, that is a dumb idea for several reasons: (1) I’ve spray painted things before, and it’s really hard to do in winter, because it’s cold and windy, and you can’t do it in your house because of the fumes and the potential mess. (2) Spray painting is fine for shoes and some clothing, because they are far enough away from people’s sight lines that an uneven coating isn’t too noticeable. Because glasses are on your face, the coating needs to be PERFECT or else it looks like trash and you will never wear them out of the house. Trust me. (3) There is no way to ensure that the inner ridge for your lenses stays clear of paint buildup. You need to be able to pop your lenses back in, right? You can try to tape off that inner ridge, but then your spray coating needs to be super super accurate. If you have ever spray painted anything before, you will know that this is a fool’s errand. There is a reason people use spray paint for big projects and not little ones like glasses. (4) Blog posts of glasses that have been spray painted look like crap. I know that sounds mean, but. . .I’m being honest.

Glasses are on your face, People. They need to be PERFECT. This is not time for arts and crafts!

So, what to do....

Then, I started searching synthetic dyes. I have dyed some of my clothing before with fabric dye. But I had no idea that there was such a thing as synthetic dye. I watched a few YouTube videos of guys who had dyed their frisbee golf frisbees with synthetic dye, so I thought. . .maybe that would work!

I found a dye called iDye Poly (from Amazon) in a bold orange color. The directions said to add the dye and the reactor (in the same package) to boiling water. I got an old pot (NOT USED FOR FOOD, OBVIOUSLY!!!), a packet of dye, a meat thermometer, and a small tub of cold water.


Make sure you’ve removed your lenses, before you start dying them!!


So, then I brought water and the dye to a boil.


The package said to keep the dye at 165 degrees, but a helpful YouTuber said to keep the water around 140 for thin plastic (so it won’t warp), dip it for a few seconds, rinse it in cold water, and then repeat until the color is what you want. 

I didn’t want to ruin my meat thermometer, so I measured the heat from underneath the pot.


So that’s what I did....dipping, and....


...rinsing....


I did that over and over for about 30 minutes, but the color still wasn’t where I wanted it, although, it became definitely bolder. This is probably due to the fact that I was dying on top of a translucent rust color. I should have started with a lighter orange, yellow, or even clear frames....oh well. 
Just to show you, I put the original photo underneath this one, so you could compare.
After:

Before:


And if you need to see them on my face, the first one is the before, the second is after. Even though, the color looks very different in the pictures above, you can see below that they still look brown on me (and when I wear brown, it really makes my nose stand out!!!).

Before:

After:


So....that was a frustrating waste of time. I was back at square one. I was going to give up, but then I started searching Zenni again and found these: orange and pink (because I’d been wanting some pink ones for a while too.)


This is what they looked like on me. I mean....they are okay, but...the color is so light that they kinda wash me out and age me.


So....third time’s the charm, right? I ordered some RIT DyeMore Synthetic dye (also from Amazon) in pink and orange.


I repeated the whole “dip and rinse” method that I had done above. The pink ones took about fifteen dips. The orange ones I dipped twice!


FINALLY! Colors I like!! And so professional looking! Also, notice that my face looks so much more proportional and in focus! Colors are important!

Before: (so you can compare)


And because sometimes, the dying process can shrink your frames a tiny bit, and your lenses may no longer fit.....
Bonus: Video on how to get lenses back into frames when they won’t fit!


The End!


Thursday, November 16, 2017

Travel Downsizing: Deodorant

Have you ever noticed how your travel-sized deodorant always runs out halfway through your trip? Have you also noticed how travel-sized deodorant costs nearly as much as a regularly-sized one? Do you hate paying for checked bags and would like a really easy tip on down-sizing so that you can be one step closer to your goal of traveling with only a carry on and personal item? 
(FYI here is a post on how to pack for cold weather in only a carry on.) 

Here is a very quick "hack" to help those of you cheapskates, like me!

You need: An empty travel-sized deodorant container and a full regularly-sized one.


So, first open both containers.


Then, start twisting the bigger container so that the product starts to rise.


With some of the product coming out of the bigger container, hold the product up against the opening of the travel-sized container. This is to make sure that the product will fit. (You may want to take your empty travel container to the drugstore and check before you buy.) As long as they keep making regularly-sized deodorant that is small enough to fit inside a travel-sized container, you only ever need to buy the travel-sized container once. You can then keep reusing it like this every time your product runs out.


Remove the product from the bigger container by continuing to twist it up until it pops out.


Then, place the product into the smaller container and start twisting it down.


(You may need to press the top of the product with your thumb to get the threads to catch and pull the product down.)


Sometimes, the product is still sticking out the top, but that's okay. As long as it is securely screwed into the container, it's usable.


Don't worry if the lid doesn't go down all the way. It will after a couple of uses.


Anyways, that should save you a little space!

The End!


Sunday, June 18, 2017

Refashioning: Moschino Inspired - Lips and Eyes Embroidered Dress with Gems

So, I've been on a Moschino kick recently. I love the graphic patterns with simple silhouettes.

I also really like me a good lipstick print.

Here is a Moschino dress with lips all over it:


I'm not really a fan of the cigarettes, though...


Here is a Love Moschino lip print dress: 


This one isn't Moschino, but I just really like the silhouette and the print:


Okay, remember this dress from my last post? Well, anyways...I was thinking about how the facial features, while seemingly random, have all been placed in the accurate places to create faces. I found this inspiring, and I have been itching to sit down at my embroidery machine to recreate this effect.


Okay, so here is my project. First, I found this Nanette Lepore blouse at Goodwill. It was at Goodwill because it has several gems missing from the shoulders.


You can see the missing spots here.


The gems were too good to pass up, so I paid my dollar for this shirt, took it home, and started cutting!


Scene two: Enter the fifty-billionth little black dress that I own. It's H&M and also from the Goodwill dollar rack. I have another fit'n'flare black dress that is similar to this one that I end up wearing instead; however...I didn't want to give this one up! It fits and I like how it looks on me, even though I never wear it....

Result: this dress would make an excellent canvas for my embroidery machine!

(Even if you don't have an embroidery machine, this post may give you some ideas on revamping clothes that you already own.)


I wasn't exactly sure how I wanted to situate the embroidery. I just knew I wanted it to pretty well cover the dress sort of like a print would. Therefore, I ironed as much stabilizer onto the wrong side of the dress as I could. By ironing the stabilizer all on at once, I could then "power through" and embroider to my heart's content without stopping. (I also didn't have to keep plugging and unplugging my iron and waste energy.)


I started with the front pocket on the bodice. It used to be a functional pocket, but...like I'm ever going to put anything in it! So, I didn't mind that I embroidered the pocket closed. 

Incidentally, all these embroidery designs were ones that I found for free online while Google searching.


Then, I added some tiny lips and an eye (to mimic the "almost faces" of the Moschino dress above).


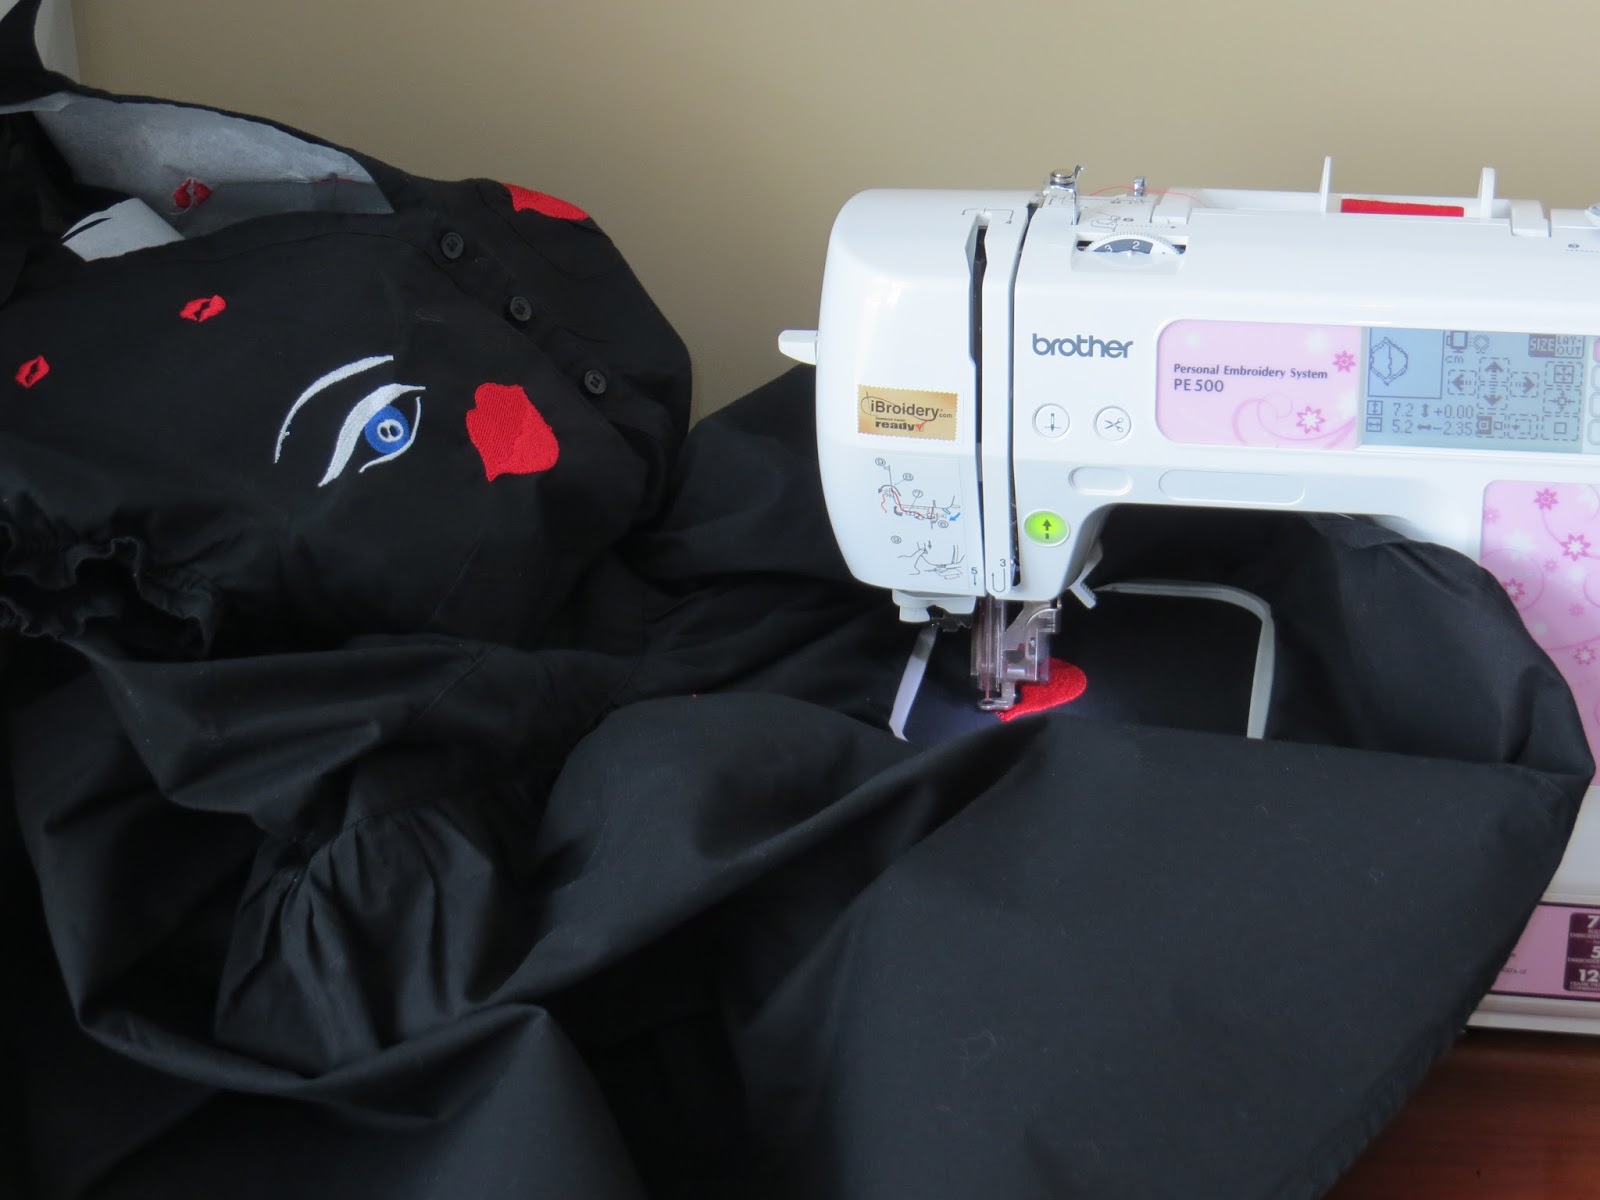
My embroidery machine at work.


So, the embroidery took hours. I had to individually stitch every one of the lips separately. The tiny lips were nice. Because they were so small, I could stitch three to five of them in one hooping, but I still had to plan them out one at a time. It took a LOT of work and a lot of babysitting. If you have an embroidery machine, you know what I mean. You would like to just set the design, push "Go," and walk away, but it's not as simple as that. The thread likes to randomly catch and break, and it even broke one of my needles! So annoying. Oh well, it's still super fun.


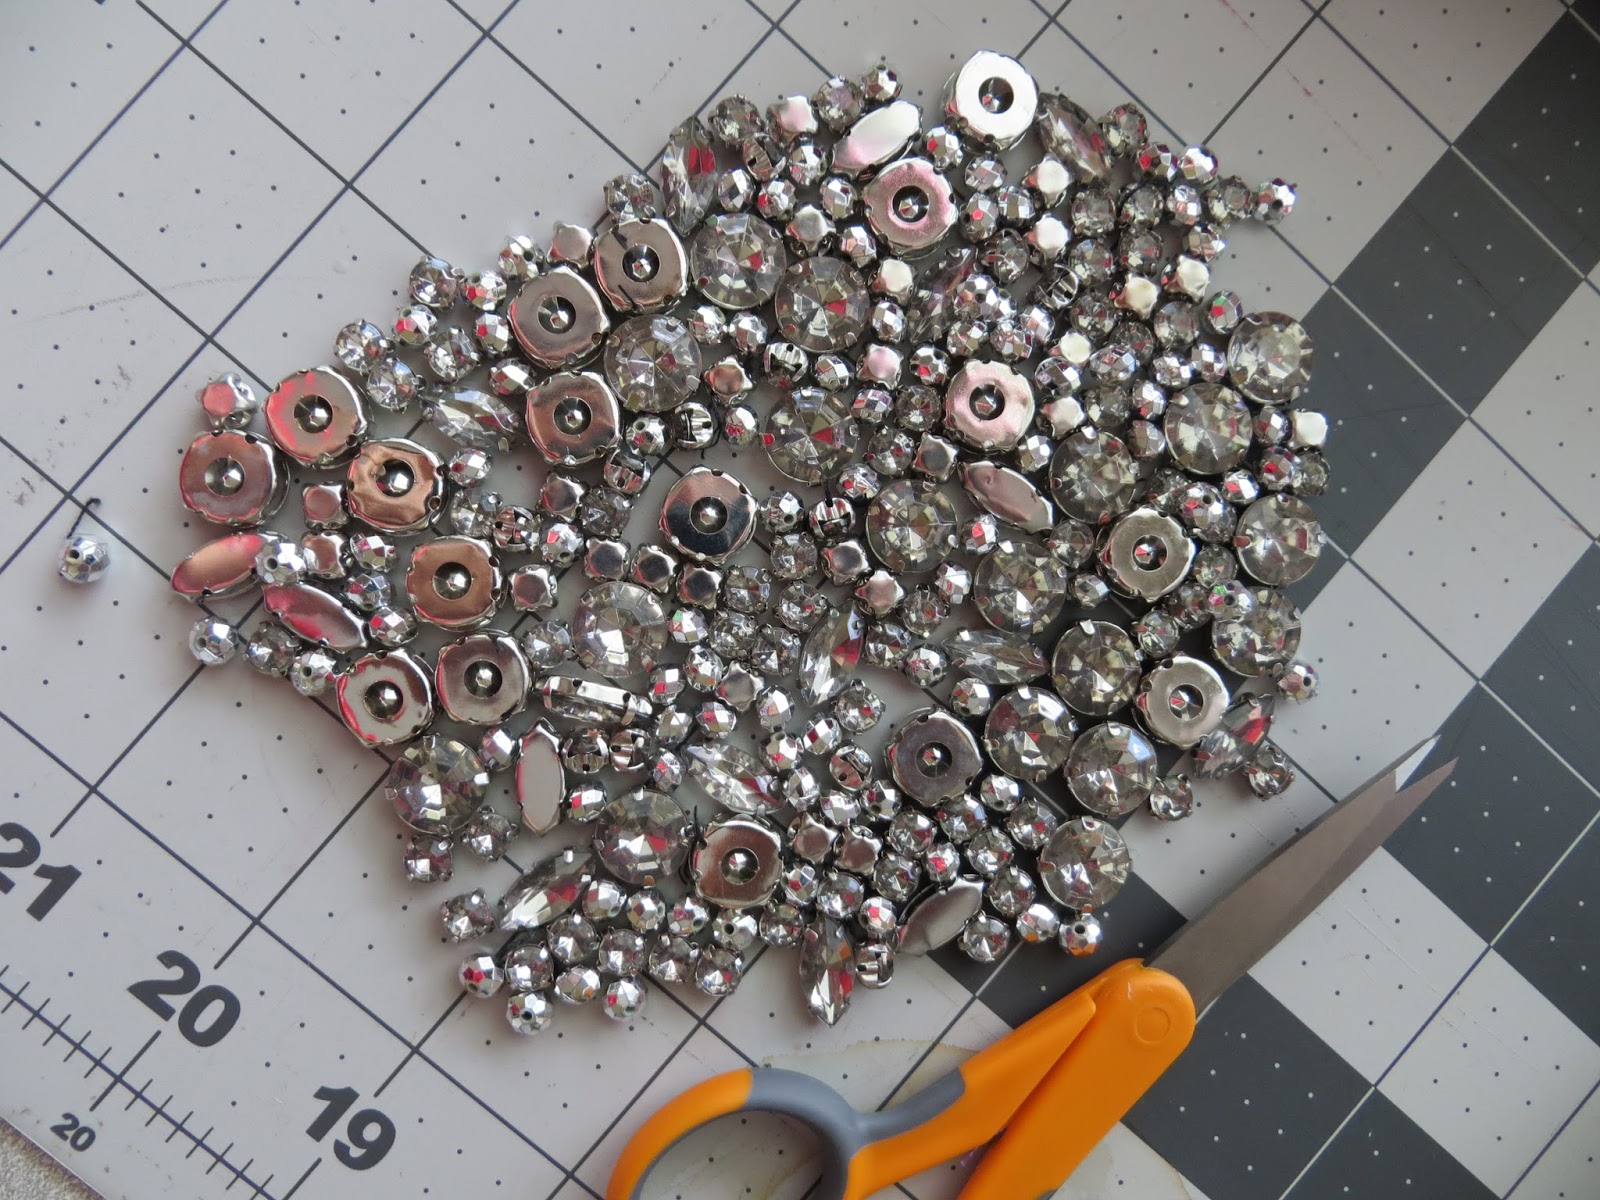
While the machine was embroidering, though, I did have enough time to cut all the gems off the first shirt I showed you.


Skipping way ahead, here is the finished dress! (Almost)


Here is my little "couture" part. I hooped each section in a handheld hoop and added gems to my designs, just for a little something extra....


(This one was a mistake! I could have died!!! I wasn't paying attention and accidentally stitched these bigs lips UPSIDE DOWN!!!! What was I thinking!? Anyways, pulling out all those hundreds of stitches wasn't happening, so instead I took this marquis shaped gem and sewed it on the bottom of the lips. You probably wouldn't have noticed if I hadn't told you.)


I didn't add any gems to the back for comfort reasons, but here are close ups of the embroidery on the back.


Here is the finished dress! Not bad for some Goodwill couture!


The End!