Showing posts with label Blanket. Show all posts

Thursday, June 22, 2017

Refashioning: T-Shirts and Socks into a Quilt. . .Bonus: Hair Tie Elastics

Who would make old socks into a quilt???? Well, I'll explain myself in a second. Let me start with the T-Shirts.

If you read my last post, you would know that I made thirty of my old T-Shirts into a quilt. Well, I had a few more. . .And these ones had emblems on them that were too big to fit into my square pattern. You can see below that they would only work in elongated rectangles. This required a little more forethought as I needed to plan out how they would lie. See, unlike the squares, they weren't all the same length, so I had to configure them so that they would fit into an even shape on all sides.


Then, I sewed the majority of them into five strips. (And then I sewed the strips together, but I didn't take a picture of that step.) Like last post, I doubled each piece with not only the front of the shirt, but also the back. (You can see why if you go here.)


All right. Now here come the socks. See. . .I lived in South Korea for three years. In Asia, you can buy the cutest little ankle socks on the street for $1. Needless to say, I bought a bazillion. They were so cute, but I don't wear them anymore. Some of them I never wore. But they are so cute! I didn't want to just throw them away! So, I thought I would add them to the bottom of my second T-Shirt quilt. Yes, I washed them a few times before doing this!!! Don't worry!


First, I cut the toes off. . .(And the heels and ankle bands.)


Then, I turned each sock around and cut up the middle. Because these socks were much thicker than the T-Shirts, I left them at one layer.


Then, I matched up the folds and sewed them all into strips like this.


Then, I sewed the strips together.


Then, I added them to the bottom of the quilt top. (I did measure them all out precisely of course. I don't just do things willy-nilly!)


Okay, here's the part I didn't show, but just explained in the last post. I laid my jersey backing fabric down first (very important to use jersey and not woven), and then laid my batting down. I was running out of batting at this point, so you can see where I've pieced it together.


Then, I laid my quilt top down and trimmed my batting around the outside of the quilt top, but within the backing fabric. 


Then I folded the backing fabric over the batting and pinned it through the quilt top and through all the layers. 

I sewed the backing fabric in place around the perimeter of the blanket.


Then, I pinned down my columns at regular intervals and did the actual quilting step. (Again, read the other post to see what that means.)


Here is the finished quilt.


Okay, last thing...I saved the prettier ankle bands of the socks to use for hair ties! They make the best hair ties because they don't break your hair!


The End!


Refashioning: T-Shirts into a Quilt

Making T-Shirts into a quilt was really popular a few years ago. Everyone was making them and it was revolutionary. Well. . .I may be a day late and a dollar short, but I still had a bunch of T-Shirts that I wasn't wearing, yet didn't want to get rid of, so. . .whether it's in vogue or not, I still did this project! I did do it a tad differently than the norm, so read on to find out how.


I work for my church in the office. Sometimes, I have to make these booklets with plastic binding. Well, I accidentally messed up two of the bindings, so instead of throwing them away, I took them home, taped them together to make a square, and used them as my quilt pattern.

This is how I cut my shirts out: I laid the pattern on top of the emblem of each T-Shirt, and just cut around it--all the way through each shirt--through the front and back at once. This made two pieces per shirt.


I kept cutting until I had cut thirty shirts. I had sixty squares when I was done.


Instead of throwing away the back pieces of the shirts, I actually kept them with their corresponding fronts as I sewed all the pieces together. Why did I do this? Two reasons: (1) Not all shirts were the same stretchy-ness. Some of the shirts stretched a lot more than others. Keeping an extra layer with every piece sewn added some body and heft which gave the whole project more uniformity. In fact, I actually traded around the backing squares on some of the stretchiest T-Shirts. (2) the extra layer added an extra level of warmness. (It also made the finished blanket 25-30% heavier, so if you want a lighter-weight blanket, don't do this. However, if you skip this step, make sure all your T-Shirts have the same stretchy-ness.) You can see my layers in the picture below. I used a simple zig-zag stitch with a wideness of 3 and a closeness of 1.5. The reason I waited so long to do this project was because I was hoping to have had a serger by now. Oh well, I don't. Anyways, the zig-zag stitch worked just fine!


I sewed them in five columns of six squares. Then I sewed the six squares together. I didn't use pins because they were all the same size squares. However, I only sewed a few inches at a time and made sure that all my seams matched up as I went along. Slow and steady wins the race!


I chose this baby blue/green jersey for the backing, simply because that was the only jersey I had that was wide enough. If you do this, make sure you use a jersey backing cloth as well. It will look and feel really weird if you use a woven cloth, that doesn't stretch, behind T-Shirts that do stretch. If all you have is woven, then you will need to iron on some non-stretch interfacing behind each of your T-Shirt pieces before you sew them all together, or at least before you sew all the layers together.

 Skipping ahead. I laid my backing cloth down first, then put my batting down, then laid the quilt top down over that. I trimmed the batting and then folded the backing cloth over the batting and connected it to the top layer with pins--pinning through all the layers at once. You can't really see it in this picture, but if you zoom in, you can see all the pins around the outside.


Once I sewed all around the quilt (and mitered the corners), I pinned through all the layers at the intersections of each T-Shirt piece. You can see what I'm talking about below. See how the pin goes through the corners of the white, yellow, green, and orange shirts? I then rolled it all up, and with the roll starting in my lap, I started feeding all these intersections through my machine, back tacking at just the intersections. This is a very necessary step because it keeps your batting (and everything really) in place. Little known fact: This is actually the act of quilting--when you sew through all the layers of a blanket to add warmth to a blanket, and to keep all the layers in place. (Some people think that quilting is when you sew a bunch of pieces together, but that is actually called "piecing" to make a quilt top.)


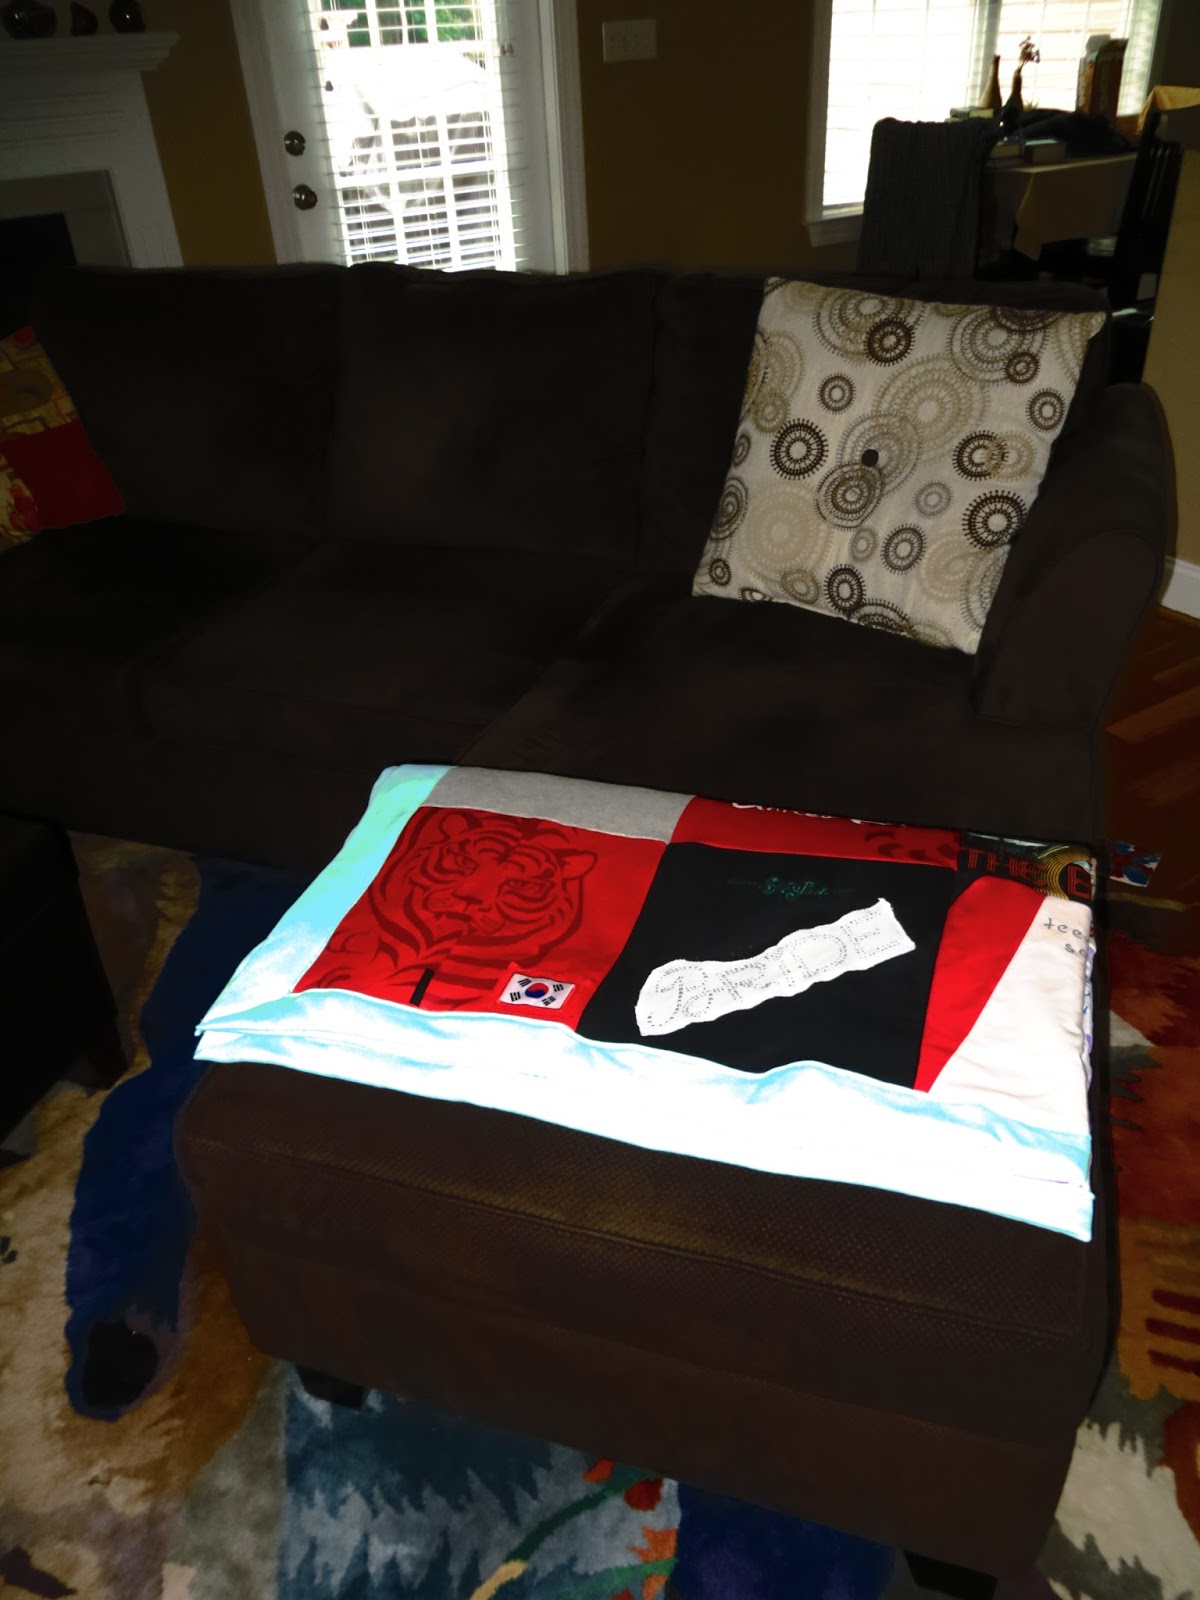
The finished quilt. Now I can keep all my sentimental T-Shirts that I never wear without them cluttering my drawers!


The finished quilt on my couch.


The End!


Monday, January 6, 2014

Make A Pillow/ Blanket/ Bag Playset for a Baby Boy....and a Headband for Mom

So. . .I bet you thought I was lazy and didn't do anything blog-worthy over the holiday! Well, here's one of the things I did.

About a week before Christmas I came across this piece of really cool Michael Keaton Era Batman fabric at a thrift store:


As some of you may know, I am the proud owner of a new nephew, so I knew I needed to make something for him out of this. The piece of material was about 60"x45". (I'm not even kidding when I say that the man behind me in line at the thrift store, who looked like Santa before his hair turned white, gave me the money to buy it! It was destiny!)

The problem is that there are very few cool sewing projects to make for young boys. I Googled and Pinterested for about an hour and then just gave up and did what I had in my head to begin with. This project took about an hour from start to finish. I cut the top 12 or so inches off the top and turned the cut portion into two pillows (filling courtesy of an extra bed pillow we had lying around). Then I folded the remaining 30ish by 60ish piece of fabric in half and made a blanket. I left two holes in the sides and inserted parachord around the perimeter of the blanket and that way it could be both a blanket with pillows:


Or gathered up it could be a bag with pillows in it for easy transportation:


I like this project because it's really gender neutral and can be used by any child for years and years, not just the cutesy newborn phase. (Is it wrong that I can forsee him tying this to a stick and pretending to be a hobo?)


I had a few inches left, so I made my sister-in-law, a super-heroine in her own right, a Catwoman headband. (Sorry, I wasn't wearing makeup, so...the top of my head is all you get!)


The End!