Showing posts with label pink. Show all posts

Tuesday, September 20, 2016

Make Your Own Reusable Hot or Cold Himalayan Salt Spa Pack

Today, we are going to make spa packs! Who's excited?

A few months ago, my husband and I went to Seoul. I lived there for three years, and we had a week of vacation to burn before our Thailand mission trip, so I begged and begged and we went. I wanted to show him around! Anyways, I took him to the Dragon Hill Spa (featured in the show "Better Late Than Never"). Our favorite sauna there was the salt sauna. It had salt rock built-in to all the walls and little spaces that looked like big sand boxes of pebble-sized pink salt that you could lay on top of with a blanket. 

Salt has lots of amazing health properties--one of which is that it gives off negative ions when heated. You can google "negative ions" to find out the benefits, so I won't bore you with that. It also has detox properties. You can google that too. There is controversy over whether this stuff is legit. 
Alls I can say is, it works for me, People!


As soon as we got home, I found a really good deal on 20 lbs. of medium sized pink Himalayan salt on eBay. I was going to recreate the spa!

This is how to make reusable hot/cold salt packs. 

(I realize that Himalayan salt can be expensive, so you could also use rice or beans to do this, but you won't get the controversial negative ion properties. Just the hot/cold properties. Don't use table salt. That's just stupid.)

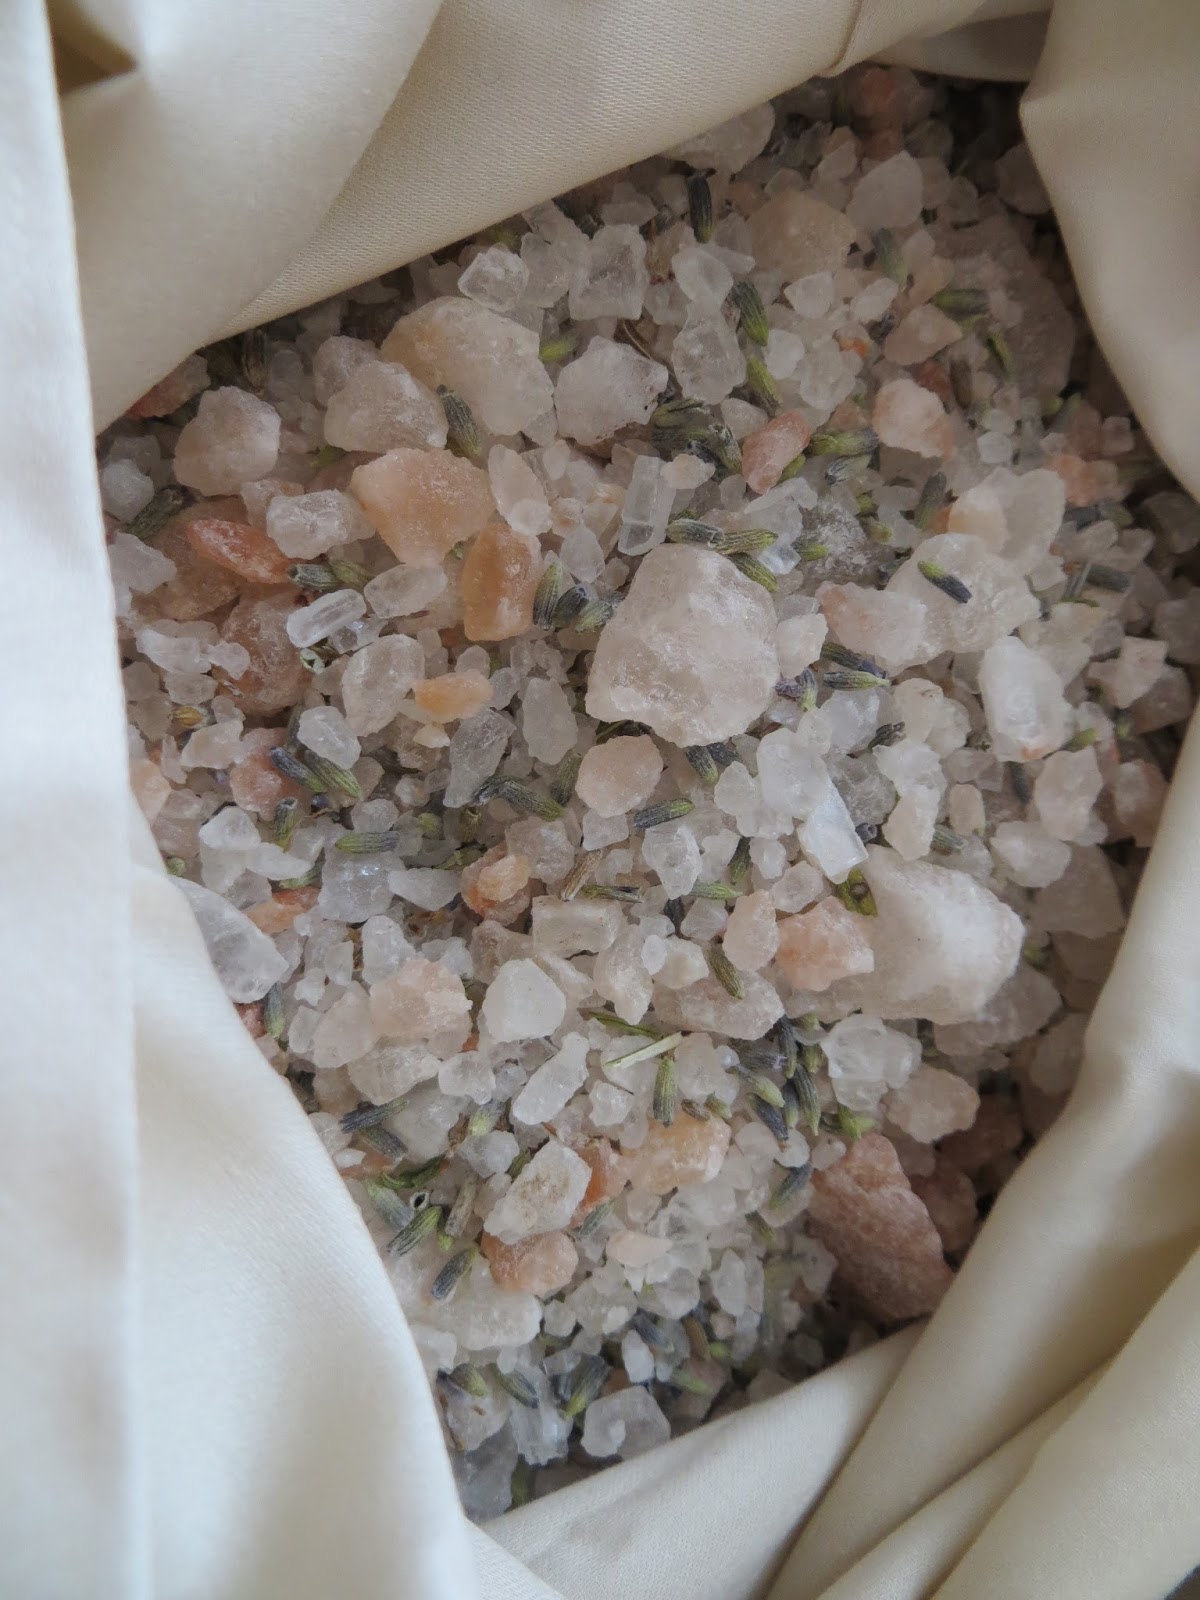
This is what I used: pink medium-sized Himalayan salt and a red solo cup for measuring...


...lavender...(You don't have to use this. I just had way too much from the last time I made soap.)


...a pillow case...(Or you can just sew your own in the size of your choosing. I just had these and wasn't using them.)


First off, you need to turn your pillow case inside out. Then, add three red solo cups of salt to your pillow case.


Then, add the lavender (if you want to or have it).


Then, shake it up so it mixes.


Next, hold the pillow case by the opening and shake the salt to the bottom. Lay the pillowcase on the floor and pin it through the middle like this. The pins are pointed up. 


Next, roll up the open side of the pillow case like this, pick it up by the roll, and take it to your machine.


You can see the roll on the right side.


Once you have that seam created, go back and make another seam right next to it. This will ensure that the salt stays sealed inside the fabric.


Next, pick the pillowcase up with the seam you just created in your left hand and the bottom seam of the case in your right. This will make all the salt dump to one side. Then pin this area in quadrants like the picture below. It helps to pin the middle first and then pin the other two areas. I put extra pins around the bottom quadrant to keep the salt from escaping too much during sewing. (Salt is essentially a rock and can break your sewing needle.) Pick it up the way you laid it down (left hand on middle seam, right hand on bottom seam) and take it to the machine.


Start on the side farthest away from the salt, and do it like this: Start sewing about two inches from the middle double seam. Sew down a few inches and stop. Then, pick up the sewing foot and move the fabric down a few inches. Start sewing again. Stop when you are about two inches from the end. Make sure to back tack each time. (Look at the next picture to see what this means.)


So on the right of the sewing machine foot, see that broken line of sewing? That's what I was describing above. Those gaps will allow the salt to shift inside the bag. 
Next, sew the middle line, but make sure to sew a broken line there as well.


So, this picture is backwards, but you can see the two broken lines and you can see that the salt is reservoired (Is that a word? No.) into the pinned area. Next, take all the pins out, pick the case up by the "salt end," and shake the salt all down to the other end.


See how the salt is all shaken to the other side now? Then, pick up the case by the former "salt end," and flip it over.


When it is flipped, pin the last quadrant with the pins pointing to the middle seam and away from the bottom hem.


Next, sew one last broken line.


Next, shake your pillow case until you can feel salt distributed evenly in all four quadrants.


Next, grab the open side of the pillow case and turn it back right side out. Make sure the corners of the open side meet the middle seam like this. This is important. If you don't make your pack from a pillow case, make sure you make it with at least two layers of fabric. Salt gets kinda powder-y and it's better to have two layers to ensure you don't get dust everywhere.


Then, pin both seams together and sew them in place.


You're done!


NOTE - It is reusable. You can heat it in the microwave or put it in the freezer over and over. The one note of caution I have is not to get it wet because salt will combine and harden in a stiff unpleasant shape. It can also melt away if you have it in too much water. If you do happen to get it wet, lay it out in direct sunlight for a few hours so it can dry out. Make sure to break up the damp area so it doesn't harden into one rock-hard blob. 

You may think, "Why don't I just make it water proof?" That's fine except the whole point of using salt is for it's properties, and that requires porous fabric.


I got all creative and bought a discounted massage/heat mat on eBay. I laid a few pillow case packs on it. So nice and relaxing! I can really tell a difference. If you don't want to invest in a mat, you could always just make a few packs, put them in the microwave for a few seconds, and then lay on them. . .or cover yourself with them. Whatever you want! Get creative and go relax!


The End!


Tuesday, June 3, 2014

3 Yards of Jersey Fabric Becomes Yoga Pants and a Maxi Dress!

I am a Type 4 with a secondary 1. My least present type is Type 3; however, it does show up in two ways: shopping savvy, and practical efficiency. This blog post is an example of that efficiency. I decided to post it in case it helps someone else think through their sewing planning.


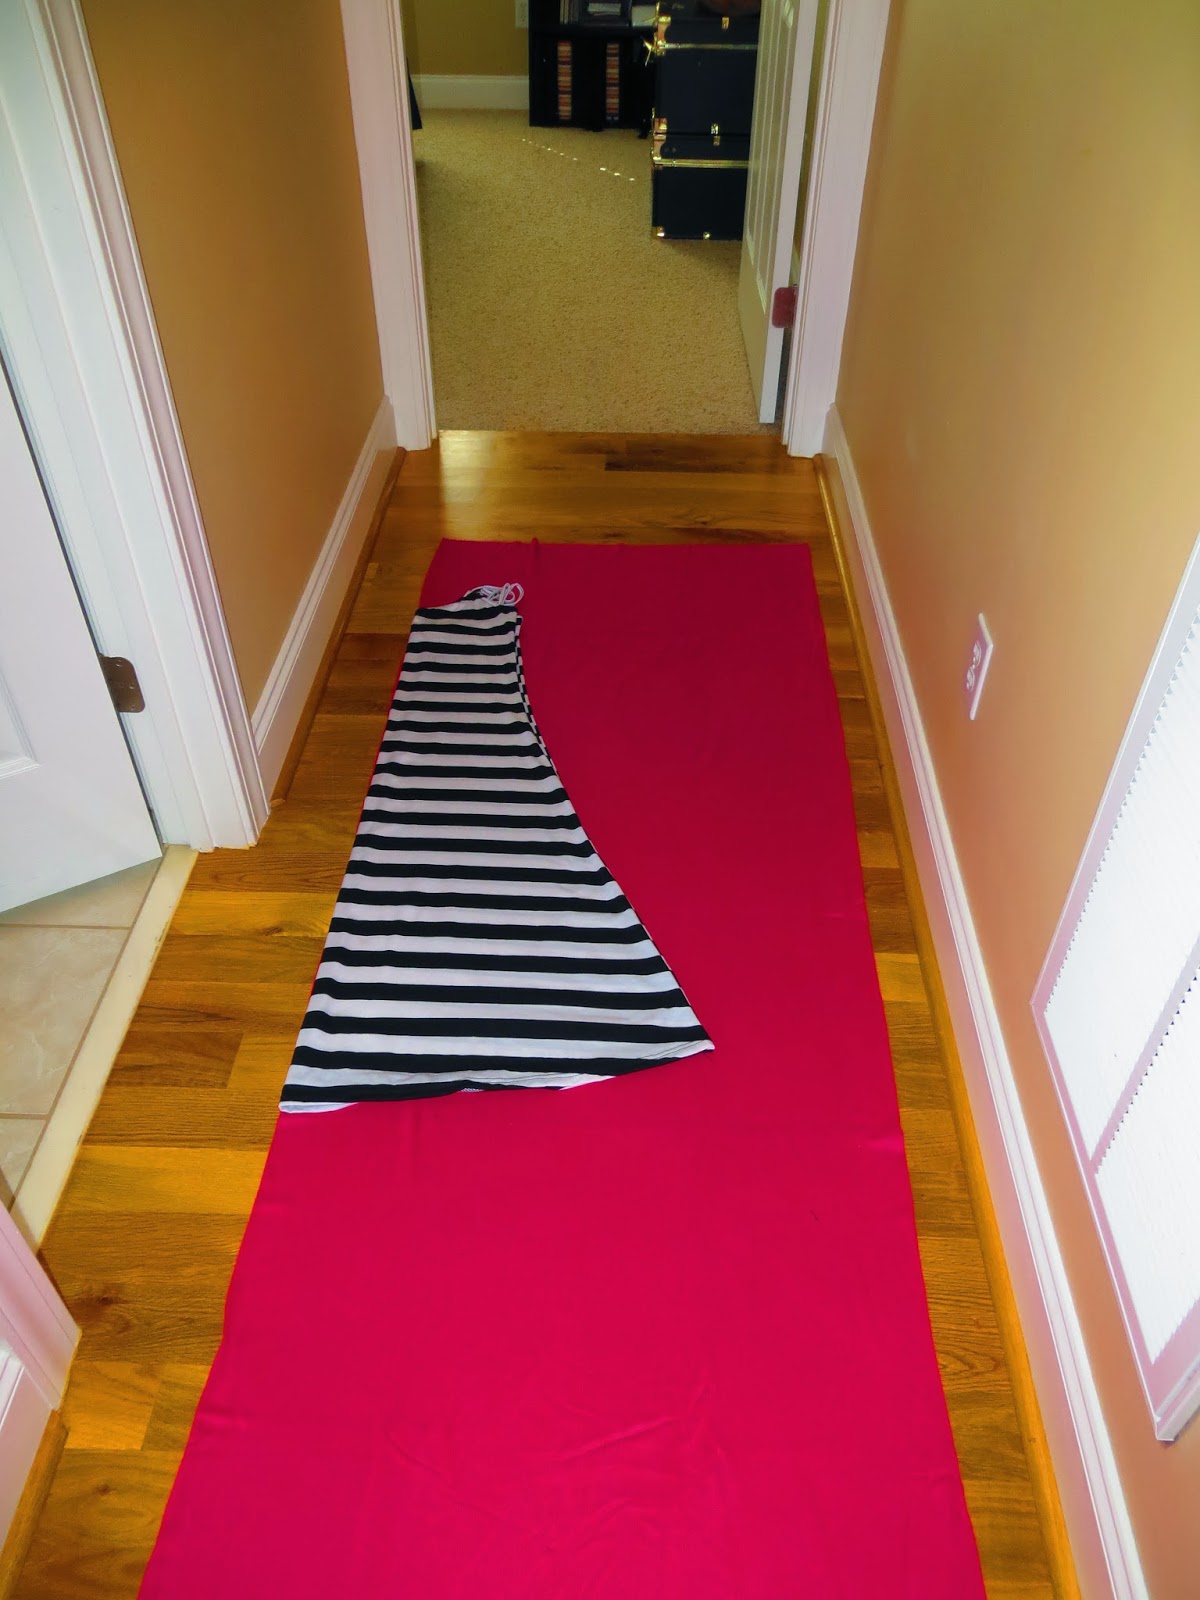
The first thing I made was a maxi dress. I laid down a maxi dress from my closet and cut around it. An advantage to doing this is that you don't have to pin anything. Fabric is much heavier and more flexible than paper patterns that need to be pinned. If you notice the empty fabric right next to the dress is the same sort of triangle shape, so I flipped the maxi dress over and laid it down going the other way. I was really lucky with this fabric because it's a giant tube, so both sides of the fabric are a fold. This means I didn't have to sew a seam up the back of the dress. A back seam isn't the end of the world, so if that's what you have to work with, do it. I made the straps out of scraps.


Then with the bottom half, I folded it in half vertically and laid some yoga pants on it. I cut around those as well. I made the top waist band out of extra scraps.
**NOTE** If you do this, make sure to unfold both pieces and cut the waist hem lower in the front on both legs. This keep the waist higher in the back to allow for your butt, and keeps the pants comfortable in the crotch when sitting.


Here is the dress. 56" long.


And here are the pants. 37" inches long.


The End!


Friday, February 14, 2014

Christopher Kane Spring 2014 Inspired: Modification: Raglan Floral Shirt from a 70s Shirt and a Mini Dress

Sometimes you find something so gross and tacky at the thrift store that you can't not buy it. Case and point: The butterfly collared floral wonder below. I just couldn't pass it up. That's not just a painted or stamped floral pattern. Rather, it's a compiled photograph of flowers! How cool is that? Also, the shirt itself was handmade, which means not only was someone stylin' like it's 1979, but also she was doing it ON PURPOSE. 

I just felt I needed to buy it, if for no other reason than respect.


A year or so ago, I bought this dress for $6 on eBay. It's actually really well-made and lined. It has this neat little cape-let and epaulet details, and even though it looks repulsive on my body, I just couldn't part with it because of the color.

Do you smell a modification coming together?


Remember that one shoulder cut-out shirt I made here? Well, this new shirt is also an homage to that Christopher Kane Spring 2014 show with the florals and the nudes and the pinks. Skipping ahead a few hours:


I kept the "V" of the neckline as a keyhole detail as you can see above, but did away with the collar. It was a little too groovy for my scrawny neck.


I used some of the lining of the dress as the cuff of the sleeves because it was the same color only shinier. Just a little detail.


The End!


Monday, January 20, 2014

Christopher Kane Inspired - Bejeweled Shoulder Cut-Out Sweatshirt

Marie Claire's February 2014 magazine featured Drew Barrymore wearing this Christopher Kane sweatshirt that retails for $3045!!! (No doubt because of the jewels on it.)


The cut-out is cool, but kind of really big. I liked the idea though.


It's kind of a specific color, though. Sort of nude pink. I had a skirt in my closet that I never wear because it's made for someone without hips, but I never got rid of because I love the color:


It took a lot of planning, because the fabric was REALLY limited, so I couldn't make any mistakes. I had just enough material to make this:


As you can see, the hole is smaller. I just felt it was more tasteful.


I thought about putting a necklace around it, but I didn't really have anything that would go, so I used pretty buttons instead.


This is all that was left of the skirt!


The End!


Thursday, October 17, 2013

Breast Cancer Awareness Jumper - Pink and Tweed

For some reason, the colors aren't coming through on this one the way I'd hoped. Anyways, I bought a yard and a half of this sort of brown and pink cotton tweed a few weeks ago. I've had to go to work a lot this week, so I had no time to do anything with it. Today I had off, so I decided to make something with it.


You can't really tell, but it's tan and black together with a light pink stripe going one way and a bright pink stripe going the other way. I wanted to make a jumper with pockets to wear with this light pink long-sleeved sweater/shirt that I have.


The side seam patterns match up and the front bodice stripes are exactly off center to the waist strip in the front and the back.


It has pockets!


Aaand then my camera ran out of batteries. Consider yourself aware.

The End.


Tuesday, September 24, 2013

Chanel Inspired: Argyle Skater Outfit

A few days ago, my friend and former roommate, Brandy McNeace gave me a piece of this pink and grey argyle sweatshirt fabric. It was about 30" x 60":


It made me think of those Scottish Chanel dresses like this one:


It also made me think of this little skater outfit in a Clark's ad that I cut out a few months ago and really liked for some reason:


I also have been seeing a lot of dropped shoulder patterns for fall and winter lately like the one in this picture from October 2013's Marie Claire:


So I made this. It went really fast. I think pattern, cutting, and construction took about an hour:


I didn't do much to keep things symmetrical since I had to be a bit utilitarian within the dimensions of the fabric. That's also probably why I got it done so fast. Symmetry adds a lot of time to construction. The grey bands around the bottom hem of the shirt and the sleeves comes from that green skirt I used to make these couple shirts.


I did something different with the sleeves. It is sort of a modified batwing. (Most batwing shirts are constructed of one piece of fabric.)


Also, it is two pieces: a shirt and a skirt. This way they can be worn together or separately. (The elastic comes from the grey skirt I used to make those same couple shirts.)


The End!