Showing posts with label clean. Show all posts

Friday, May 11, 2018

Refashioning - Dying a Trench Coat .... Bonus: Get a Facial and Clean Your Shower Curtain

So...I bought this Candies trench coat a few months ago at the thrift store.


It's really nice and was in near perfect condition. The only thing I didn't like about it personally was the color. This pale pink color washes me out like none other.


Well, I decided to put it up for sale on eBay and Poshmark where it has been sitting for as many months. People "liked" it and added it to watch lists, but no one ever bit. I even took it to a consignment shop and they didn't take it. I was so confused. It's super stylish, a great fit, never goes out of style, etc. If the color had looked good on me, I would TOTALLY have bought this! I mean...the color looks terrible on me, and I still bought it! Ha!

Anyways, people don't make sense. . .

After months of waiting, I knew what action I should take: Dye it hot pink!


So, I downloaded the Hobby Lobby app and pulled up my 40% off coupon, drove to Hobby Lobby, found "Fuchsia" RIT dye and bought the 8oz bottle. (Regularly $4.95, but between $2-$3 with my coupon!)


According to the directions on the bottle, you are supposed to use 1/2 a bottle per pound of fabric with three gallons of water--the hotter, the better. The coat weighs only one pound, but I wanted the color to be as saturated as possible, so I decided to use the whole bottle of dye.

Also, the coat is cotton, so the bottle suggestions for organic fabric was to add 1 cup of salt to the dye bath. Also, it said to add 1tsp of dish detergent.

So. . .I know that some people buy a huge cauldron sort of pot for dying, but. . .when you think about the clean up, and the fact that the item has to be rinsed and re-rinsed after the dying, plus the fact that water splashes, plus the fact that I would have to store said cauldron somewhere when I'm not using it. . .

I dismissed that idea and chose to do the deed in my washer. 
(I've done this several times before, and I can tell you, it works great!)


So, here is my step-by-step, tried-and-true method.

First of all, fill my kettle with as much water as it will hold and turn it on so the water boils.


After about a minute of letting the water boil, I started my washer. I put it on "small" load size and "hot/cold" for water temperature. While the water was filling up, I added the cup of salt, the teaspoon of dish detergent, and the bottle of dye. I actually rinsed out the bottle of dye and dumped it into the rest of the water. I did that a couple of times until the water came out of the bottle clear. (This is to utilize as much dye as possible, and also reduces drip potential when walking it to the trash can.)

I took a long pole and swished the mixture around until the salt was dissolved and all the ingredients were well incorporated. At that point, I turned the water off and added the trench coat. I didn't let the water fill up more than necessary, because too much water dilutes the color. 

[It helps to spread the garment out long-ways and drop it down in the washer in a circle (versus balling it up and throwing it in). This helps the dye adhere more evenly to the garment.]

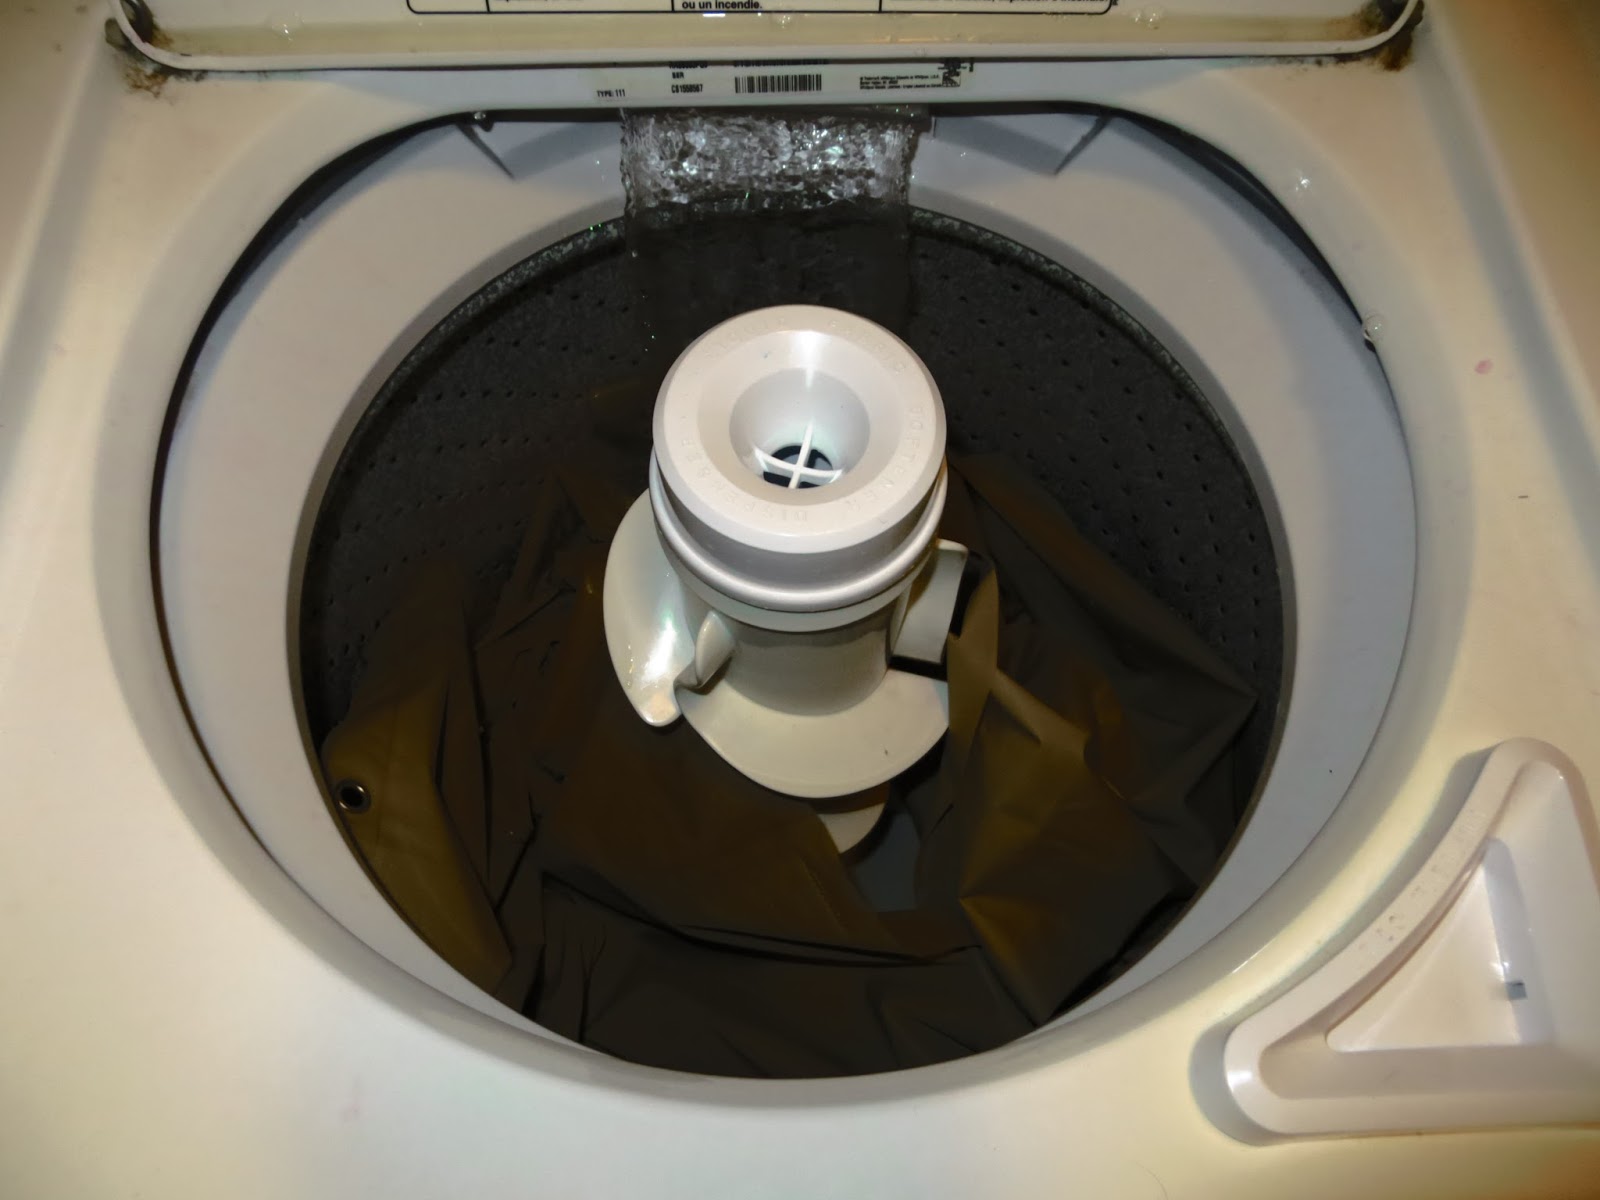
Once the water in my kettle started boiling, I poured it into my washer. This hot water made the rest of the water just that little bit hotter to really bring out the color. (I've tried using just the hot water in the washer itself, and it's not hot enough to create saturated color.) Then, I took my pole and started pushing the garment down under the water. You can see in the picture below that there were air pockets in the clothing that made it pop up above the water. If you walk away and don't push them down, those pockets will not get dyed consistently with the rest of the garment, so stirring and pushing is really really necessary. This is a 30 minute labor of love. (I've learned this the hard way.)


So. . .30 minutes is a long time to stir and push, and I hate wasted time, so I decided to walk away for a second and put on a face mask. These paper masks take 20 minutes to work, and I'd been working for ten minutes on the coat already, so. . .voila! 


So, with the mask on, I came back to my washer and stirred and pushed some more. 

Another tip: maybe once or twice during this stirring step, take your pole and pull the garment out of the water and then push it back down the other way, if you can. This just helps the dye get into any hidden folds that were created when the clothing was first put into the water.


Okay, so after the 30 minutes of stirring and pushing, I turned my washer back on. I used the remaining water to rinse my pole off so I wouldn't have pink droplets all over my wash room.


While the washer worked I dried my pole by resting it on an old towel.


This is the coat after the dye bath.


Okay, but I wasn't done. The directions say after that first wash, the item needs to be washed again, in warm water this time, with a mild detergent. This is for two reasons: (1) to set the color so it won't bleed onto other clothing the next time you wash it and (2) to help clean your washer of residual dye.

I didn't have mild detergent, but I did have some Oxi booster which is good for bringing color out in clothing, so I used a tiny bit of that.


This is how much I added.


I also sprinkled a little more salt into the wash since salt helps lock color into organic threads.


Then, I added my coat again.


Okay, so after the washer had run its course, my garment was nicely dyed; however, the inside of my washer was still a little messy. You can see pink droplets all over my washer lid here.


Enter: bleach and one more wash cycle.


So, I ran one last small load with hot water, and I slowly poured bleach over the stains on the lid. This bleach ran into the washer. If you do this, you can run this as an empty load, if you want. . .but I HATE wasting things, so I took this opportunity to add a shower curtain to the bleach water. Why? Because this is the best and easiest way I've discovered to wash a dirty shower curtain. Why spend hours scrubbing off the soap scum, calcium deposits, and whatever else when you could just throw it into a washer with bleach and be done with it!? I've done this method since college and it works like a charm!




After the curtain cycle, you will notice that my washer is squeaky clean and I barely had to do anything to get it there! Plus, I have a super clean shower curtain to boot!


Oh! Before I forget, here is the finished trench coat! 


And here is the "Before". . .


And here is the "After"!


The End!


Friday, October 14, 2016

Sunday School Craft - Jesus Healed 10 Lepers

Okay, I totally ripped this one off from Pinterest.

You just need paper (I used cardstock), and crayons.

On Pinterest, they had hand-drawn/written the entire thing. All I did was type the wording into a Publisher document and then trace my hands around the words. You are welcome to print these out if you need them! I did "Jesus Healed 10 Men..." on one side, and then "...but only 1 said 'Thank You!'" on the back.


Just so's you know....All the parents LOVED this one, and I was like...uhhh...What about those other crafts that I really worked at??? 

Haha! Anyways, it's a cute idea! :) And it wasn't mine!


Front:


Back:


The End!


Wednesday, September 21, 2016

Sunday School Craft - Elisha and Naamon the Leper

For this craft you will need: cardstock paper, regular paper, crayons, cups (clear if possible), tissue paper (optional), scissors, plastic knives or Popsicle sticks, glue, and tape.


Here is my Naaman craft:


A side note about these crafts: I'm trying to work with what we already have on hand at the church, so. . .for instance, I couldn't find any popsicle sticks, so I taped all my little Naamans onto plastic knives ahead of time. Hopefully, the little kids not beat each other with them. . .

Although the little creatures who "make" these crafts cannot read, I still think it's important to include key verses from the stories so that parents/caretakers can read them or look them up later. You never know, these crafts may get tossed into a corner to be found years later when the before toddler can now read. It may change his or her life. You never know. . .But God's Word never returns void, right?

The verse around the cup is 2 Kings 5:14— "So Naaman went down to the Jordan River and dipped himself seven times, as the man of God had instructed him. And his skin became as healthy as the skin of a young child, and he was healed!"

Here are my templates:


I printed all my little Naamans onto cardstock (there are seven on each page), cut them out, and taped them to plastic knives (I did this ahead of time, because the kids in these classes are really young, but if you kids are older, they can do this part). Then, I printed the verses out on regular paper, cut those out and taped them to each cup. Then, I cut a slit into the bottom of each cup. To make my examples, I colored my Naamans, and then I glued different colored pieces of tissue paper to the inside of the cups (the Jordan River was dirty, right? That was Naaman's main complaint.). Then, all you have to do is stick your knife handle down through the slit of the cup. Dunk your Naaman seven times, and then flip him over to show him clean!

The End!


Friday, January 31, 2014

How to Clean Surface Spots Off Suede Shoes

Okay, I actually just figured this one out. I bought a pair of Ugg Clogs at the thrift store today in hopes to make a buck on eBay. However, when I got home to take pictures of them, I realized there were little like...grease drops?...on them? I guess the original owner dropped food or something.


On eBay, the difference between tiny grease spots or none can be $10 or more.

So I got an idea. You could probably do the same with fine sandpaper, but if you are female, you can use an old emery board. Simply sand over the spots, and voila! They disappear!


Ta da! All ready for sale!

You're welcome!


The End.

Monday, May 6, 2013

Make Your Own Conditioning Shampoo

I recently ran out of shampoo, so I thought, instead of buying more, why don't I make some?

All I had to buy was a big 32oz. bottle of Dr. Bronner's Castile Soap, because I had the other ingredients on hand. It is tea tree scented (which my husband says smells like kerosene, but I think it smells earthy. Choose your poison. Dr. Bronner's has scents available in lavender, tea tree, peppermint, and. . .I forget the other one). It was about $12 at a regular grocery store (16 oz. bottles are around $6 or $7), but it will last me at least two years if not longer. Also, I will be able to use it for many other purposes besides just shampoo. Stay tuned!. . .Or just google other uses for Dr. Bronner's.

Recipes online exist for making your own liquid Castile soap from Kirk's Castile soap bars if you want an even cheaper option than Dr. Bronner's. (Unfortunately, I read those blogs after buying this bottle.)

Ingredients:

1. 1c boiling water with one green tea bag added to it.
2. 2T coconut oil (olive, jojoba, argan, or your favorite hair-loving oil)
3. a few ice cubes (or make the water amount 1 1/2c to start)
4. a few drops of essential oil (for scent)
5. 1/3c Dr. Bronner's
6. 1/3c aloe vera gel
7. An empty shampoo bottle (preferably with a pump)


Directions:

1. Bring your water to a boil. Add the green tea bag and let it steep about five minutes, and then squeeze the tea bag to get the most out of it.

2. Immediately, add the coconut oil and stir it till it melts.

3. I added several ice cubes to the mixture to cool it down, because I wanted to make sure that the coconut oil wouldn't harden into clumps at the surface of the liquid, and it never did. If you don't want to add ice cubes, you can just add a little more water.

4. Add the aloe.

5. Add a few drops of essential oil. I used lavender, just because it pairs nicely with tea tree.

6. I added 1/3c of Dr. Bronner's and the mixture fit perfectly into an old shampoo pump bottle.

Simplified directions: Make a cup of hot tea. Add the oil to the hot liquid and stir. Add water or ice cubes. Add a few drops of essential oil. Add the aloe gel. Add the castile soap. Stir and then pour the mixture into a bottle.

Tips:

1. If you add a bit more oil, you won't even need a conditioner afterwards. (Unless you have really dry hair like me, in which case, you can put a bit of coconut oil directly onto your towel-dried hair after your shower.)

2. To use the shampoo, tip the bottle upside down and back upright (don't shake, because it wastes the lather). Put just enough in your hand that it makes a puddle. Rub your hands together until it lathers. Then, rub your lathered hands into your scalp and then work through the length of your hair. Repeat if necessary. (Don't put it straight onto your head, because it won't lather well that way.) Wash it out.

3. NOTE: Your hair is going to be clean; however, it will not feel the same as when you shampoo with commercial cleansers. In fact, you may think your hair is not clean, because it will feel oily to you. It's not. This feeling comes from the fact that cheap chemicals in store-bought shampoos strip your hair, and you have become accustomed to the stripped feeling. You know how when you wash your hands in soft water, they feel like the soap isn't washing off, but actually you are just used to hard water? Same thing. Give your hair a little while to grow accustomed to this change; your oil glands have been working over time for decades to compensate for the drying chemicals in your commercial shampoo.

4. If your hair is extremely oily and/or very fine, I would back off the coconut oil. Play with different hair-loving ingredients to find your perfect formula. Just make sure to use diluted castile soap in there somewhere so you get a lather. Maybe use baking soda instead of aloe if your hair is really oily. . .Things like that.

5. If you want to lighten your hair, add lemon juice. If you want to redden your hair, use red tea instead of green. If you want to darken your hair, add coffee or black tea.

6. This soap will keep for up to 3 months if you put it into a dark bottle and keep it in a dark place away from excessive heat. It might keep longer if you add a preservative, but the point is to have it preservative free, in my book. If you don't use large amounts of shampoo, consider cutting the recipe in half. If it smells spoiled, throw it away.

7. This shampoo costs around $1.00 a bottle to make, and is far nicer than normal "natural" shampoos in the store that cost upwards of $15. If you make your own liquid castile soap, this shampoo will costs even less than $1.00! Plus, companies still put chemicals in "natural" shampoo to extend the shelf life.

8. This formula can also double as a body wash, shaving cream, and is mild enough for a face wash. If you are acne prone, however, stay tuned as I will be posting a recipe for acne-prone skin face wash soon!

Friday, March 15, 2013

Make Bug-Repelling Laundry Detergent!

Let's make our own laundry detergent and stick it to the man!

**UPDATE**(for an even faster and easier recipe, scroll to the bottom!)

Things that you already have:
1. Baking Soda
2. Bar Soap
3. 1/2 cup measure
4. Plastic Bottles/Containers (enough to hold 6 quarts).
5. Cheese grate

Things you might not have (but should):
1. Stainless steel stock pot (at least 12 quarts) with a lid.
2. Essential (or Skin So Soft) oil of your choice.
3. Box of Borax 


Directions:

Step 1: Grate 1/2 cup of bar soap.
Step 2: Pour 1 quart of hot tap water into your pot and heat on stove.
Step 3: Pour in the bar soap shavings and stir till they dissolve.
Step 4: Remove pot from heat.
Step 5: Pour 5 more quarts of hot tap water into the pot.
Step 6: Pour in 1/2 cup of Baking Soda and 1/2 cup of Borax.
Step 7: Drop in several drops of oil and stir.
(I used 2 capfuls of Skin So Soft to keep bugs from biting me!!!)
Step 8: Let it stand overnight.

The End.


It took about 10 minutes total (not counting the night part).


Costs of Things and Where To Buy Them:

1. Baking Soda - $0.50 - Aldi or Dollar General
2. Bar Soap - . . .I HOPE you already have this. . .
3. 1/2 cup measure - Free - Stolen from your mom's house.
4. Plastic containers - Free - If you use old detergent bottles.
(Mine, in the picture below, are from Dollar Tree.)
5. 12-quart Stock Pot - $9.00 - Walmart.com 
(Probably cheaper at Big Lots)
6. (Optional) Essential Oil - Varies in price 
(You don't need anything over $10.00. . .
no matter what the person at Whole Foods told you.)
7. (Optional) Skin So Soft - $16 (I got mine on sale for $10)
- Your neighborhood Avon Lady
8. Borax - $4.00 - Dollar General

Total Price: $13.50 - $41.50 for literally tens of gallons of detergent!


Me, I already had everything but the Borax, so I'm out $4.00!

Feel free to play around with the measurements. My concoction is a bit potent compared to others' online, but that's 'cause I wanted to use the cap from an old bottle of detergent to measure.
**NOTE: The liquid turns almost Jello-like after a few hours, but a simple shake before pouring alleviates this problem.**


**UPDATE** The above recipe is super easy and only takes about 10 to 15 minutes to make, but letting it stand overnight is kind of a pain. Since posting this blog, I've figured out an even simpler, faster, more immediate recipe! Double this recipe to make 6 quarts of detergent in under 5 minutes!

To make 3 quarts of detergent:
1. Pour 1/4c of borax, 1/4c of baking soda, and 1/4c of table salt into a 3 quart container.
2. Pour hot tap water over the mixture leaving a little space at the top.
3. Stir until the powders dissolve.
4. Stir in 1/4c of Dr. Bronner's castile soap ($12 for 32oz. at Food Lion) and scented oil.
(Don't shake!)

Whenever you are ready to use it, simply tip it upside down and back upright to get all the sediment to disperse and then pour the same amount into your washer as before. Don't shake it, because that wastes the lather. This mixture is far more liquid than the other mixture.

**Another note: Neither of these recipes give a very lasting fragrance to laundry, so don't waste too much scented oil. Also, you will get better results if you pour your laundry soap into the washer, turn the washer on, wait for the water to rise a bit, and then add your clothes.