Showing posts with label coconut oil. Show all posts

Saturday, January 16, 2016

Surviving the Daniel Fast: Vegan Chocolate Pudding Cookies!

"Pudding cookies??? ...wait...on the Daniel Fast?...What about *gasp*...SUGAR??" you ask.

Well, stress not, Dear Reader. Read on.

So my husband and I are about to begin week three--the final week--of our 21 day fast, and I am craving cake and coffee like nobody's business...so it's giving me plenty of time to pray...and also to be creative with what I am allowed eat.

"I want cookies!!!" I screamed...(in my head so I wouldn't be mistaken for a crazy person....)

Searching for an eggless, sugar free, gluten free cookie option brought me to a lot of recipes that were haystack-y or nugget-y, but nothing truly cookie-like...so...I decided I needed to offer the world a recipe that did so. I improvised. Since I was improvising, these measurements are probably not exact but are as best I remember them. Makes about 30-36 cookies (depending on how big you make them.)

Ingredients:
1. 3T of ground flax seed
2. 6-8T of water
3. 1/4c of ground tapioca
4. 1/3c cocoa powder
6. 1 1/2 bananas (around 1 cup)
7. 1/3c coconut oil
8. 1t baking powder
9. 1t vanilla extract
10. 1-ish cup gluten free flour
11. 1-ish cup almond milk
12. Nuts (to your taste)

Directions
1. Grind up flax seed in a coffee grinder. Add to mixing bowl with water. Stir. Set aside. (This will become your two eggs.)

2. Grind up tapioca in coffee grinder. Add to flax along with a splash of almond milk. Stir. Set aside.

3. Now preheat your oven on 350 degrees. In a separate small bowl or large mug, microwave your coconut oil till melted. Add the bananas and mash them up. Go ahead and grind the nuts in the coffee blender to give the flax and tapioca a few more minutes to soak up the liquid.

4. Now add the coconut oil and bananas to the mixing bowl along with the cocoa powder, baking powder, and vanilla.

5. Okay so...this next part is just to add flour and milk until the mixture is a nice dough-y consistency and it becomes fairly hard to stir. Add the nuts and stir one more time.

6. Put aluminum foil on cookie sheets and lightly spray them with oil if you want. (The coconut oil in the cookies works well enough to keep them from sticking too badly.) Add small spoonfuls of dough (they will be sticky) and put the sheets into the oven for 10 minutes. (Halfway through, I switched the two sheets on their racks to keep the cookies baking evenly.)

Done!

Notes:

- One thing that impressed me about them is that they came out really really well. Not goopy on the inside, but very spongy on the inside, crispy on the outside. Very satisfyingly cookie-like.

- They didn't spread out all over the pan, but held their shape--rather round. If you like flatter cookies, add more milk.

- They held together REALLY well even though I didn't use eggs. I attribute this to the combination of tapioca, flax, and banana.

- They cooked really evenly and didn't burn on the bottom. I think this may be due to the fact that coconut oil burns at a higher temperature than butter....but I may have totally just made that up...

- You might not want to take these to family/church events because people expect sugar at those things and while the bananas add sweetness (especially the riper they are), it's not what most Americans are used to.

- If you don't like bananas, try adding another fruit that goes well with chocolate like strawberries, applesauce, mango, or peaches...Things with a banana-like consistency when blended. (Not sure if citrus would work because of the acids, but...you can always experiment!)

- You just made cookies with no gluten, animal product, or added sugar (or sweeteners of any kind!); yet packed with fiber, potassium, protein, and skin cancer protecting cocoa!

The End!

Sunday, January 10, 2016

Surviving the Daniel Fast: Vegan Chia Seed Tapioca Pudding and Coconut Chocolates

If you are vegan or if you are on the Daniel Fast, here is a great recipe for some desserts. Keep in mind that none of these recipes use animal products nor sugar, so these probably won't be for everyone's taste.

First of all the tapioca pudding. If you know me I love pressure cooking because I'm impatient. I also like to make things in bulk so I don't have to spend my life cooking. However, I have a sweet yet sometimes finicky husband who doesn't like to eat the same thing every day for very long....so stay tuned after the first recipe for some variations on the tapioca theme. In other words, think of this pudding recipe as a base.

(I'm blogging from my phone and Blogger is being stupid, so I might not have pictures....)

You will need:
1. 1 1/2 cup tapioca. (I used Bob's Red Mill small pearl tapioca)
2. 6 cups almond milk
3. 1 can coconut milk (skip this if you have thyroid or triclyceride issues)
4. Shredded unsweetened coconut
5. Vanilla extract
6. Coconut oil
7. Nutmeg
8. 1/4 cup chia seeds (or you could add more if you're a fan)

Directions

1. Add a tablespoon or so of coconut oil to the bottom of your pressure cooker and melt over med high heat. Add the shredded coconut and toast till a nice brown color. (Amounts are to your taste.)

2. Immediately add tapioca and almond milk. Stir. Turn to high heat. Add coconut milk, vanilla (to taste), nutmeg (to taste), and you will probably have to add a few cups of water because it starts thickening like crazy. Keep stirring like a madman so nothing burns on the bottom of your cooker.

3. Once it starts to boil, lock the lid on. When the pressure indicator pops up, turn the heat down (somewhere around 3) and set your timer for 6 minutes. When it's done, let the pressure come off naturally (about ten minutes).

[Skip to chocolates recipe below while the pudding cooks to save time.]

4. Aaaaaand then I forgot I didn't add the chia seeds, so I put them in after pressure came off. It's probably better that way anyway since they don't really have to be cooked.

Notes: Next time I will only cook the tapioca for 5 minutes because I like them rather chewy and they were just a little mushy.

Several recipes for people who get bored easily (these are still vegan and sugar free):

1. Mexican - Using your "base" that you made above, add cinnamon and just a dash of red pepper.

2. Korean - Add mochi (rice) balls, red bean, and cereal powder.

3. Fruity - Uhhhh....add fruit! Obviously!

4. Chocolate - Add cocoa powder.

5. Pumpkin spice - Add canned pumpkin, cinnamon, ginger, a tad more nutmeg, and allspice.

6. Hawaiian - Pineapple and mango.

7. Peppermint Mocha - Cocoa powder and just a TAD of peppermint extract.

Some other things you could add: peanut or almond butter (has sugar, so do as the Spirit leads), nuts, dried fruit, and....you know....whatever else you feel like adding!

Okay, while your pudding cooks, you can do this fun and horribly messy project!

You will need:

1. 2 parts coconut oil
2. 1 part cocoa powder
3. 3/4 parts unsweetened shredded coconut (optional)
4. Cashews (or other nuts...or not)
5. Vanilla extract
6. Silicon chocolate mold (or just pour it all into the bottom of a container and break it in pieces when you're done.

Directions:
1. Melt the oil in the microwave.

2. Add the cocoa powder, vanilla, and shredded coconut. Stir

3. (I prepped my molds with one cashew each during step one, but you don't have to if you don't want nuts.) Pour the mixture into the mold.

4. Refrigerate.

5. Eat. Keep uneaten ones refrigerated.

The End!!


Thursday, February 19, 2015

Three More Things to Do With Coconut Oil: Oil Pulling, Facial Moisturizer, Leather Purse Conditioner

I love coconut oil. Here are three more things you can do with it:


1. Oil Pulling

You've probably read about this on a million other blogs before finding it on mine. It's been around a while. However, in case you haven't, here goes. This sounds gross at first. Basically, what you do is put about one tablespoon of coconut oil in your mouth, let it melt, then swish it around (WITHOUT SWALLOWING) for 20 minutes. (Be sure to spit it out outside or in a paper napkin in the trash because it solidifies when room temperature and can clog your drain.) Some people say oil pulling is a load of crap and some people say it will cure every disease known to man. For myself, I just know that whenever I ever get a canker sore, I swish coconut oil in my mouth for 20 minutes and it magically disappears. Every time. So...

2. Facial Moisturizer.

You rub it together in your hands and then put it on your face. This works best if you first wash your face normally, put a hot wash cloth on your face for about 30 seconds to open your pores, and then add the coconut oil immediately after. Don't even dry your face with a towel or anything. Just let your face air-dry and soak the coconut oil in. It's antibacterial and has age-fighting hyaluronic acid. This is especially good for people with dry/sensitive skin.

3. Leather Purse Conditioner.

Rub it in your hands. Rub it all over your leather purse (or jacket or shoes or whatever). Instant conditioning and helps your leather items look brand new!


The End...and You're Welcome!

Monday, May 6, 2013

Make Your Own Conditioning Shampoo

I recently ran out of shampoo, so I thought, instead of buying more, why don't I make some?

All I had to buy was a big 32oz. bottle of Dr. Bronner's Castile Soap, because I had the other ingredients on hand. It is tea tree scented (which my husband says smells like kerosene, but I think it smells earthy. Choose your poison. Dr. Bronner's has scents available in lavender, tea tree, peppermint, and. . .I forget the other one). It was about $12 at a regular grocery store (16 oz. bottles are around $6 or $7), but it will last me at least two years if not longer. Also, I will be able to use it for many other purposes besides just shampoo. Stay tuned!. . .Or just google other uses for Dr. Bronner's.

Recipes online exist for making your own liquid Castile soap from Kirk's Castile soap bars if you want an even cheaper option than Dr. Bronner's. (Unfortunately, I read those blogs after buying this bottle.)

Ingredients:

1. 1c boiling water with one green tea bag added to it.
2. 2T coconut oil (olive, jojoba, argan, or your favorite hair-loving oil)
3. a few ice cubes (or make the water amount 1 1/2c to start)
4. a few drops of essential oil (for scent)
5. 1/3c Dr. Bronner's
6. 1/3c aloe vera gel
7. An empty shampoo bottle (preferably with a pump)


Directions:

1. Bring your water to a boil. Add the green tea bag and let it steep about five minutes, and then squeeze the tea bag to get the most out of it.

2. Immediately, add the coconut oil and stir it till it melts.

3. I added several ice cubes to the mixture to cool it down, because I wanted to make sure that the coconut oil wouldn't harden into clumps at the surface of the liquid, and it never did. If you don't want to add ice cubes, you can just add a little more water.

4. Add the aloe.

5. Add a few drops of essential oil. I used lavender, just because it pairs nicely with tea tree.

6. I added 1/3c of Dr. Bronner's and the mixture fit perfectly into an old shampoo pump bottle.

Simplified directions: Make a cup of hot tea. Add the oil to the hot liquid and stir. Add water or ice cubes. Add a few drops of essential oil. Add the aloe gel. Add the castile soap. Stir and then pour the mixture into a bottle.

Tips:

1. If you add a bit more oil, you won't even need a conditioner afterwards. (Unless you have really dry hair like me, in which case, you can put a bit of coconut oil directly onto your towel-dried hair after your shower.)

2. To use the shampoo, tip the bottle upside down and back upright (don't shake, because it wastes the lather). Put just enough in your hand that it makes a puddle. Rub your hands together until it lathers. Then, rub your lathered hands into your scalp and then work through the length of your hair. Repeat if necessary. (Don't put it straight onto your head, because it won't lather well that way.) Wash it out.

3. NOTE: Your hair is going to be clean; however, it will not feel the same as when you shampoo with commercial cleansers. In fact, you may think your hair is not clean, because it will feel oily to you. It's not. This feeling comes from the fact that cheap chemicals in store-bought shampoos strip your hair, and you have become accustomed to the stripped feeling. You know how when you wash your hands in soft water, they feel like the soap isn't washing off, but actually you are just used to hard water? Same thing. Give your hair a little while to grow accustomed to this change; your oil glands have been working over time for decades to compensate for the drying chemicals in your commercial shampoo.

4. If your hair is extremely oily and/or very fine, I would back off the coconut oil. Play with different hair-loving ingredients to find your perfect formula. Just make sure to use diluted castile soap in there somewhere so you get a lather. Maybe use baking soda instead of aloe if your hair is really oily. . .Things like that.

5. If you want to lighten your hair, add lemon juice. If you want to redden your hair, use red tea instead of green. If you want to darken your hair, add coffee or black tea.

6. This soap will keep for up to 3 months if you put it into a dark bottle and keep it in a dark place away from excessive heat. It might keep longer if you add a preservative, but the point is to have it preservative free, in my book. If you don't use large amounts of shampoo, consider cutting the recipe in half. If it smells spoiled, throw it away.

7. This shampoo costs around $1.00 a bottle to make, and is far nicer than normal "natural" shampoos in the store that cost upwards of $15. If you make your own liquid castile soap, this shampoo will costs even less than $1.00! Plus, companies still put chemicals in "natural" shampoo to extend the shelf life.

8. This formula can also double as a body wash, shaving cream, and is mild enough for a face wash. If you are acne prone, however, stay tuned as I will be posting a recipe for acne-prone skin face wash soon!

Wednesday, April 24, 2013

Make Your Own Eye Cream

I am really excited about this eye cream. I've been using it for a while now before bed and it's really good. It keeps my skin really supple and non-wrinkly, and because it is kinda waxy, it keeps my skin moisturized even after I've washed it off the next morning. If you have really oily skin, I think this would still work for you because natural ingredients tend not to mess with your ph balance. Try it and see!

There is really only one step to this process if you followed my last two blogs (especially the one on making lip balm). All three processes took me 20 minutes total to do. To bring you up to speed, I suggest going here.


How to Make Your Own Eye Cream:

After following the directions on my last blog, all you have to do is add a table spoon of honey. I suggest using local honey as it helps your tolerance to pollen allergies. Honey is what changes the consistency of our lip balm into a cream, and honey is really good for you and your skin. If you are allergic to honey then use olive oil:


This step is optional, but you can add another fragrance if you like. I added lavender because it smells good with mint, and also it's good for your skin:


Stir it up and pour into a small cosmetic jar:


Put it in the refrigerator for an hour or so. Spread it on your eyes with your fingers in small massaging circles.


Things to remember:

1. The reason I did green tea and coffee bean butters is mostly because I knew I'd make this eye cream last and both of those butters have anti-aging properties.
2. Coconut oil and honey are anti-bacterial. Probably the others are too, but I know those two are for sure.


The End!

Tuesday, April 23, 2013

Make Your Own SPF Lip Balm

This is continued from Make Your Own Stretch Mark Eraser, if you want to make that. To make the eraser, lip balm, and eye cream, it took me about 20 minutes. That's why I'm writing these three blogs in a sequence. Otherwise, to bring you up to speed, you need these ingredients:


Namely:
1. Cocoa Butter 
2. Coconut Oil
3. Coffee Bean Butter
4. Green Tea Butter
5. Beeswax
6. At least 4 lip balm containers (You used 2 of your 6 for the stretch mark eraser)

All these ingredients can be found raw and for sale on eBay and Amazon. You don't really need the Green Tea or the Coffee Bean butters, but I added them because they are really good for protecting against sun damage. However, coconut oil has some sun blocking capabilities on its own. If you want major sun blocking power, add some zinc oxide powder (cosmetic grade) before the last step.


How to Make Lip Balm:

If you've already made the eraser, skip to the third picture down. Otherwise, get a hot pot and put water in it and wait for it to boil (or else put a pot of water on the stove):


While the water is boiling, grate about a tablespoon and a half of beeswax. (It's really annoyingly sticky and doesn't wash off your grater very easily, but grating it helps the beeswax melt more evenly later. It's actually an important step not to skip.):


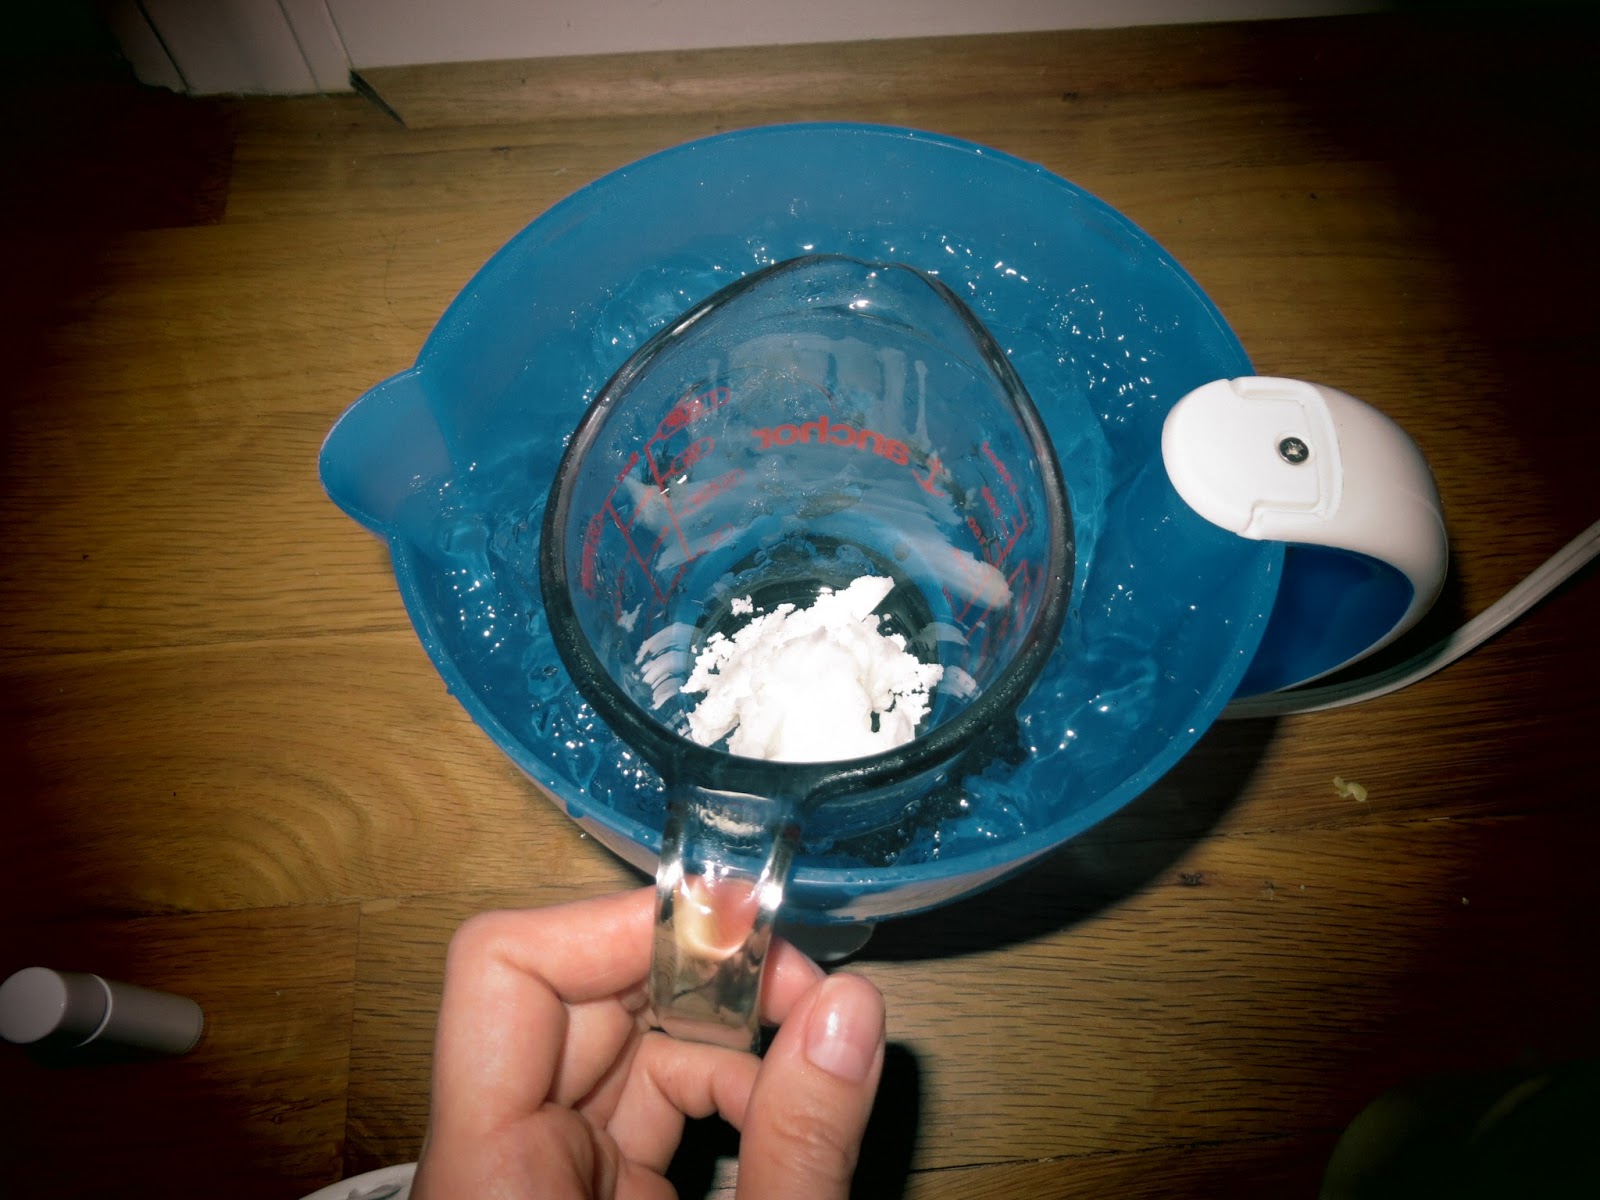
Now add your beeswax to a Pyrex measuring cup and submerge it into the boiling water. (Don't use a plastic cup.):


Wait for it to melt then add one tablespoon of coconut oil and one table spoon of cocoa butter. Mix it all with a chopstick or butter knife. (Notice the towel under my hot pot now in this picture...):


Then add about 1/2 a tablespoon of green tea butter and coffee bean butter:


Then add some fragrance or flavoring. I added peppermint extract to make it all "Burt's Bees"-y. Also, I knew peppermint wouldn't conflict with the eye cream I was going to make after this:


Pour your liquid into four lip balm containers. Put your containers in the fridge in your Pyrex cup. (The starred containers below are my "erasers" from the blog prior to this one.) I got the idea to stand them up with paper towel from another blog:


The finished product:


Things to remember:

1. About 1/2 a tablespoon of butter will fill a lip balm container, so for 4 containers, you need 2 tablespoons total of product. If you do the math on the directions I just gave, you will come to 4 1/2 tablespoons of product (1 1/2T beeswax + 1T coconut oil + 1T cocoa butter + 1/2T green tea butter + 1/2T coffee bean butter = 4 1/2T). I used the remaining 2 1/2T to make my eye cream in the next blog.
2. Any seed/bean butter will work in place of these, I just used these ones for their sun damage fighting properties.
3. My husband loves this lip balm. He claims it lasts longer than his other lip balms. . .and he's right!


Now to make eye cream...


For a complete list of makeup DIY, go here.

Monday, April 22, 2013

Make Your Own Stretch Mark Eraser

The next three posts are a triptych of sorts. You can make all three in about 20 minutes, which is what I had one day between engagements. The first thing I made was a "Stretch Mark Eraser," then lip balm (Am I allowed to call it chapstick? Isn't that a brandname?), and finally eye cream.

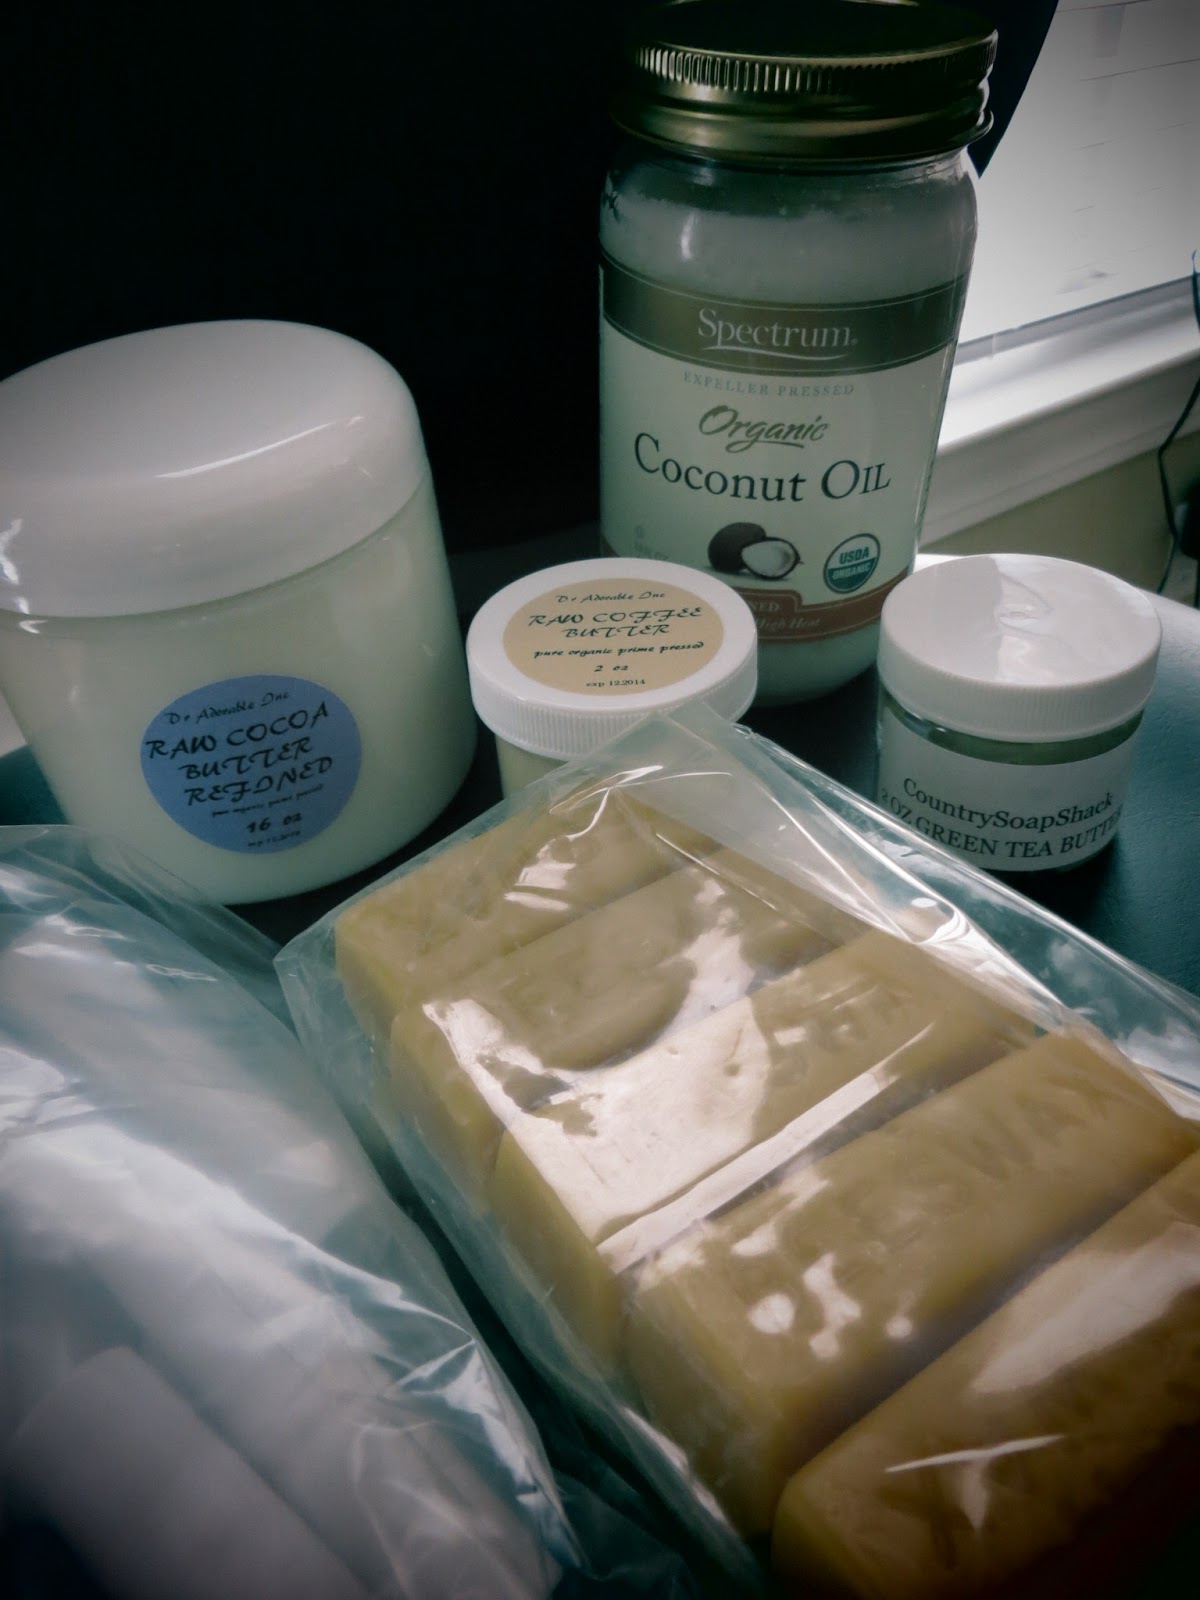
These are the ingredients you will need:


Cocoa Butter - Helps skin elasticity and fights stretch marks.
Coconut Oil - Antibacterial and skin softening.
Coffee Bean Butter - Fights sun damage and wrinkles.
Green Tea - Fights sun damage and wrinkles.
Beeswax - Thickening agent and good for skin.
At least 6 lip balm containers.

(I've way over simplified what each ingredient does, 
but at least you get some idea of why I got each of them.)

You can find these ingredients and containers on Amazon and eBay. If you've been reading my posts, you will know that I already had the coconut oil from this post. I'm not posting the prices, because the prices are kinda random. I just searched for the cheapest ones that are the purest and from sellers with decent feedback. Usually, raw butters like these are cheaper the more you buy, but you don't need a whole ton of them. Obviously, the green tea and coffee bean butters are the most expensive, which is why my containers of such are smaller. My rule of thumb is not to go over $10 per ingredient.  I also knew I'd be using all these ingredients again for other products I want to make, so I bought the amounts accordingly.


How to Make a Stretch Mark Eraser:


I've read that other bloggers attempting this sort of project either had a double boiler or did a make-shift one on the stove. I decided since I didn't have a whole lot of time that I would use my trusty hot pot. While the water was boiling, I grated about a tablepoon and a half of beeswax. (The beeswax is actually for the lip balm and eye cream, but you might as well use your time wisely):


When the water started to boil, I added about a tablespoon of cocoa butter to
a small Pyrex measuring cup:


I put the measuring cup into the boiling water and waited for it to melt:


It only took a few minutes:


Then I poured it into two lip balm containers:


This is what the finished product looks like:


The last step is to put it into the freezer or refrigerator for an hour or so until it's hard.


Things to remember:

1. One heaping tablespoon of butter will fill two lip balm containers.
2. You could probably melt a tablespoon of cocoa butter in the microwave instead of a double boiler if you're really pressed for time.
3. Beeswax is super waxy and a pain to grate, so only make this for yourself 
and people you really love.
4. Instead of rubbing the "stretch mark eraser" directly onto your stretch marks (which can stretch them even further), consider rubbing the cocoa butter into your palm and pressing what comes off onto your delicate skin.
5. You could just scoop the cocoa butter right out of the jar and press into your skin, but if you want to keep your cocoa butter sterile, I suggest making these little "erasers."
6. I've had little stretch marks since I've been losing weight and mine are getting smaller after a few days of using this stuff.


Monday, April 8, 2013

Make Your Own Leave-In Conditioner

Why this is a good idea:

1. Easy - This is a very easy item to make. In fact, all you need to do is buy a jar of Coconut Oil. (You can actually stop reading here if you just wanted to know how to make it.)

2. Versatile - Coconut oil is kind of a splurge (Mine was $7.50 for 14oz at Food Lion), but a little goes a looooooong way, and this same jar also can be used for cooking. (Word to the wise: Coconut oil is one of the only plant-based oils that is super high in saturated [i.e. bad] fat. It is slightly better for your bad cholesterol levels than cooking with butter, but if you are looking to lose weight, cook with an oil that is liquid at room temperature [i.e. canola or olive].) Also, if you stay tuned, you will learn other interesting and fun money-saver/natural things you can make with coconut oil--so make the splurge!

3. Better - I have tried every hair product on the market and nothing ever works. What I notice about coconut oil is that, used sparingly, my hair is more manageable, softer (emphasis on the soft!), and way less "fly-away" than it's ever been. Plus, coconut oil is natural, so you know it's better! You too can have the hair of an island princess!

4. Frugal - Even though a jar is $7.49, you will use far less of it than any other leave-in treatment you can buy. Also, you will save water because coconut oil is antibacterial, so you won't have to wash your hair as much. Furthermore, you will be saving yourself the application of sulfates and alcohol (which promote hair loss) and other nasty filler chemicals that "the man" adds to your current hair products.


Something I like about coconut oil is that I didn't have to special order it or go to some health food store to get it. There is a certain comfort in knowing I can always go to the grocery store if I run out. (Any Mitch Hedberg fans out there?. . ."Oh yeah! . . . Kinkos!")


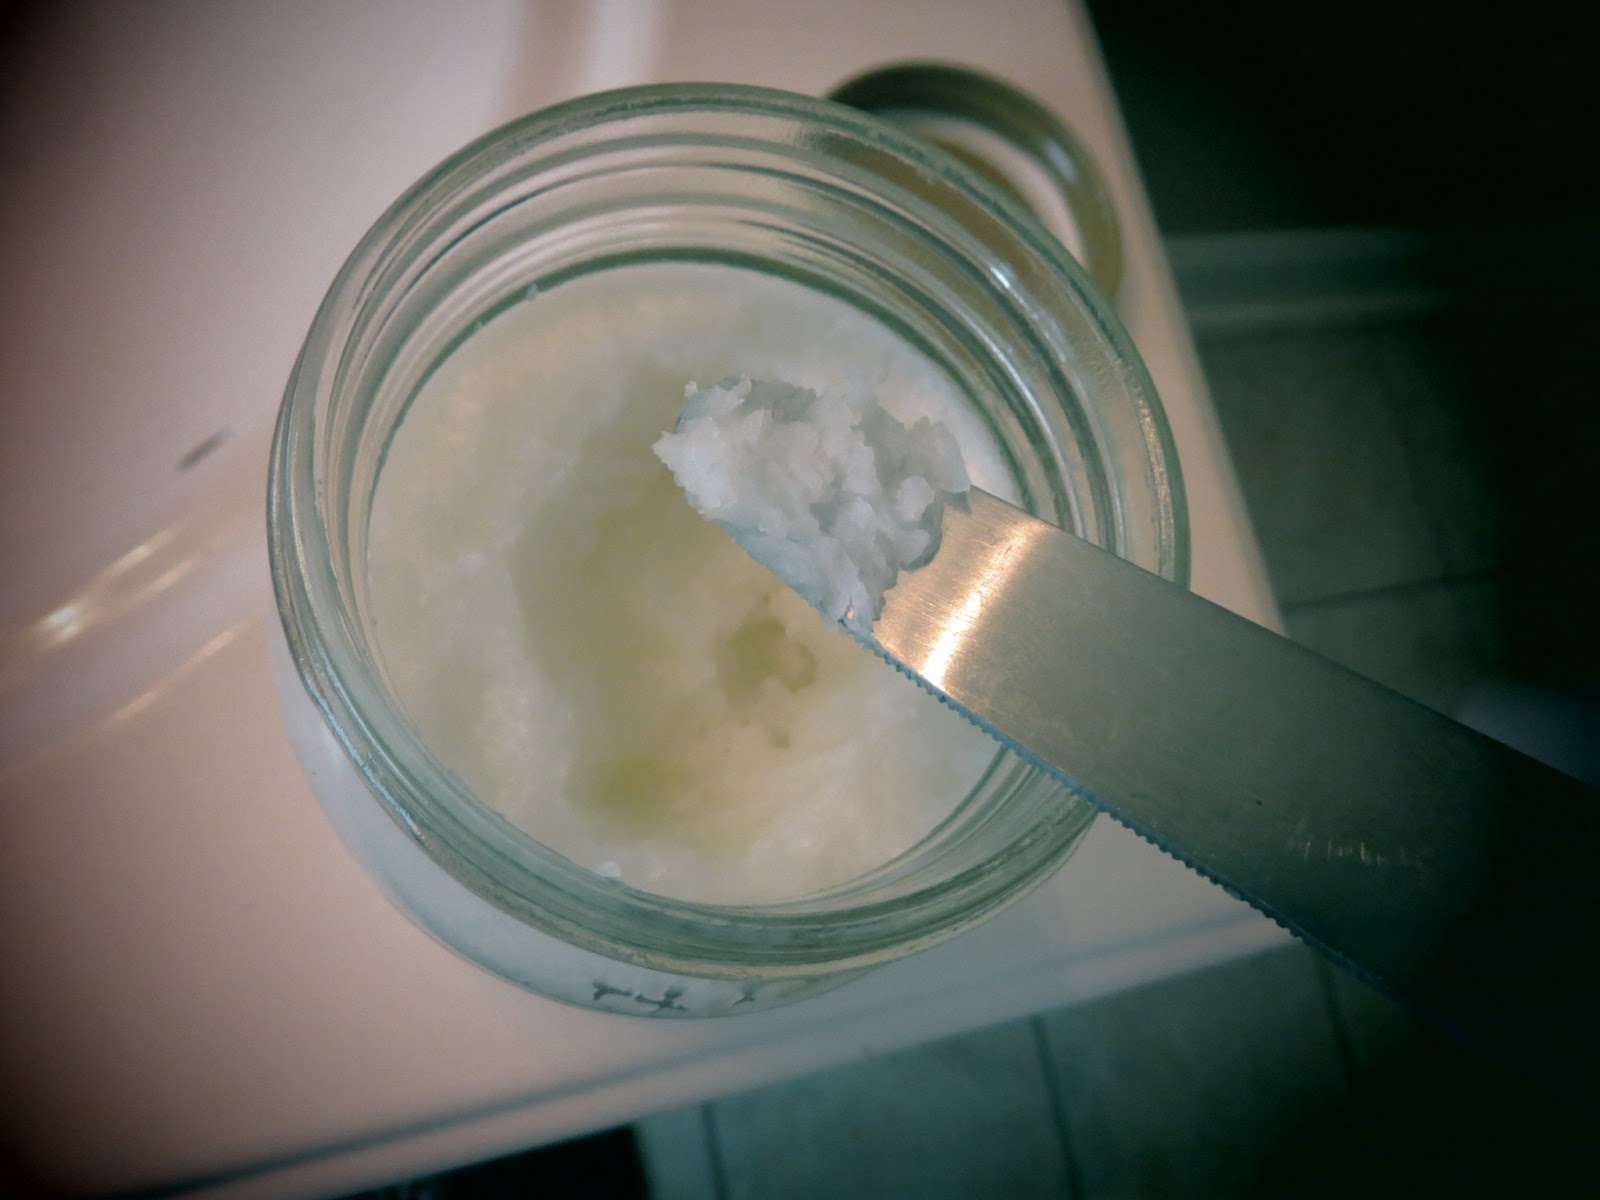
I suggest getting the stuff out with a knife or some such utensil 
to keep it as clean and versatile as possible. (Also, store it in a cool, dark place.)
Just get a little bit out at a time. Too much is going to make your head look greasy. My hair is long, curly, and course (like a classy Brillo pad) so I used a whole tip of a knife. If your hair is fine, start waaaaay smaller. Play around to find your perfect amount.


As soon as you put it on your hand, it starts melting. That shows you that it's not the worst of the saturated fats. . .but still.


Press your hands together until it completely melts.


Apply it to your hair. Start at the ends and work your way up. 


For Fine Hair: A larger amount can be applied to wet hair for an hour or so and washed out. (This is an especially good option for people with people with dry shafts of hair but greasy follicles who wouldn't be able to apply coconut oil to dry hair without weighing it down.)

For Curly Hair: Simply towel dry your hair. Apply a small amount of coconut oil and a small amount of hair gel (all-natural hair gel recipe coming soon). If your ends dry faster than your roots, apply a bit more oil to the ends. Scrunch your hair and shake it out a little. The coconut oil will naturally guide your strands into nice "piece-y" curls as your hair air dries. (Usually, I have to twist each lock into a curl and apply mounds of product.) Time saved: 15 minutes. The end.

Quick Fix: If you accidentally overdo it, get out your baking soda from when you made your own Laundry Soap and/or Dish Washer Soap and sprinkle it over whatever part of your head looks a little greasy. Brush it out until you don't see any more powder. Voila! (I have to do this on my bangs every once in awhile. Why do bangs get shiny when the rest of your head doesn't?? No idea. . .)


I washed and straightened my hair on Friday evening and applied it then. I only had to reapply a tiny bit on Monday morning (this skippidge of two mornings of reapplying product is unheard of in "Jessica'sHeadLand"). This picture is from Monday evening.

I know I just started doing this, but I was so impressed, I just had to blog about it. I am not sure, but if i had to hazard a guess, I think over time I am going to see fewer split ends and thicker hair. I'll have to report back in a few weeks.


UPDATE: Since that picture was taken, I actually did not have to wash my hair for an entire week and it didn't look oily or gross--even with FIVE hour-long cardio workouts that week! I washed my hair the following Friday, but didn't use shampoo, only conditioner--hoping that I could go "sulfate free" for the rest of my life. Unfortunately, by Tuesday night, my hair was feeling not so great, so I washed it with shampoo on Wednesday morning. 

My words of wisdom are: Until we can figure out a natural, thoroughly clean version of shampoo (I realize you can buy sulfate-free shampoo from the grocery store, and this may be your only option), I would advise washing your hair twice with shampoo before going without washing it for a week.