I've been working on this one for a few months now to make sure I got them all correct first-hand before posting them.
All of the following makeup can be made naturally without many chemicals and for a fraction of the price of store bought brands. You can actually decrease toxins, boost antioxidants, and save hundreds of dollars per year! Almost all of these are my own creations that I have actually tried and I know for a fact work. The mascara is from a blog that I have found that I haven't tried yet, but hope to in the near future.
Most of these products are made with natural "food" type ingredients, so remember to make small amounts of each at a time. Larger amounts take longer to use, and bacteria can get in and destroy all your work!
1. Powder
2. Eye Shadow
3. Eye Liner
4. Mascara (I have another method I'm working on but haven't perfected yet.)
5. Blush
6. Lip Tint
7. Lip Gloss
Showing posts with label lip gloss. Show all posts
Sunday, June 30, 2013
Make Your Own Lip Tint Stain
I have been searching online for recipes on how to make your own lip stain, but most of them require refrigeration--no thanks! Other DIY "lip tints" end up just being colored lip gloss. To me, a lip tint is something that actually stains the lips for awhile, not just a few seconds.
Another issue is that most lip stains at the store cost upwards of $8. If I could make my own for pennies, and make it just as effective, why wouldn't I? I think I've come up with a great answer!
UPDATED RECIPE:
I have included my first recipe below this one, but since this is my current and most successful method, I'm putting it here at the top.
Combine 2-3pts. vodka, 1-2 pts. olive oil (or I've also been using castor and grape seed), and 1pt. food coloring in an empty lip stain tube. Voila! Perfect long-lasting, nourishing lip stain! (It will keep for several weeks bc of the vodka.) You can make straight red, orange, purple, and pink this way, but if you don't look good in pure colors, you can also mix colors to create nudes and earthier colors.
----------------------------------------------------------------------------------------------------------------------------------------
OLDER RECIPE: (It still works, but the citric acid irritates my lips, so now I do the method above.)
1. 1/2 a Kool-Aid powder packet.
2. Vodka, white vinegar, saline solution, or some other clear liquid that will kill germs for awhile. (I don't recommend rubbing alcohol, because that is poisonous if ingested. Also, if you have children under 21, skip the vodka. Even though it's not for drinking, kids aren't going to understand.)
3. An empty lip gloss container--the kind with a wand.
I used strawberry flavored Kool-Aid powder for a nice bright red color, but if you like more coral-y colors, add some lemonade powder. If you like more berry-colored lips, add more blue raspberry. If you like more nude-colored lips, start with red and add blue and yellow till the shade browns up a little.
2. Get whatever Kool-Aid powders you think you will need. I used strawberry (straight red) for this experiment, but I have black cherry (red with a little blue) waiting on hand whenever I run out.
Tips:
1. The only drawback on this formula is that the citric acid in the Kool-Aid can sting a bit if your lips are very sensitive. Mine got over it after the first day or so of using it, but if yours don't, I suggest using straight up red food coloring with some kind of clear, sterilizing liquid. Citric acid is a preservative on its own, so that's why I use the Kool-Aid.
2. This formula also makes a nice stain for cheeks, but I can never get it to work without looking like a clown. If you want a powder blush, go here.
3. Lock it in place with lip balm!
Another issue is that most lip stains at the store cost upwards of $8. If I could make my own for pennies, and make it just as effective, why wouldn't I? I think I've come up with a great answer!
UPDATED RECIPE:
I have included my first recipe below this one, but since this is my current and most successful method, I'm putting it here at the top.
Combine 2-3pts. vodka, 1-2 pts. olive oil (or I've also been using castor and grape seed), and 1pt. food coloring in an empty lip stain tube. Voila! Perfect long-lasting, nourishing lip stain! (It will keep for several weeks bc of the vodka.) You can make straight red, orange, purple, and pink this way, but if you don't look good in pure colors, you can also mix colors to create nudes and earthier colors.
----------------------------------------------------------------------------------------------------------------------------------------
OLDER RECIPE: (It still works, but the citric acid irritates my lips, so now I do the method above.)
Ingredients:
1. 1/2 a Kool-Aid powder packet.
2. Vodka, white vinegar, saline solution, or some other clear liquid that will kill germs for awhile. (I don't recommend rubbing alcohol, because that is poisonous if ingested. Also, if you have children under 21, skip the vodka. Even though it's not for drinking, kids aren't going to understand.)
3. An empty lip gloss container--the kind with a wand.
I used strawberry flavored Kool-Aid powder for a nice bright red color, but if you like more coral-y colors, add some lemonade powder. If you like more berry-colored lips, add more blue raspberry. If you like more nude-colored lips, start with red and add blue and yellow till the shade browns up a little.
Directions:
Basically, all you do is clean out your empty container, add some liquid, add about 1/2 a packet of powder, add some more liquid till the container is full, shake it, and you're done! For the directions with pictures, see below.
1. Get a clean lip gloss container
Basically, all you do is clean out your empty container, add some liquid, add about 1/2 a packet of powder, add some more liquid till the container is full, shake it, and you're done! For the directions with pictures, see below.
1. Get a clean lip gloss container
2. Get whatever Kool-Aid powders you think you will need. I used strawberry (straight red) for this experiment, but I have black cherry (red with a little blue) waiting on hand whenever I run out.
3. Add a bit of liquid to the container. (If you add the powder first, it all sticks to the bottom--this is experience talking!)
4. Add 1/2 the packet of powder. (This picture is actually of beet juice powder--an earlier failed attempt!)
5. Add some more liquid till the container is full.
6. Shake it up!
7. Put it on!
It lasts for hours and hours!
1. The only drawback on this formula is that the citric acid in the Kool-Aid can sting a bit if your lips are very sensitive. Mine got over it after the first day or so of using it, but if yours don't, I suggest using straight up red food coloring with some kind of clear, sterilizing liquid. Citric acid is a preservative on its own, so that's why I use the Kool-Aid.
2. This formula also makes a nice stain for cheeks, but I can never get it to work without looking like a clown. If you want a powder blush, go here.
3. Lock it in place with lip balm!
For a complete list of makeup DIY, go here.
Tuesday, April 23, 2013
Make Your Own SPF Lip Balm
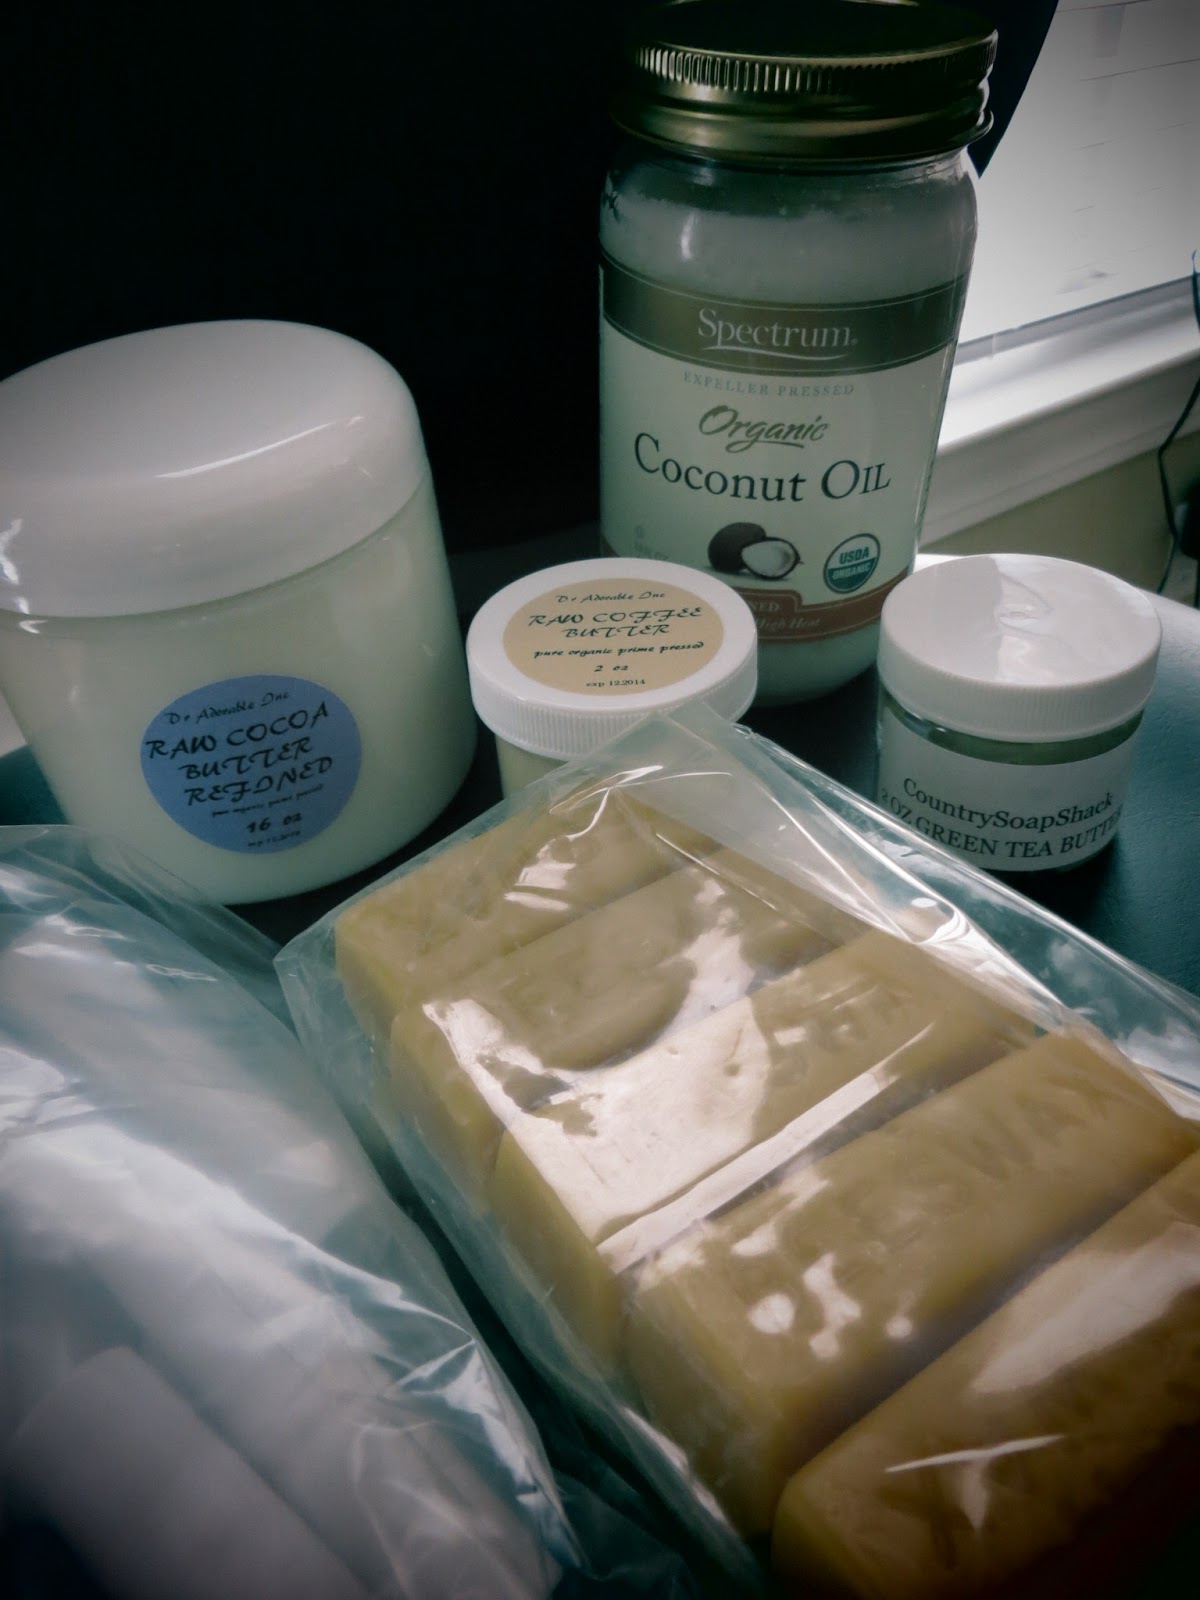
This is continued from Make Your Own Stretch Mark Eraser, if you want to make that. To make the eraser, lip balm, and eye cream, it took me about 20 minutes. That's why I'm writing these three blogs in a sequence. Otherwise, to bring you up to speed, you need these ingredients:
Namely:
1. Cocoa Butter
2. Coconut Oil
3. Coffee Bean Butter
4. Green Tea Butter
5. Beeswax
6. At least 4 lip balm containers (You used 2 of your 6 for the stretch mark eraser)
All these ingredients can be found raw and for sale on eBay and Amazon. You don't really need the Green Tea or the Coffee Bean butters, but I added them because they are really good for protecting against sun damage. However, coconut oil has some sun blocking capabilities on its own. If you want major sun blocking power, add some zinc oxide powder (cosmetic grade) before the last step.
How to Make Lip Balm:
If you've already made the eraser, skip to the third picture down. Otherwise, get a hot pot and put water in it and wait for it to boil (or else put a pot of water on the stove):
While the water is boiling, grate about a tablespoon and a half of beeswax. (It's really annoyingly sticky and doesn't wash off your grater very easily, but grating it helps the beeswax melt more evenly later. It's actually an important step not to skip.):
Now add your beeswax to a Pyrex measuring cup and submerge it into the boiling water. (Don't use a plastic cup.):
Wait for it to melt then add one tablespoon of coconut oil and one table spoon of cocoa butter. Mix it all with a chopstick or butter knife. (Notice the towel under my hot pot now in this picture...):
Then add about 1/2 a tablespoon of green tea butter and coffee bean butter:
Then add some fragrance or flavoring. I added peppermint extract to make it all "Burt's Bees"-y. Also, I knew peppermint wouldn't conflict with the eye cream I was going to make after this:
Pour your liquid into four lip balm containers. Put your containers in the fridge in your Pyrex cup. (The starred containers below are my "erasers" from the blog prior to this one.) I got the idea to stand them up with paper towel from another blog:
The finished product:
Things to remember:
1. About 1/2 a tablespoon of butter will fill a lip balm container, so for 4 containers, you need 2 tablespoons total of product. If you do the math on the directions I just gave, you will come to 4 1/2 tablespoons of product (1 1/2T beeswax + 1T coconut oil + 1T cocoa butter + 1/2T green tea butter + 1/2T coffee bean butter = 4 1/2T). I used the remaining 2 1/2T to make my eye cream in the next blog.
2. Any seed/bean butter will work in place of these, I just used these ones for their sun damage fighting properties.
3. My husband loves this lip balm. He claims it lasts longer than his other lip balms. . .and he's right!
Subscribe to:
Posts (Atom)