Showing posts with label health. Show all posts

Tuesday, October 24, 2017

Make Your Own Turmeric Latte Mix!

If you haven't heard, turmeric lattes are the next big thing. They taste similar to chai lattes, but are super super good for you. The compound curcumin found within turmeric is widely known to fight cancer and inflammation and all kinds of bad stuff. I'm not a scientist nor a medical professional, and don't want to give mis-information, so. . .Google it!

Anyways, it can be kind of time consuming to make a real turmeric latte as it requires heating nut milk on the stove and using a hand-held blender to foam it.

When processes are that involved, let's be honest, we AREN'T going to do them every day.

So, here is a scaled-down easier method that you can do every morning in lieu of or in accordance with your morning coffee!


First of all, you will need at LEAST the following spices: turmeric, ginger, and cinnamon. All three of those spices can be found at Aldi or Big Lots for $1.00-2.00. (I suggest buying them soon as once big corporations find out that their low-cost items are now considered "health foods," they go and jack up the prices.)

I also added a tiny bit of cardamom, but that is because I have it. Be warned, though. Cardamom is like. . .upwards of $16 a bottle at Wal-Mart! It's really good for you, though, so if you have it, add it.


The ratio I have found on other blog posts and online recipes seems to be something like: 1 part turmeric to 1 (or less) part ginger to 1/3 part cinnamon. But if you like one of these spices more than the others, feel free to tweak. (You could also add pumpkin pie spices like nutmeg and clove if you want.) The important thing is to keep turmeric as the biggest part. I added a 3.75oz. bottle of turmeric, two 1.5oz. bottles of ginger, about 1oz. of cinnamon, and about a tablespoon of cardamom to this mason jar cup. (If you don't have a mason jar, an old washed out pasta sauce jar will work equally as well.)


Then, I shook it all together.


So now on to how to make the latte.

You can add as much of your powder to your nut milk (almond, coconut, etc.) as you want. I do a heaping tablespoon, and I add it to just a little bit of milk to start.


I stir that together for a few seconds. I do this because sometimes if you add the powder to a full glass of milk, it causes annoying lumps. If you stir a little milk with the powder to make a paste, the powder breaks down more evenly. (This trick is helpful with any powder-to-drink mix.)


Then, I filled the mug with milk. . .


. . .and added a little honey. I do highly recommend honey or some other sweetener as the spices can be kind of bitter/harsh on their own. But don't add very much! It doesn't take but a little bit of sweetener to counteract the bitterness. 
Don't cancel out the healthfulness with sugar! (You KNOW that is what the big corporations are going to do once these lattes catch on. They will create their own "ready made" mix and it will promise to be all healthy, meanwhile it will be LOADED with sugar. Happens every time!)

You can also add a tablespoon of coconut oil or ghee butter (if you real real fancy!) and heat it all together. That's what you are supposed to do, actually, but. . .anyways. . .I was running late this morning, so I didn't.


Then, I put the mug in the microwave for two to three minutes.

To make a really foamy latte, you can put this mixture in a separate microwave safe container, heat it for a minute, shake the container, heat it for another minute, shake it, etc., until you get a nice thick foam--you know, like a regular latte. Anyways, I didn't have time for that mess, so I just heated it up and sprinkled some cinnamon on top. My drink still had a little layer of foam on the top, so it wasn't like I was missing out on the latte experience or anything! 


So, there you have it! For a couple of dollars, you can have a ready made nice cozy spicy drink mix on hand for the whole winter (that ISN'T loaded with sugar)! You can also use the mix for other things besides lattes. You can add it to coffee, or like. . .muffin mixes. . .or wherever you feel appropriate.

(P.S. these jars make great gifts!. . .You're welcome!)


Simplified Directions:

Drink Mix:
1 part turmeric
1 (or less) part ginger
1/3 part cinnamon
(other spices - optional)
1 glass jar

Latte:
1 tablespoon of mix to a cup of nut milk
A bit of honey
1 tablespoon of coconut oil
Heat for 2-3 minutes
Enjoy!


One last note!!! Swallow a few peppercorns before drinking and your body will absorb the nutrients more fully! (Or you can add pepper to the mix, if you want.)


The End!


Thursday, January 8, 2015

Homemade Chemical-free Toothpaste

So my mom bought me a "make your own natural toothpaste" kit for Christmas. I put it all together tonight. I'm guessing at the measurements because they were all pre-measured in the kit, but these are the ingredients I used. The last three I added.

1/2c bentonite clay
3 cinnamon sticks (about 2.5"ea.)
1T dried stevia leaf
2T whole cloves
1t Celtic sea salt
2t baking soda

(2 packets xylitol sweetener, 3T activated charcoal powder, and one whole nutmeg)

I simmered the cinnamon, cloves, stevia, and nutmeg in 1 1/2c of water in a saucepan for 30 minutes. Then I strained them into a glass and added the salt, baking powder, and xylitol. I added the charcoal to the clay and then mixed in the liquid till I got a paste.

I currently store it in a glass container in a drawer (away from light) and add it to my toothbrush with a wooden chopstick so as to be sanitary.

Apparently, the clay is super absorbent and shouldn't be stored in plastic or metal as it can absorb the chemicals and heavy metals. I'm a little worried because my toothbrush bristles are plastic...but I figure that at least it's better than using fluoride toothpaste...? Maybe? Hopefully? Am I gonna die?.....Moving on....

According to the instructions that came with my kit, cinnamon and cloves are anti-bacterial (so is nutmeg, which is why I added it). Stevia is a natural and non-cavity forming sweetener (so is xylitol, which is why I added it too...plus, it's supposed to strengthen enamel from what I've read). The clay absorbs bacteria and scrubs gunk off your teeth (so does charcoal, plus it's supposed to whiten somehow...even though it's black...?).

I know I sound confused in this post, but I'm actually really excited to use it because my gums have been receding for the past 20 or so years and maybe this will help. I've used it a couple of times so far and it feels and tastes pretty good.

I'll have to post an update at some point. Will this toothpaste solve all my paranoid health concerns or will it aid and abet my teeth rotting out of my head? Stay tuned for the answer!

The End!

Thursday, May 2, 2013

Make Your Own Hair Dye

Two things happened in 1989 as far as I was concerned: 

(1) I was nine years old, and 

(2) The Little Mermaid happened. 

Ever since then, I have wanted to be a red-head. Now that I'm getting older (um. . .a bit past nine), graying is the inescapable inevitability. I'm hoping with a vitamin-rich diet, and this little trick I'm about to share, I can prolong color-loss as long as possible. (If you don't want red hair, scroll down for other natural hair dye options.)

Why This Is a Good Idea:

1. HEALTHFUL - That hair dye is chock-full of terrible ingredients is no secret. Even though companies claim that no one has died of cancer from hair dye since 1980, you have to ask yourself why every other box of hair dye says things like, "Amonia-Free!" and "Safer Formula!" Exactly what was amonia doing? And why is it still in half the dyes? Also, if the formula is safer now, then what was I putting on my head a month ago??? 

These are important questions. Therefore, if you can make a permanent dye with natural, hair-strengthening ingredients, you best do it!

2. TIME-HONORED - Women (and men) have been dying their hair with henna for centuries.

3. COST-EFFECTIVE - Making dye with henna costs less than store-bought dye even from the get-go--let alone the health benefits from not covering your head with damaging chemicals. It costs far less than a professional dye job.


What you need: 


1. Henna powder - You can easily buy this online on eBay. It is probably for sale at your local Asian/Indian market if you live in a city. If you want really red hair, I suggest going for a pure henna powder. Sometimes packagers add ingredients like coffee and amla to darken the dye to more of an auburn or brownish red. If that is what you're going for, though, do it!

2. Hot water - Boil it in a kettle, not the microwave.

3. Lemon juice - You can also use lime juice. You can also use both together! (Some people use apple cider vinegar. I have tried it and I hate it. It makes your hair smell like vomit. Also, I feel like lemon juice gives brighter and shinier highlights.) Don't skip this ingredient. Henna needs something acidic, like citrus or vinegar, because the acid is what helps the "dye release" of the powder.

4. Essential Oil - Some would say this is optional, but henna has a very earthy green tea-ish smell. It's not bad, but if you don't want to smell like a plant, I suggest using an essential oil. I like to use peppermint, because I would rather my hair smell like a mojito than the aforementioned vomit!

5. Other non-ingredients: A plastic cup that you don't care about, a chop stick, a head wrap, rubber gloves, bobby pins, a hair claw, and a brown pillow case.


You may think that this process is going to be too labor-intensive, but actually, the actual amount of time it takes is the same amount of time you'd use to apply regular color. You are going to do this in two stages, however. You need to do this first part in the morning (takes about five minutes) and then dye your hair that same evening. Then, you are going to sleep with the dye on your hair all night and wash it out the next morning. You can easily do this on a work-night, but I usually save it for Friday night so that I can leave it in extra long on Saturday morning. 


The morning before the evening that you dye:


1. Pour a few tablespoons of henna into a plastic cup and drizzle some boiling water over it till you get a thick dough-y consistency. 

As far as amounts go: My hair is down to my waist and I have been dying it this way for several years now. I use maybe five heaping tablespoons of powder. I'm not sure. I just pour it in the cup till it looks right. You really just need to do it a few times yourself to get the right amount for your hair length and thickness. 


2. Drizzle some lemon and/or lime juice into the mixture till you get a thick paste. I like mine to be slightly runny because it spreads more evenly that way.


3. Wait all day or at least four to six hours.


That evening:


1. When you finish your day and before you go to bed, wash your hair (no conditioner), don your gloves, and apply the paste wherever you want color. I usually take my chopstick and part my hair, front to back, one part at a time from ear to ear. Every time I make a part, I stick the chopstick into the sauce, twirl it around the stick, and paint it into the part. Then, I take a nice little handful of paste and, leaning over my tub, work it into the middle length of my hair and then the ends. Then, I twist my hair up into a bun on the very top of my head and bobby pin my bangs back. Lastly, I use my gloved fingers to paint the remainder of the henna around the edges of my hair. . .But if you have your own hair coloring system, do that! Make sure to wipe away any excess on your skin, but don't worry too much about it because it will just crust up and flake off.  I usually put moisturizer on my face before I start just to make sure that the henna doesn't stick to my skin. 


2. This might be the hard part for some people: Sleep in your pasted hair. It's not really that bad, though, and the long amount of time really helps the color set in. My personal system is to put the dye on my hair around 7:00 and let it air dry a bit before going to bed. Then, I wrap my head in this pink head wrap that I got at the Dollar Tree a million years ago (for. . .a dollar). Then I cover my pillow in this brown pillowcase just in case any stray dye feels like creeping out. I've never had it happen, but it would be awful if it did!

If you don't feel comfortable sleeping in the dye, then I would recommend at least four hours. I would also recommend spending a lot of that time with a hair dryer because the drier the paste gets, the more it absorbs into your hair shaft. Also, the less time you leave the henna on your head, the pinker and more temporary your hair color will be instead of red and permanent.

3. The next morning, wash it out. NOTICE: the first few minutes of washing is going to be kind of traumatic because your hair will be crunchy and immovable. Also, your shower is going to seem like it's never going to be clean again for about a solid five minutes. Don't worry. After the warm water has loosened the hardened paste for a while, the henna washes down the drain surprisingly cleanly. I only have to brush off the walls of my shower with my hands a little bit during the rest of my shower and no one is the wiser that the seconds prior were so catastrophically dirty.


This is the color of my hair before dying. (Keep in mind, it was still henna-ed, but a few months ago, so the new growth is brownish.):


This is the color of my hair immediately after washing and styling. (These last three photos are non-doctored, and I used the same camera settings, lighting, and location):


This is after a few days:


I would really recommend washing your hair with a super mild shampoo to help retain the color, but I would advise that for any dye job.


If you don't want red hair:

1. Blond - I hear that lemon juice and chamomile helps hair that is ALREADY BLOND retain its sheen. As far as a non-chemical way to go blond from originally dark hair, I don't think it exists. Bleach for sure is NOT the way to go. Maybe lemon juice and the sun?

2. Brunette - Add about 1 part finely ground coffee or amla to 1 part henna. Notice: coffee and amla alone are not going to dye your hair! Henna is not just a red dye, it actually bonds to the hair shaft to strengthen it and allow for dying to happen. Coffee and amla don't bond to the hair like that, they just help tone that bond down from red to brown.

3. Black - Purchase indigo powder on eBay (yes, the stuff that makes jeans blue). Go through the entire above process. It's important to do the henna process first to prepare your hair. The next morning, mix some indigo with some water until it makes a paste (Wear gloves!). Apply it right away to your rinsed hair. Wait two to four hours and then rinse it out. Your hair will be jet-black. Notice: mixing the indigo with the henna together doesn't dye your hair black. You have to do it in two steps to get black hair. You can use this method even if your hair is blond!

Tuesday, April 23, 2013

Make Your Own SPF Lip Balm

This is continued from Make Your Own Stretch Mark Eraser, if you want to make that. To make the eraser, lip balm, and eye cream, it took me about 20 minutes. That's why I'm writing these three blogs in a sequence. Otherwise, to bring you up to speed, you need these ingredients:


Namely:
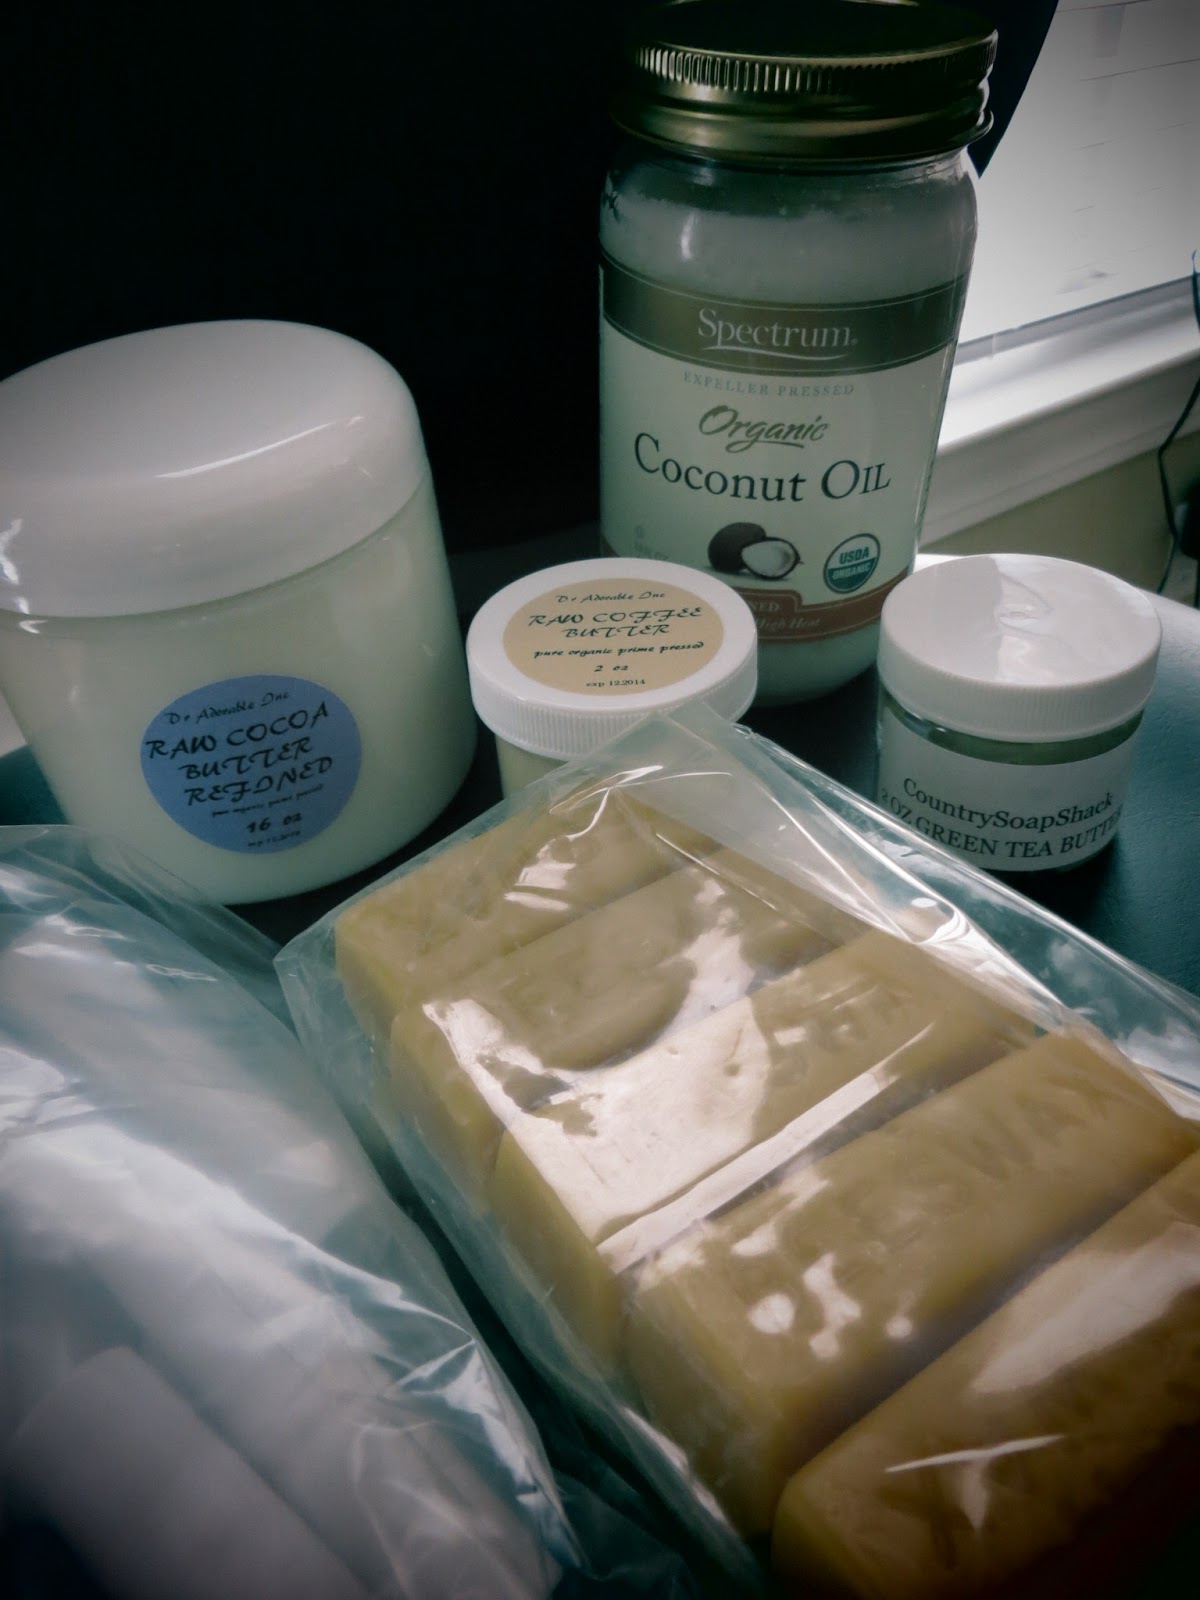
1. Cocoa Butter 
2. Coconut Oil
3. Coffee Bean Butter
4. Green Tea Butter
5. Beeswax
6. At least 4 lip balm containers (You used 2 of your 6 for the stretch mark eraser)

All these ingredients can be found raw and for sale on eBay and Amazon. You don't really need the Green Tea or the Coffee Bean butters, but I added them because they are really good for protecting against sun damage. However, coconut oil has some sun blocking capabilities on its own. If you want major sun blocking power, add some zinc oxide powder (cosmetic grade) before the last step.


How to Make Lip Balm:

If you've already made the eraser, skip to the third picture down. Otherwise, get a hot pot and put water in it and wait for it to boil (or else put a pot of water on the stove):


While the water is boiling, grate about a tablespoon and a half of beeswax. (It's really annoyingly sticky and doesn't wash off your grater very easily, but grating it helps the beeswax melt more evenly later. It's actually an important step not to skip.):


Now add your beeswax to a Pyrex measuring cup and submerge it into the boiling water. (Don't use a plastic cup.):


Wait for it to melt then add one tablespoon of coconut oil and one table spoon of cocoa butter. Mix it all with a chopstick or butter knife. (Notice the towel under my hot pot now in this picture...):


Then add about 1/2 a tablespoon of green tea butter and coffee bean butter:


Then add some fragrance or flavoring. I added peppermint extract to make it all "Burt's Bees"-y. Also, I knew peppermint wouldn't conflict with the eye cream I was going to make after this:


Pour your liquid into four lip balm containers. Put your containers in the fridge in your Pyrex cup. (The starred containers below are my "erasers" from the blog prior to this one.) I got the idea to stand them up with paper towel from another blog:


The finished product:


Things to remember:

1. About 1/2 a tablespoon of butter will fill a lip balm container, so for 4 containers, you need 2 tablespoons total of product. If you do the math on the directions I just gave, you will come to 4 1/2 tablespoons of product (1 1/2T beeswax + 1T coconut oil + 1T cocoa butter + 1/2T green tea butter + 1/2T coffee bean butter = 4 1/2T). I used the remaining 2 1/2T to make my eye cream in the next blog.
2. Any seed/bean butter will work in place of these, I just used these ones for their sun damage fighting properties.
3. My husband loves this lip balm. He claims it lasts longer than his other lip balms. . .and he's right!


Now to make eye cream...


For a complete list of makeup DIY, go here.

Monday, April 8, 2013

Make Your Own Leave-In Conditioner

Why this is a good idea:

1. Easy - This is a very easy item to make. In fact, all you need to do is buy a jar of Coconut Oil. (You can actually stop reading here if you just wanted to know how to make it.)

2. Versatile - Coconut oil is kind of a splurge (Mine was $7.50 for 14oz at Food Lion), but a little goes a looooooong way, and this same jar also can be used for cooking. (Word to the wise: Coconut oil is one of the only plant-based oils that is super high in saturated [i.e. bad] fat. It is slightly better for your bad cholesterol levels than cooking with butter, but if you are looking to lose weight, cook with an oil that is liquid at room temperature [i.e. canola or olive].) Also, if you stay tuned, you will learn other interesting and fun money-saver/natural things you can make with coconut oil--so make the splurge!

3. Better - I have tried every hair product on the market and nothing ever works. What I notice about coconut oil is that, used sparingly, my hair is more manageable, softer (emphasis on the soft!), and way less "fly-away" than it's ever been. Plus, coconut oil is natural, so you know it's better! You too can have the hair of an island princess!

4. Frugal - Even though a jar is $7.49, you will use far less of it than any other leave-in treatment you can buy. Also, you will save water because coconut oil is antibacterial, so you won't have to wash your hair as much. Furthermore, you will be saving yourself the application of sulfates and alcohol (which promote hair loss) and other nasty filler chemicals that "the man" adds to your current hair products.


Something I like about coconut oil is that I didn't have to special order it or go to some health food store to get it. There is a certain comfort in knowing I can always go to the grocery store if I run out. (Any Mitch Hedberg fans out there?. . ."Oh yeah! . . . Kinkos!")


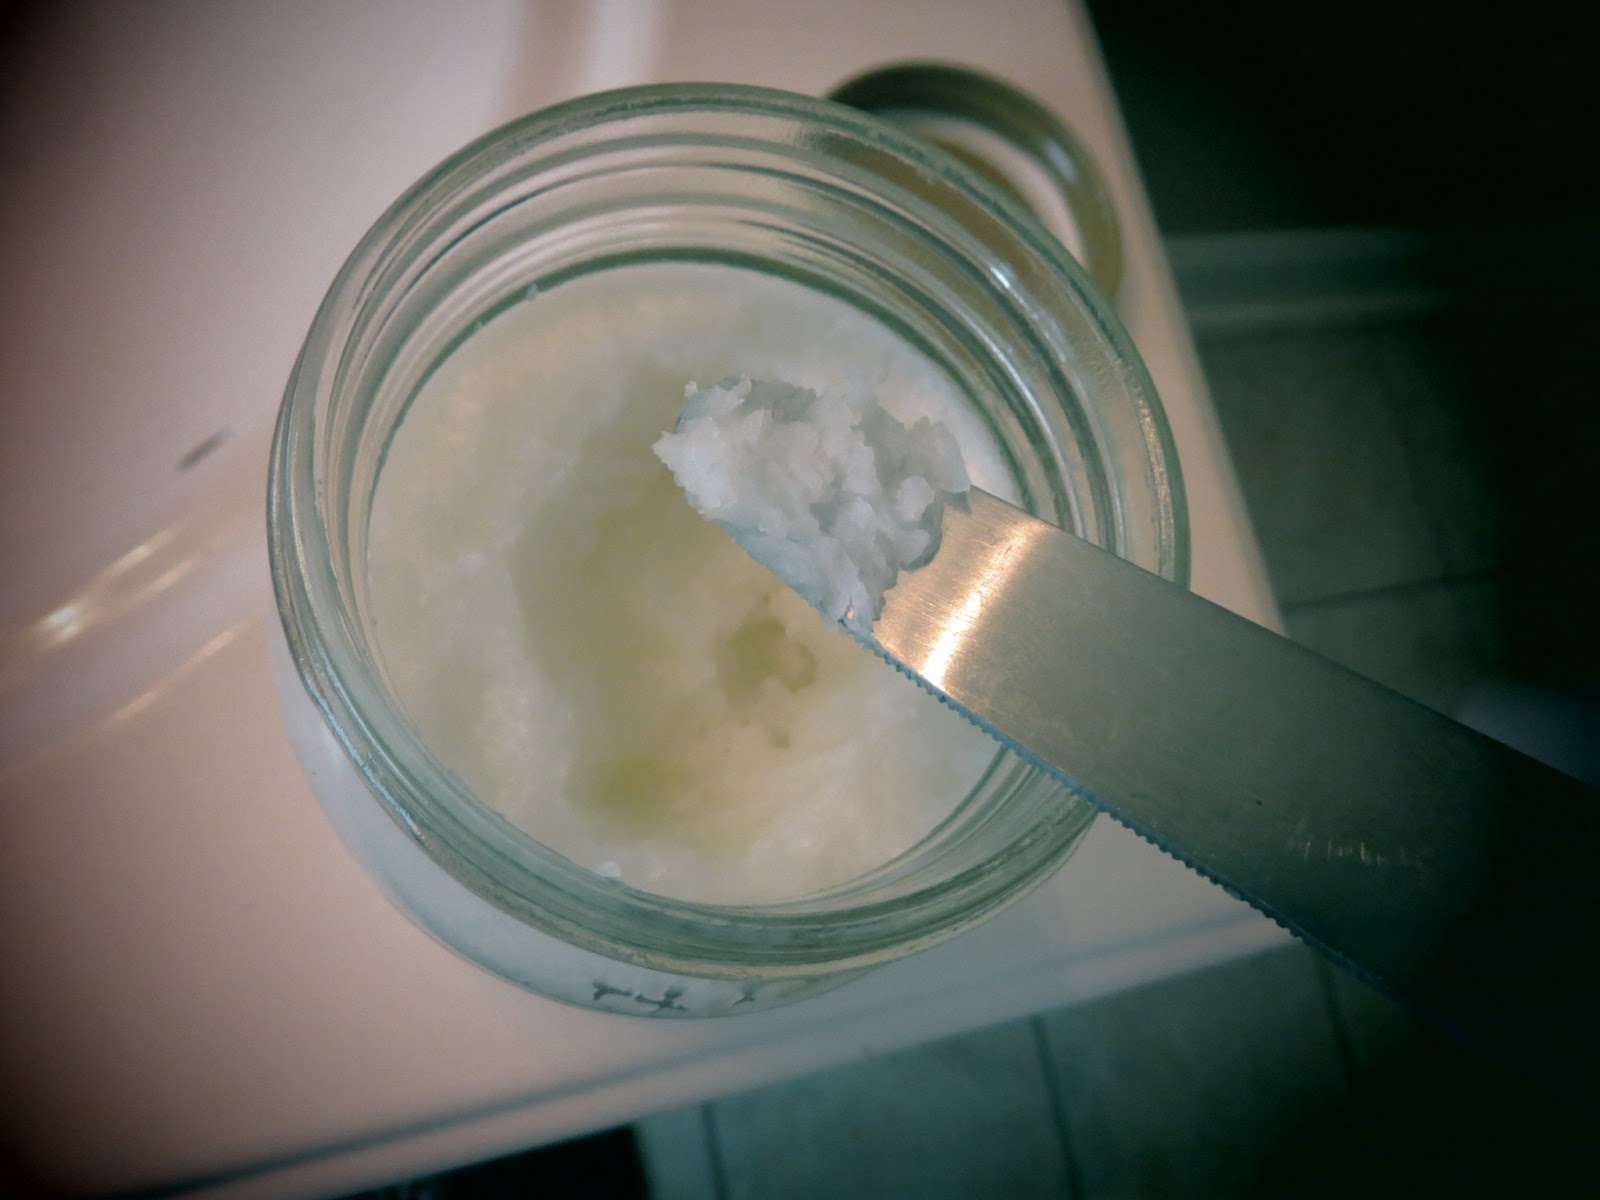
I suggest getting the stuff out with a knife or some such utensil 
to keep it as clean and versatile as possible. (Also, store it in a cool, dark place.)
Just get a little bit out at a time. Too much is going to make your head look greasy. My hair is long, curly, and course (like a classy Brillo pad) so I used a whole tip of a knife. If your hair is fine, start waaaaay smaller. Play around to find your perfect amount.


As soon as you put it on your hand, it starts melting. That shows you that it's not the worst of the saturated fats. . .but still.


Press your hands together until it completely melts.


Apply it to your hair. Start at the ends and work your way up. 


For Fine Hair: A larger amount can be applied to wet hair for an hour or so and washed out. (This is an especially good option for people with people with dry shafts of hair but greasy follicles who wouldn't be able to apply coconut oil to dry hair without weighing it down.)

For Curly Hair: Simply towel dry your hair. Apply a small amount of coconut oil and a small amount of hair gel (all-natural hair gel recipe coming soon). If your ends dry faster than your roots, apply a bit more oil to the ends. Scrunch your hair and shake it out a little. The coconut oil will naturally guide your strands into nice "piece-y" curls as your hair air dries. (Usually, I have to twist each lock into a curl and apply mounds of product.) Time saved: 15 minutes. The end.

Quick Fix: If you accidentally overdo it, get out your baking soda from when you made your own Laundry Soap and/or Dish Washer Soap and sprinkle it over whatever part of your head looks a little greasy. Brush it out until you don't see any more powder. Voila! (I have to do this on my bangs every once in awhile. Why do bangs get shiny when the rest of your head doesn't?? No idea. . .)


I washed and straightened my hair on Friday evening and applied it then. I only had to reapply a tiny bit on Monday morning (this skippidge of two mornings of reapplying product is unheard of in "Jessica'sHeadLand"). This picture is from Monday evening.

I know I just started doing this, but I was so impressed, I just had to blog about it. I am not sure, but if i had to hazard a guess, I think over time I am going to see fewer split ends and thicker hair. I'll have to report back in a few weeks.


UPDATE: Since that picture was taken, I actually did not have to wash my hair for an entire week and it didn't look oily or gross--even with FIVE hour-long cardio workouts that week! I washed my hair the following Friday, but didn't use shampoo, only conditioner--hoping that I could go "sulfate free" for the rest of my life. Unfortunately, by Tuesday night, my hair was feeling not so great, so I washed it with shampoo on Wednesday morning. 

My words of wisdom are: Until we can figure out a natural, thoroughly clean version of shampoo (I realize you can buy sulfate-free shampoo from the grocery store, and this may be your only option), I would advise washing your hair twice with shampoo before going without washing it for a week.

Thursday, March 7, 2013

A Doable Exercise Plan

Most of us get burnt out doing exercise because we watch something like The Biggest Loser or read an inspirational magazine article and think, "I'm going to start waking up at 6:00 and run for an hour!". . .Yeah, like that happens. Or, "I'm going to join a gym!". . .All it takes is one rainy day, and that idea is dead in the water!

Most people then use the age-old excuse, "Exercise? Who has that kind of time?" And yet. . .these same people watch at least five different T.V. shows per week. . .hmmmmmm. . .(Am I judging? Yes, but only because I was totally there six months ago.)

So here is a completely doable routine. It's absolutely free, you don't need any special equipment (unless you want to drag that elliptical or treadmill out of the closet), you don't need a lot of space, and you get to watch your favorite T.V. shows in the comfort (and non-judgmental confines) of your own home!

A FEW THINGS TO THINK ABOUT BEFORE STARTING:

1. Do it at your own pace. Start working in one to two minute intervals, catch your breath, and then pick back up. Just vow to stick with it for a whole hour of T.V. watching a day.

2. Do it every day, Monday through Friday. If you like to wake up early, then do it early. If you like to do it after work, do it after work, but make sure to do it at the same time every day. This helps your body understand that it's getting into fat-burning mode. Think about it: You know how you get hungry three times a day? Well, your body will naturally start craving exercise during "that" time of day. Your body will actually miss it when it doesn't get it! I know I sound crazy, but . . . it's true! This is coming from a person who hated P.E. class in high school. Like hated hated. Like would have rather studied for a test! I'm not kidding!!!

3. Set one goal. That goal is to try it every day for a month. Just a month. At the beginning of the month, step on a scale and remember the number. Let that number haunt you. Don't step on the scale again for at least a week after starting this if not the entire month. If you don't weigh less at the end of a complete month of trying this, I'll give you your money back! . . . Wait a second. . . Seriously though, I'm already excited about your results!

4. If you are a Christian and can't find the time for Bible reading and prayer, do this routine while you listen to the Bible on CD or mp3 for 30 minutes and then pray for 30 minutes. The first few times, it's going to be hard to focus because you are so out of breath, but after a few days, you will find you can actually focus deeper and pray harder than ever before! There is a reason the Israelites danced when they worshiped God. Physical movement aids focus and creativity.

5. The ENTIRE time during your hour, remember two things: Keep your belly button sucked into your spine and when you bend your knees, never let them go past your toes.

THE ROUTINE:

1. Start the first week or so simply marching with high knees whenever your show is on. When it goes to a commercial, spend the first commercial catching your breath and taking a water break. Then do pushups, situps, and stretches while sitting on the couch for the remainder of commercials. When the show comes back on start marching again! Do this for an hour.

2. By the second week start a different move every time the show comes back on. Pick the ones you like and add others as you grow stronger. (During commercials, you still do a water break, then pushups, situps, and stretches.)
 
     a. March in place with high knees, exploding off the floor and swinging your arms. (Upgrade: Run in place with high knees)

     b. Stand wider than hip distance with feet turned out--knees pointed same direction as feet at all times. Bend your knees and sit back with arms extended forward. Then straighten back up. Focus your movement in your core by sucking your belly button into your spine and squeezing your butt. Knees never go past the toes. (Upgrade: Jump as you straighten.)

     c. March in place kicking your butt as you march. (Upgrade 2: Run in place, kicking your butt.)

     d. Lunge back and forth. Start with a small bend in alternating knees. Bob a little bit as you do this move to engage your core. Again, pull your belly button into your spine and squeeze those butt muscles! Knees are always pointed toward toes and never go past them. (Upgrade: Stand wide apart and make the lunges deeper while alternately lifting your feet off the floor.)

     e. Step side-to-side. (Upgrade 1: Alternate lifting your legs to the side squeezing your side abs as you lift. Upgrade 2: Jump from side to side.)

     f. Step one of your legs out to the side, but don't put weight on it. Using the resistance of the floor, slide your foot back in targeting your inner thighs. Alternate back and forth.

     g. Jump rope in place. Don't use a real jump rope in the house (DANGER! DANGER!).  Just pretend you have an imaginary one and do the same motions. (**FUN FACT: Jump roping burns 13 calories a minute! That's 195 calories for 15 minutes!)

     h. Do front kicks. Stand with feet hip distance apart. Step one foot forward and bend both knees slightly. Keeping your shoulders relaxed and in the same place the whole time, contract your abs as you snap your back leg forward and back down into the same starting spot. Do the same amount of kicks on the other side. Start with low kicks, and as your strength increases, kick higher. (Upgrade: Bounce in between kicks.)

     i. Do Roundhouse kicks and Axe kicks. (Look these up on YouTube as they are a bit hard to describe. Keep the same form, though.)

     j. Throw some punches. Stand in the same kicking stance with both feet hip distance apart, then step one foot forward. Whatever foot is forward, start a jab with the same hand, then jab with the other hand. That's one rep. Make sure you are not using your shoulders to do this, but instead powering the movement with your abs and the turn of your hips. Change from jabs to crosses and then do some uppercuts. (Upgrade: Bounce in between punches.)

     k. Upgrade any of these moves by holding hand weights and swinging your arms.


You can pick and choose whatever you want from that list, and if you can come up with new ones, do them! Just make sure you are moving for one whole hour!