Showing posts with label warm. Show all posts

Wednesday, February 11, 2015

Shiny Silver Fuzzy Sweatshirt

I made a sweatshirt using the sweater below as my pattern. Blogger's sideways ways have struck again.


Here it is. I did my same "lay it down and cut around it" method that I've done a million times before, so I skipped right to the end.


A close up. This fabric is really interesting. It's shiny and almost metallic, yet fuzzy, and if you look hard enough, you can see sort of a paisley pattern going on.


A super close up.


The End!


Wednesday, February 12, 2014

Valentine's Day Special: Gentleman's Robe/ Smoking Jacket

If you are like me, you have a problem trying to figure out what to get your man for Valentine's Day. I guess if you are the woman, you are allowed to skip this one every once in awhile since V-day is traditionally the time when the man buys stuff. Anyways, I just love my little baby and wanted to make him something. 

I was at the thrift store the other day and came across this pattern. It was kind of a ghetto deal where the paper patterns, in order to conserve paper on the part of the printers, were on the fronts AND BACKS of the same piece of paper! You were supposed to leave the "master" paper alone (as in not cut it), and then trace around the pieces you wanted using special pattern tracing paper. Um. . .I'm going to cut the patterns I need from the patterns in the package and DEFINITELY not buying more paper, thank you! Why do you think I bought the pattern! I did have to tape computer paper together to trace some of them. . .That was annoying. Oh well, the pattern was only a quarter.

Okay, rant over.


I went to another thrift store and found about 4 yards of this. . .I don't know what to call it. It's fleece on one side and shiny on the other. Anyways, it was bright royal blue and very soft and warm. I'd been looking on and off for the past few years for a classy "smoking jacket" for Billy to lounge in at home, but never found anything I liked. The stars aligned and I made the robe you see below:


I followed the pattern for the major parts, but as you can see my finished product is shorter and the pockets are different from the ones on the pattern packet. Actually, they are quite different as the ones you see in the picture above are really false pockets. Instead, I opted for side pockets at the seam rather than applied pockets. I just feel that side pockets are more comfortable. Plus, the robe looks classier this way.

(At one point I was trying to hurry, and I accidentally sewed a side pocket onto one of the sleeves! That's what happens when you make clothes for someone tall as a giant. You get lost in a sea of fabric.)

I used the sheen vs. fleece of the garment to make contrasts in the over-all aesthetics on the outside. In other words, most of the garment is shiny, but the false pockets, collar/band, waist chord, and sleeve cuffs are fleece. I did this to add interest to the look, but mostly I kept the fleece on the inside as functionality for warmth. Also, (I didn't take a picture of this, but. . .) I made the insides of the pockets fleece inside.


How I did the false pockets:

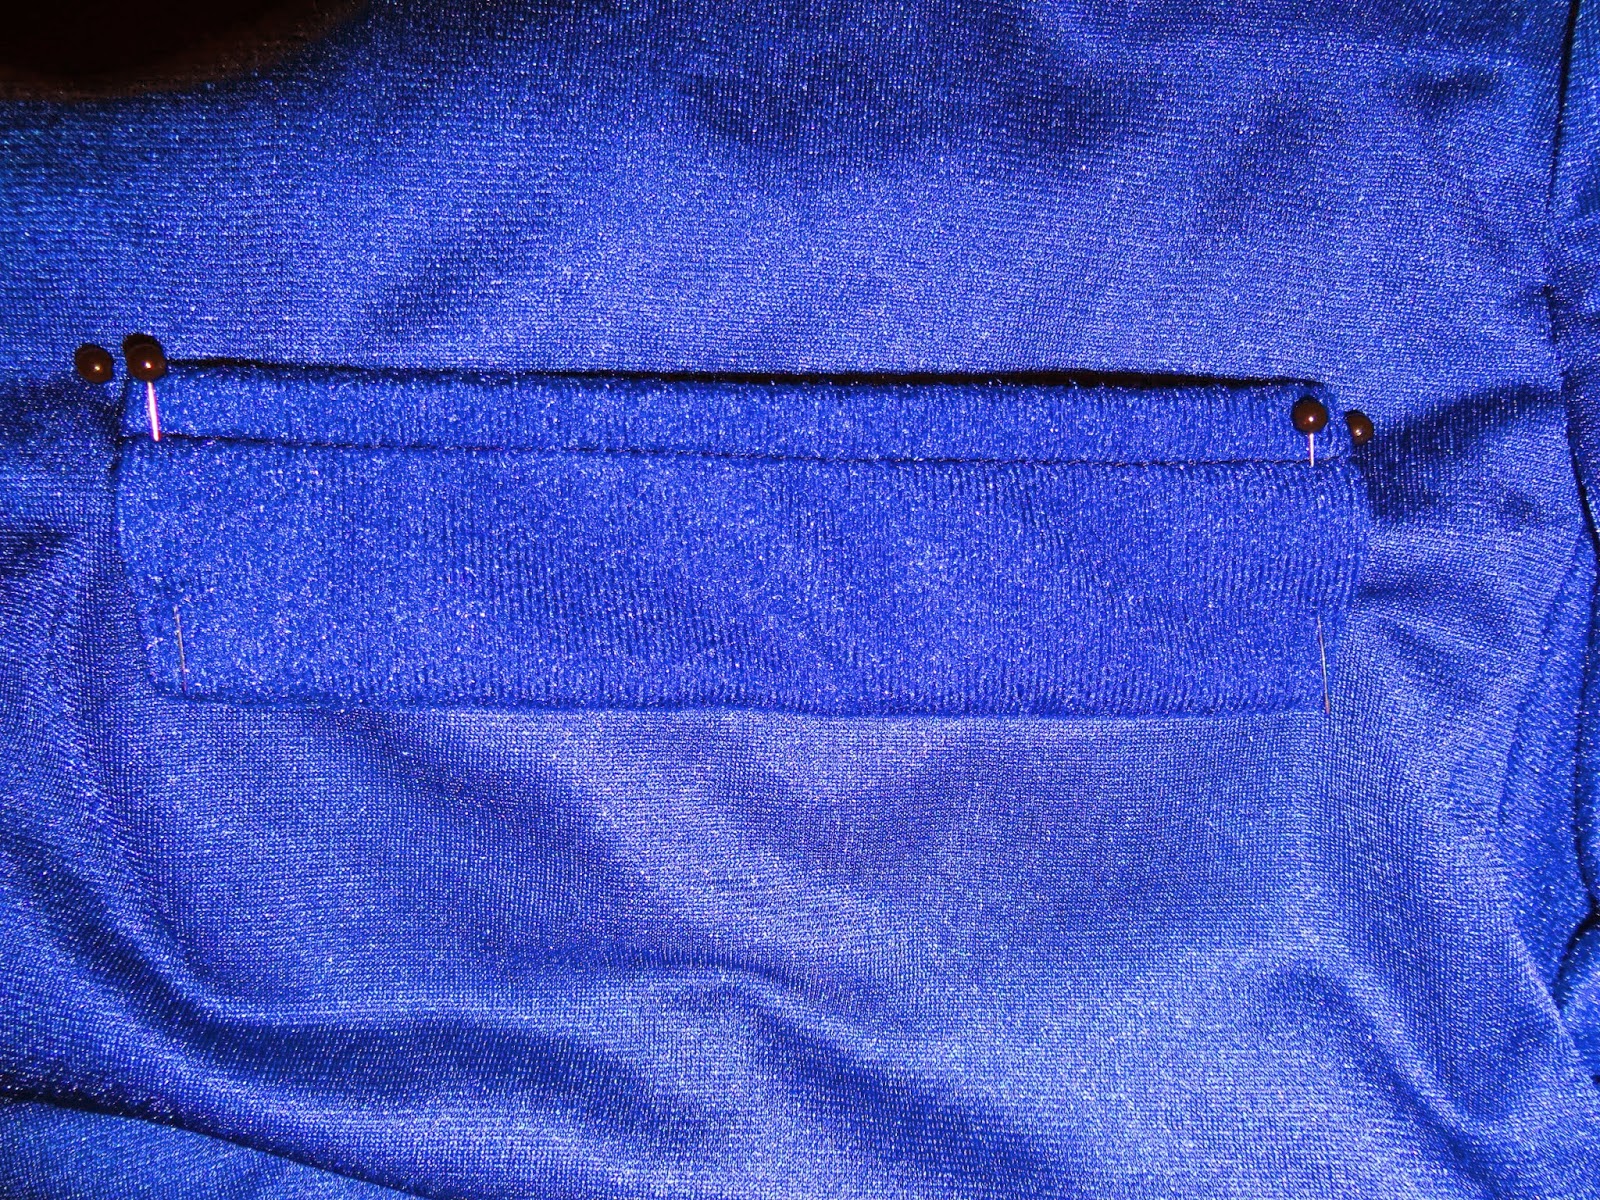
This part actually took the longest, because it was the hardest to plan. First, I had to determine where the tops of the pockets would fall in relation to the outer and inner seams on the front, how far below the belt they would be, and how wide they would be. This wasn't easy, but I won't bore you with specifics. After doing that, I put pins to mark where the top of the pocket should fall:


Leave it to Blogger to make my explanations even harder by putting my pictures in sideways. . .Anyways, if you turn your head to the right and pretend the right-hand side of this picture is the top, I laid my fake pocket on top of where the first pins were, but measured down halfway and pinned the pockets to the garment:


Okay, now the top is the top. See where I stitched? That was what those pins above were for.


Then I trimmed the top part off:


Then I folded the bottom part up to meet the first pins:


Then I stitched up the sides. If you look at sports jackets, this is what the tops of the pockets look like.


This really makes me crazy, because the false handkerchief was my favorite part and the picture is sideways no matter what I try. . .Anyways, if I can direct your attention to tipping your head to the left. . .


I also put in an internal tie to keep the whole jacket in place. This wasn't part of the pattern, but. . .it's a good idea if you make a robe. One side attaches to the waist of the left-hand side seam, and the other side attaches to the waist of the right-hand side seam of the collar/band.


If you see how I'm tugging at the waist chord in the back, you can see that I've attached the chord to the actual garment at the middle back of the waist (picture is sideways again). This keeps you from losing the chord in the wash. I learned that trick from a coat I own.


I also tacked the folded over cuffs of the sleeves so they stay in place, but still look folded and unattached.


He's cute, but he refused to model, so. . .Here is the finished product. . .modeled by the floor!


The End!


Friday, October 25, 2013

How to Pack for Cold Weather

Since the holidays are coming up, and many people will be traveling, I thought I would take a minute from my packing (to visit Montana on a mission's trip) to show how a woman packing warmly doesn't have to pack a lot. The keys are to stick to one color scheme, pack lightweight yet warm fabrics like fleece and wool, and pack layers rather than bulky items. I've packed everything I need in a small rolling carry on and a large purse. (Incidentally, the carry on has a lock on it and an expandable zipper.)

The trip will last about six days, but with what I've packed, it could last longer because almost everything can go together in different ways. I'll dissect my carry on and purse in a second, but before I do, I want to point out what I will be wearing on the plane: Sketchers boots, a long-sleeved hip-length taupe shirt, orange skinny jeans, and a light taupe fleece vest. (If I get hot, I can take the vest off. I can also pair it with other items in my carry on later if I get cold during the trip.)


Now to dissect the carry on: The inside flap.

1. 5 pairs of fuzzy socks. These are essential for sleeping and really make a difference inside your boots when the temperature drops. They also dry within a day if you have to wash them in a sink.
2. 6 pairs of underwear and socks. (They can also be washed in a sink if needed.)


The Top Layer (sorry, Blogger put it in sideways)

1. 6 pairs of black and grey fleece-lined tights. These can be worn by themselves under long shirts and dresses or under skinny jeans for added warmth.
2. Running shoes inside a mesh laundry bag. I can use the shoes for exercise, but also as alternative footwear if my boots start hurting me. (Always bring an alternative footwear option. You never know how much you'll walk and your feet may need a break.) These shoes are Sketchers "Go Run" and they are super comfortable, but also squish up nicely into luggage. Also, the mesh laundry bag will come in handy at the end of the trip when all my clothes are dirty.
3. Thermal shirt and black sweat pants for exercising. In case I don't get very sweaty, I can also use these as layers under other clothes to keep warm.


The Second Layer

1. A small loofah and a super absorbent towel. The towel is about the size of a hand-towel, but I can dry my entire body with about half of it. I bought mine in Japan, but you can find these towels in most department stores and eBay. If it's still wet at the end of the trip, I can just hang it over my carry on while I travel instead of soaking the inside of my luggage.
2. Thermal underwear. These will be my pajamas, and also a base layer if I need it.


The Third Layer

1. Two pairs of skinny jeans.
2. A black long-sleeved shirt to go under things.
4. A taupe hip-length long-sleeved shirt.
5. A long-sleeved animal print dress.
6. A casual long-sleeved blue dress.
7. A black hip-length long-sleeved shirt.
8. A taupe turtleneck.
9. A green striped hip-length sweater vest.
10. A Mary Kay stand-able mirror. (In case there is limited mirror space.)
(Notice that all my shirts are hip-length. This is to keep my butt warm!)


Inside the Big Purse

1. My small backpack travel purse with lots of pockets. (Inside I have a sewing kit, some bags of tea, bandaids, vitamins, tissues, etc.)
2. My quart-sized toiletries bag. Always keep your toiletries bag inside your purse (not your luggage) for easy access during security checks.
3. My ipod, phone, and camera chargers inside a compact-able shopping bag.
4. A taupe fleece hoodie.
5. Fleece-lined wool hat and mittens.
6. A fold up raincoat. (Doubles as an outer to go over my winter coat during blizzards.)
7. An inflatable neck pillow with eye mask and ear plugs in the pocket.
8. A "Patagonia"super light-weight compact-able down-filled winter coat.
9. Taupe pashmina scarf.
10. Velcro wrap-around earmuffs.
11. Alpaca sweater.


I still have plenty of room for some last minute items like glasses, small travel flatiron and hair dryer, extra fleece hoodie, etc.

So, hopefully that gives you an idea of how to pack warmly, fashionably, and cheaply this holiday season!

The End.