Showing posts with label Church. Show all posts

Wednesday, December 27, 2017

Sunday School Craft - New Year - "This is the year that the Lord has made" Party Stuff!

So if you are like me, you were planning all this stuff for Christmas and COMPLETELY FORGOT about New Years! So. . .here is a craft for the procrastinators and overly-busy!


First step, go to Dollar Tree and buy some party hats and blowouts.


Next, print out my template (at the end).


Then, glue the 2018 sign. . . 


And stick it to a hat!


Now, let your kids run around and be sure to give them a lot of sugar before you send them back with their parents! ;)

Happy New Year!


Template:


The End!


Thursday, December 7, 2017

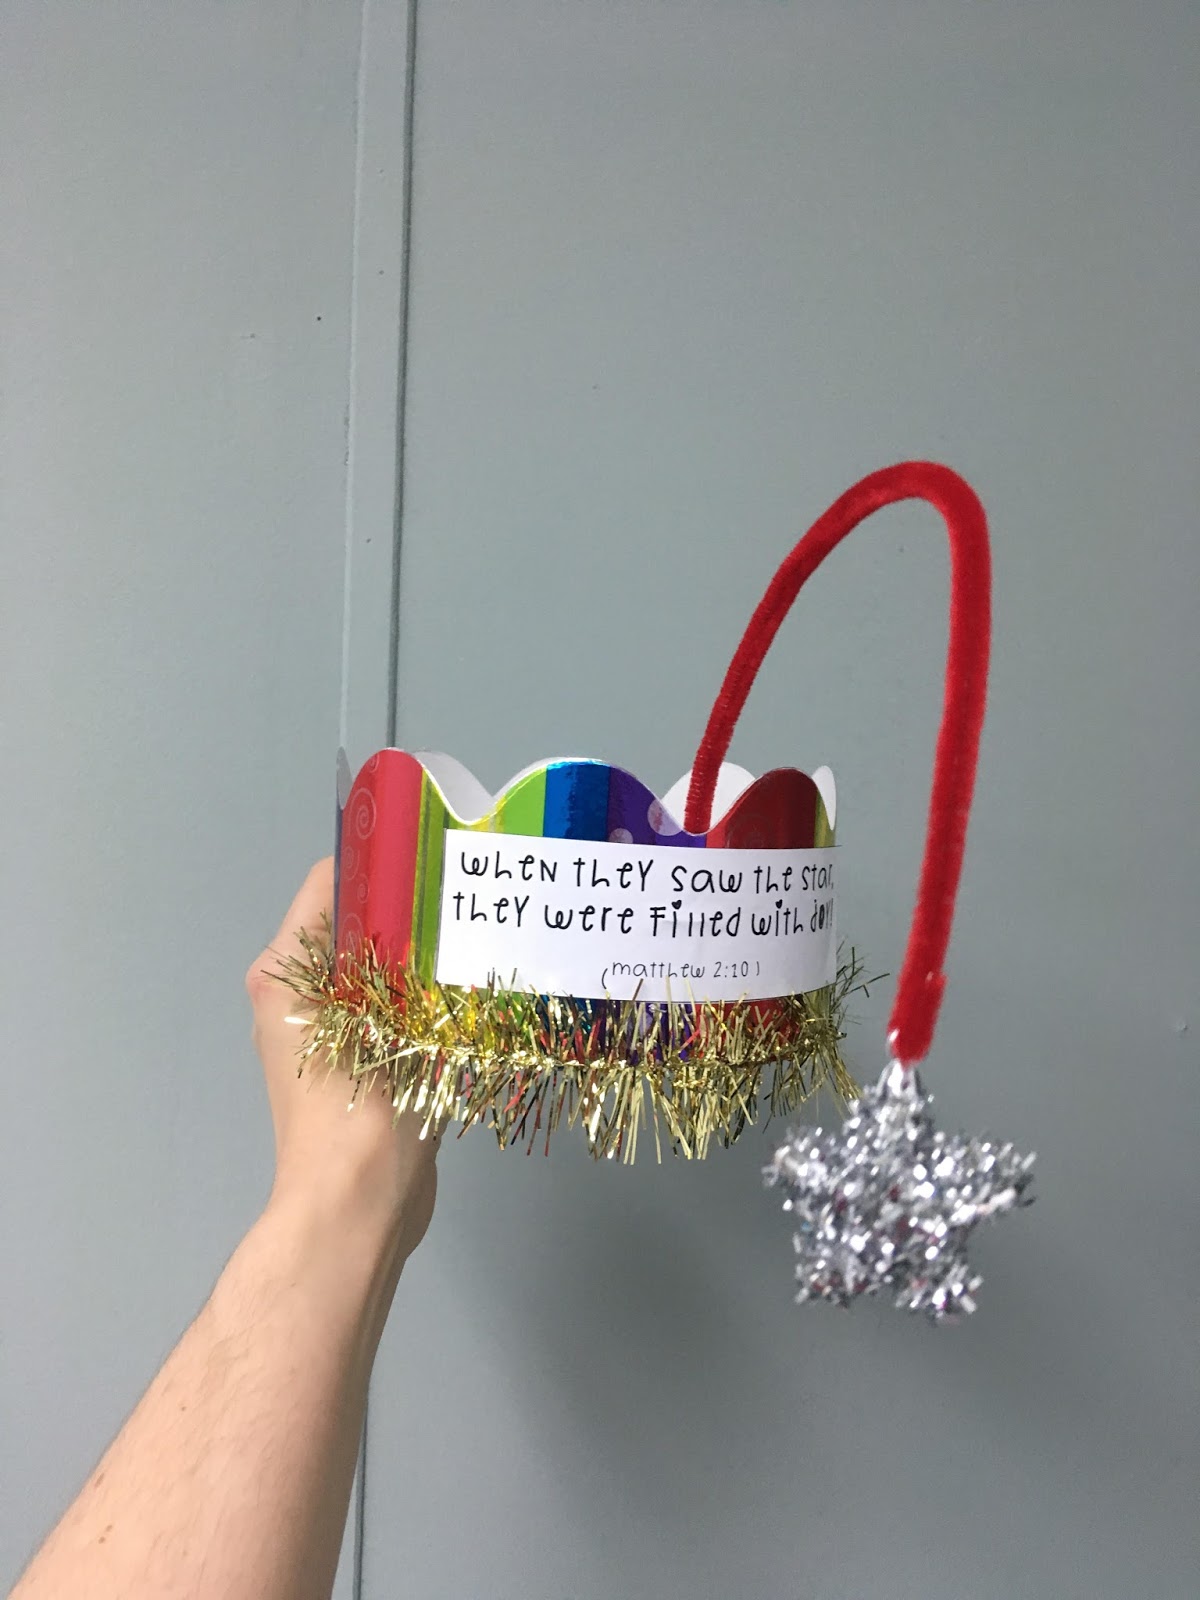
Sunday School Craft - Wise Men "Follow the Star" Crown


Okay. . .let's be honest here. . .

The MOST IMPORTANT reason for little kids to do crafts is so that adults can be equally as entertained.

This is one such craft!


You need: metallic bulletin board boarder strips (15pk at Dollar Tree), tree tinsel garland (10yds at Dollar Tree), star ornaments (6pk at Dollar Tree), pipe cleaners, paper, stapler, and a glue stick.


You can also improvise with whatever you can find. For instance, you don't need the garland. You could use construction paper to make the crown. And you could just cut out stars to hang. Anyways, this post should at least give you some ideas. The main thing is to make a crown and attach a star with a pipe cleaner for the child to "follow."


The first step is to cut the garland to the length of the boarder (This one is 18").


Then, cut out the verses in the template I've provided at the end of this post.


Then, staple the boarder onto the bottom of each boarder. (I used four staples per.)


Then, staple the pipe cleaner in two places from the back. (I also turned up the "tail" of the pipe cleaner to make sure it wouldn't pull out easily, but I didn't take a picture of that step.)


Next, glue the verse to the front of the crown.


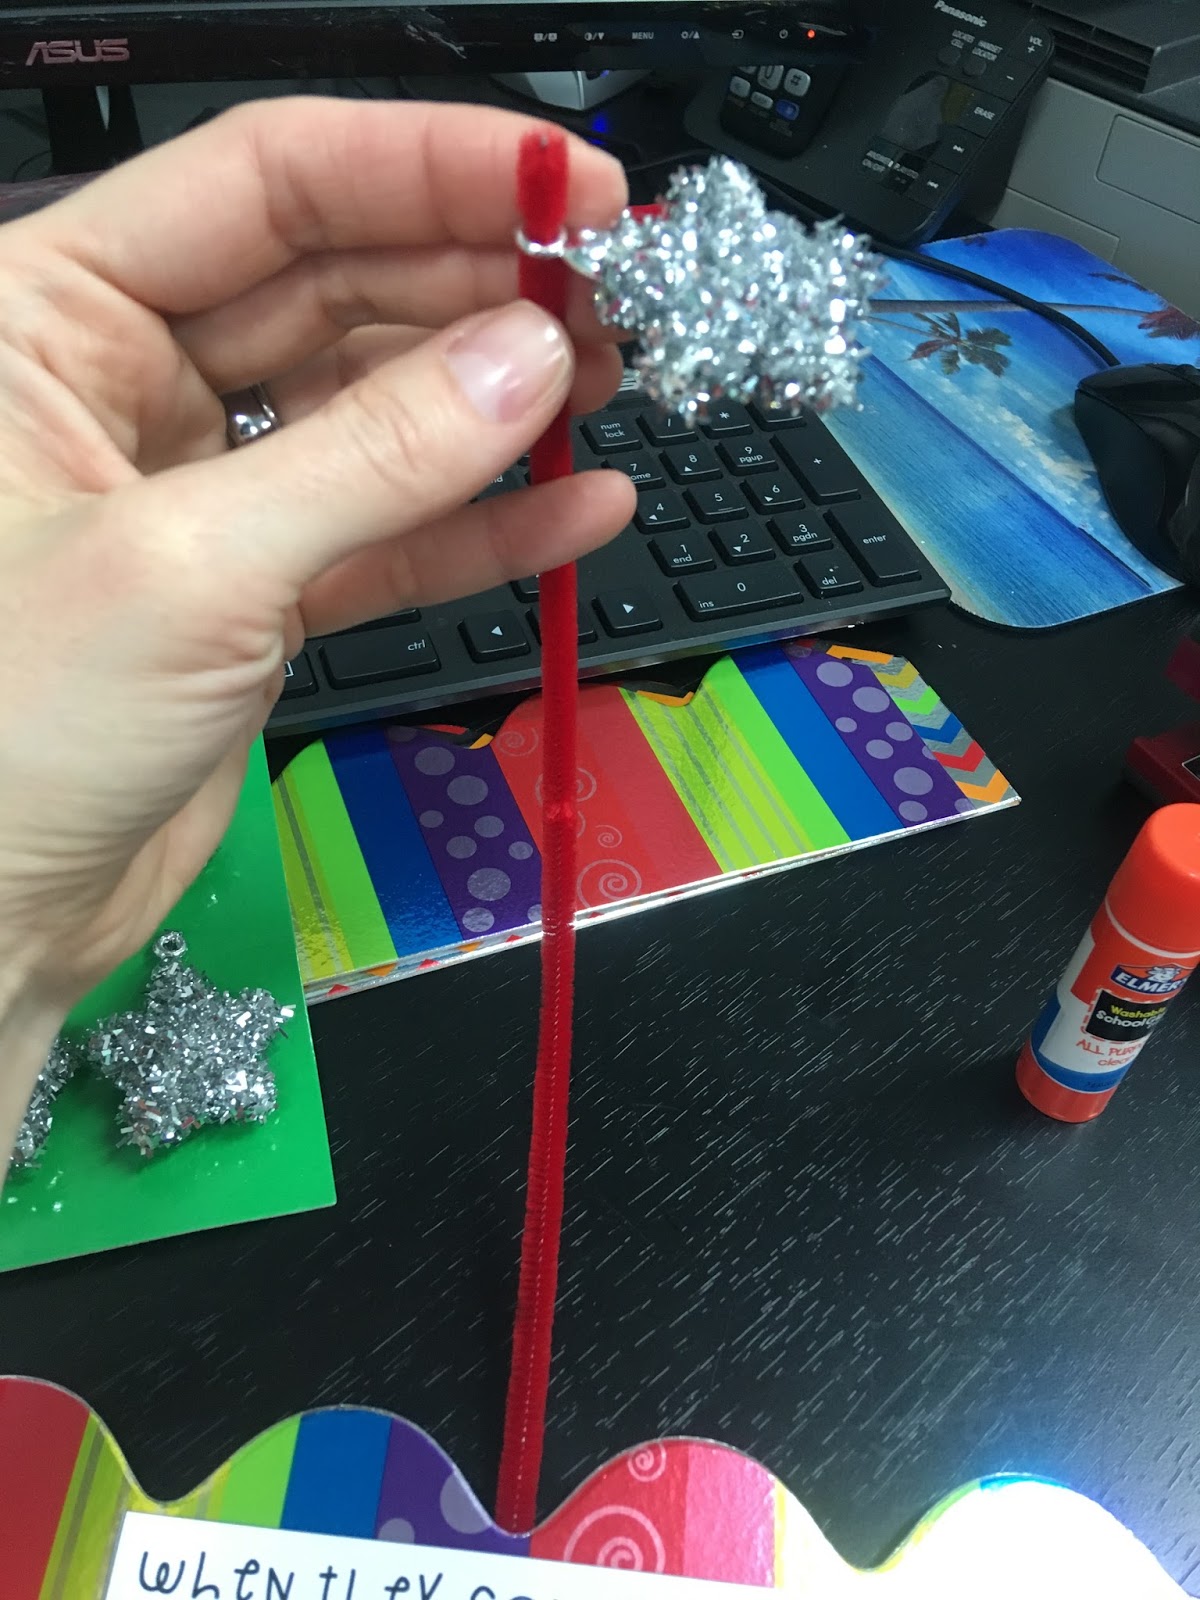
Then, take a star ornament off the card and pull off the twisty-tie.


Insert the pipe cleaner through the top hole of the star. . .


And bend that tip down.


Final step: staple the back of the crown together in two places so it makes a hat!


My head is too big, but you get the idea. . .


Cute! Can you imagine a bunch of little kids running around with these on their heads at your church??? 

Adults will lose their ever-lovin' minds!


The End!


Thursday, September 28, 2017

Sunday School Craft - Feeding the 5000. . .Five Loaves and Two Fish


So the little kids are going to learn about "The Feeding of the 5000" in a week or so. I searched Pinterest and Google for theme-worthy crafts. Most of them just showed five loaves and two fish with a pertinent Bible verse. . .which is fine. . .but I wanted to show the multiplication aspect of the miracle!


You need: cardstock, regular paper, glue, and scissors.


So if you scroll to the bottom, you will find my templates I created from Google graphics. You need to print out the same number of each page.

Then, you need to cut out the loaves and fish into vertical strips like this. (If you use a paper cutter like I have in the picture below, it works better if you cut the pages upside down as the fish column is wider than the loaf column, and won't get stuck under the cutting guard--yellow part.)


It helps if you print the basket page out on cardstock, but regular paper will work too. I only used the colored cardstock you see below because we have a ton of colored cardstock and I'm trying to get rid of it!


Next, you need to fold each fish/loaf column EXACTLY like the picture below: With the fish/loaf facing OUT. Don't start by folding the fish/loaf inward or your craft won't make any sense.


Then, make the next fold like this:


And the next like this (keep folding until the whole column is folded up):


The folded columns.


Then, glue the "bottom" fish/loaf of each column and stick them on the page.

*NOTE* The effect is more dramatic if you glue them in such a way that they will jump out from the center of the page. This will make more sense in the next pictures:


Here, I have lightly taped the sides of each folded column down, so you can see the five loaves and fish.


And here they are unfolded and "multiplied"!


UPDATE: Shortly after I posted this to Facebook, my friend, Lisa, printed the craft out for her son, Jaren.
He loved it!


Templates:


The End!


Thursday, September 7, 2017

Make Your Own DIY Pumpkin Trunk or Treat Candy Collection Box for $3.00!

My pastor's wife asked me to make a box to collect candy for our church's Trunk or Treat. Immediately, I knew I wanted to make a box that looked like a pumpkin. I searched Pinterest, but I couldn't find any. . .

And, anyways, I already knew what I wanted to make in my head:


This box doesn't have to be just for candy collection. You may be a teacher and want to make one for your classroom. If so. . .

This is how to make one yourself!

Total cost: $3.00!

The large box was one that we had at church from some shipment or other. I went to Dollar Tree and found two rolls of orange wrapping paper, and one leafy garland.


The first step was to turn all the flaps of the box so they were out.


The next step was to make knife pleats folded like this: (You can see other pictures of these pleats in other pictures, don't worry. You can also Google "knife pleats - casual.")


Then, I rolled tape like this. . .


And folded them up.


The rolling of the tape was taking too long, so I just started taping the rest of the pleats like this:


This is one side completely finished. (Be patient! It takes a while. Also, don't press down the pleats any farther than about two inches from the top. You want the rest of the paper to be folded but not creased:


Here is a back-side view of the pleats. See how they are folded from this angle?


Okay, once that side was done, I started pleating the other side of the paper.


This is what one whole roll of wrapping paper looked like. See how the middle of the paper is only slightly folded, but only the outer sides are pressed into pleats and taped?


Then, I turned the whole box upside-down and started taping the folded paper onto the bottom left side of the box. (I didn't put any paper on the back, because this box was going to be against a wall. Feel free to put paper on the back of yours if you need it. In that case, buy three rolls of wrapping paper!)

[Not pictured]


Then, I turned the box on the side that will be against the wall, and taped the paper to the box around the bottom of what would be the front.


This next step is VERY important if you want your pumpkin to have "body" and stick out like a real pumpkin: Turn the flaps of the box down. This is a little awkward as the wrapping paper will naturally be creeping up the sides. You kind of have to finagle it so you don't crush the paper as you do this.


Then, I taped the top of the wrapping paper into the top edge of the box. The paper covered exactly half of the pumpkin! I got lucky!


At this point, you can stick your hand inside the paper and sort of push it out from the inside to get it to round out like an actual pumpkin. If you want to fill it with packing peanuts or something light and puffy, feel free. I didn't.


Then, I got smart and instead of pleating one side of the paper at at time, I pleated both sides at the same time. Much faster and easier!


Then, I taped this other piece of paper to the box, starting with the box completely upside-down. . .


And then turning it on its side to finish taping the bottom part around to the front.


It's starting to look like a real pumpkin!


Then, I Googled pictures of pumpkins to make the stem, and free-hand cut one out of a piece of green paper. (If you don't have green paper, you could also paint the stem green.)


Then, I traced the stem on the back flap of the box. . .


And cut it out.


Then, I glued my green paper to it.


To keep the stem upright, I grabbed one of the empty wrapping paper tubes and taped it to the back.


Then, I added the leaf garland. (First I taped two of the leaves to the stem, but the tape kept coming off, so I stapled them.)


The tape on the wrapping paper was starting to pull away from the box, so I reinforced all the tape with clear packing tape.


Okay, now the box is done, but I wanted to make a little sign for people to know what the box was for, so I spent another $3.00 at Dollar Tree and bought this cute little owl and two fall leaves.


I also printed out a speech bubble for the owl to say, "Whoooo wants to help with Trunk or Treat? Deposit candy in the box below!"


The End!