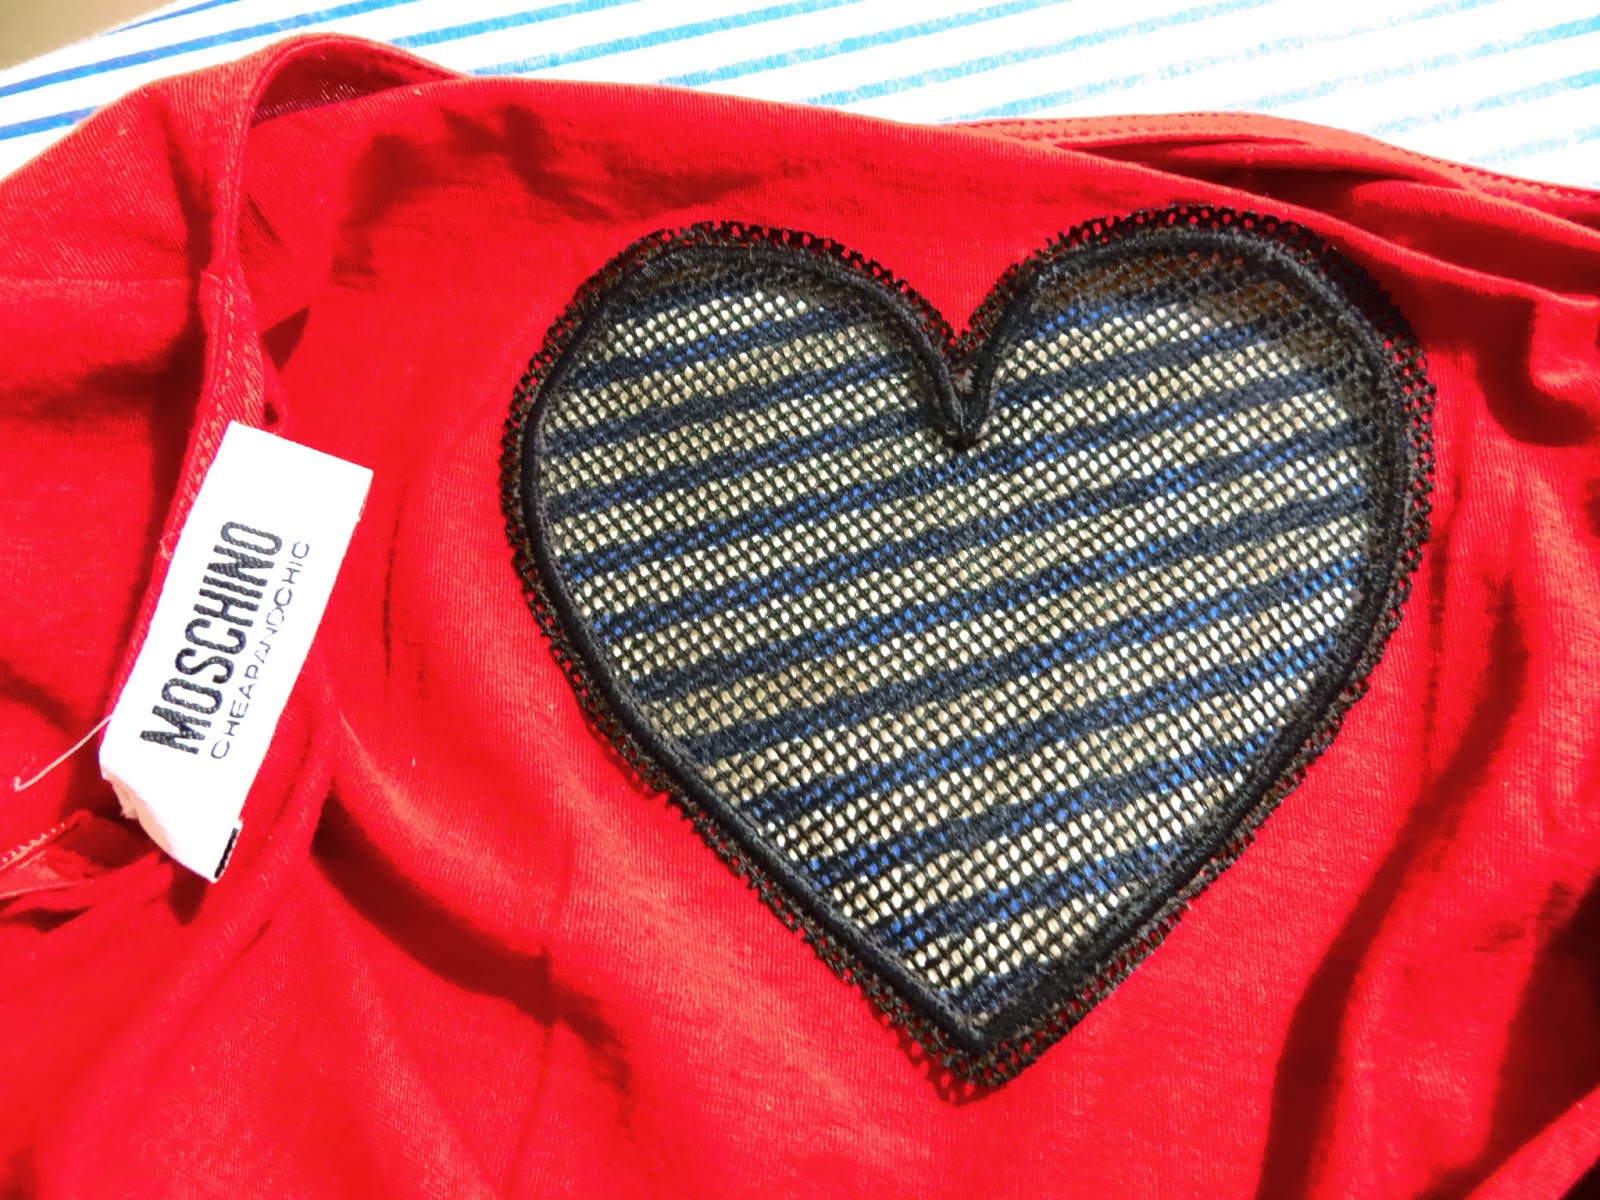
Continuing in the Moschino vein...here is a "Moschino Cheap and Chic" shirt that I bought last week.


It's interesting because the graphic heart is actually a stretchy mesh that was frame-embroidered into the shirt, and the shirt part was cut away to make a sort of "peekaboo" situation. That is why I'm calling this "reverse applique." Instead of adding a piece of fabric into an item, the designer subtracted a piece of fabric. Does that make sense?

Studying the back, I saw that the designer had placed the mesh BEHIND the shirt. You can tell this because you can see seam allowance around the heart from the inside of the shirt here:
Okay, so this post isn't going to be so much about a success story as it is a process of learning and trying something new. Hopefully, it will give you an idea or two.
I had this T-Shirt in my "Get Rid Of" pile, so I grabbed it to use for practice.

I wish I had black stretchy lace, but. . .I don't right now. I do have a bunch of this white stretchy lace, though, so I cut a piece to use.

I folded the shirt in half to find the center of the shirt and I drew a line down the center with tailor's chalk.

Then, I ironed some tear away stabilizer to the wrong side of the front of the shirt.

Then, I ironed some stabilizer onto the wrong side of my piece of lace.

This is how the pieces will be set up inside the shirt. The lace will be behind with the right side of the lace touching the back of the shirt. (In this picture, the shirt is inside out.)

Hard to see, but I drew a second line perpendicular to the center line to use as reference in keeping my embroidery hoop straight.

This part took forever. Hooping both the lace and the shirt and making sure everything was straight and even. . .no easy task!

This looks like I centered the shirt wrongly because the line is going slightly diagonally. Actually, the shirt is hooped almost perfectly. The line itself ended up being a little off.

Here is a peek at the back of the hoop inside the shirt. See how the lace is in the back?

I put the hoop into the machine.

This was my first time ever attempting a frame--let alone a reverse applique--so it seemed to me that I should stitch the first round using just a simple once-over straight line, and also making sure that the heart was 9.8cm across. When I would go back over it with a thicker satin stitch, I will have made the heart 10cm across. This was to make sure that the satin stitch would actually pick up both the shirt and the lace and not leave any gaps. (This will make more sense later.)

Okay, so here is my first round: the simple once-over straight stitch.

After that step, I pulled the hoop out of the machine and pulled the red T-Shirt away from its backing stabilizer. Using thread trimming scissors, I cut the heart portion out of the middle. I tried cutting up as closely to the stitch line as possible, but these scissors are not really made for trimming fabric, only thread. I do have some actual "duckbill" applique trimming scissors on order, but. . .I was too impatient to wait for them! (You will see later how I should have waited.)


Okay, so now I programmed my machine to sew a thicker satin stitch heart that was 10cm across.

See how the machine is stitching perfectly over the former straight line? That's why I did the first line at 9.8cm and the satin stitch at 10cm.

Okay, here's the problem: I should have cut a little more closely to the first stitch line because see how much red is sticking out from under the satin stitch? There are three ways to eliminate this:
(1) Use the same color thread as the shirt (in this case, red). That will make the excess red part less noticable.
(2) Set both stitch lines at the same centimeters across (in this case, 10cm). That way, the cut line will be farther into the satin stitch margins. I didn't know where my margins were when going from straight to satin--because I'd never done this before. I had tried to anticipate marginal error by doing the first stitch at 9.8. Next time, I'll try doing them both at 10cm and see what happens.
(3) Use actual trimming scissors. Trimming scissors are curved, which allows a person to cut much more closely to seams without the handle of the scissors getting in the way. "Duckbill" scissors are even better, because they lift the cut fabric out and away from the project so you can get even closer to seams.

Anyways. . .here is the shirt from the inside.

I tore away all the stabilizer.


And cut around the lace (just like was done to the Moschino shirt).


The finished shirt.

You can see my fingers behind the lace. So there you have it! A reverse applique!

Was it a total success? No. This was just a practice. But I learned a lot, so I thought I'd pass it on!

The End!


