Showing posts with label top. Show all posts

Friday, August 19, 2016

Refashioning: Oversized Shirt into Separates - Shirt and Skirt (V Shaped Body Type to Pear Shaped Fix)

I got this shirt in Thailand for around $1.60. I just liked the cartoon print of it and knew I could do something with it.

Actually, at this point, I've already taken in the back neckline to bring the shoulders closer together. It used to be a huge scoop neckline. Also, the sleeves were way too big for my arms. Obviously, it was made for someone who had much broader shoulder and thicker arms--maybe a ladyboy? Who knows. Anyways, this sistah is pear shaped, so. . .I thought if I took in the neckline and sleeves, the problem would be fixed, but as you can see, I'm still not gonna wear it!


Another problem is that this shirt was just so far over the top, and what I call "Miami Chic" meaning "cheap and tacky." I feel like I should be wearing a ton of gold chains and hoop earrings with stilettos, and. . .that ain't my style.


Here you can see how I took in the back neckline.


All right, so if I was going to save this shirt, I was going to need to spread the love a little bit. So I cut it in half.


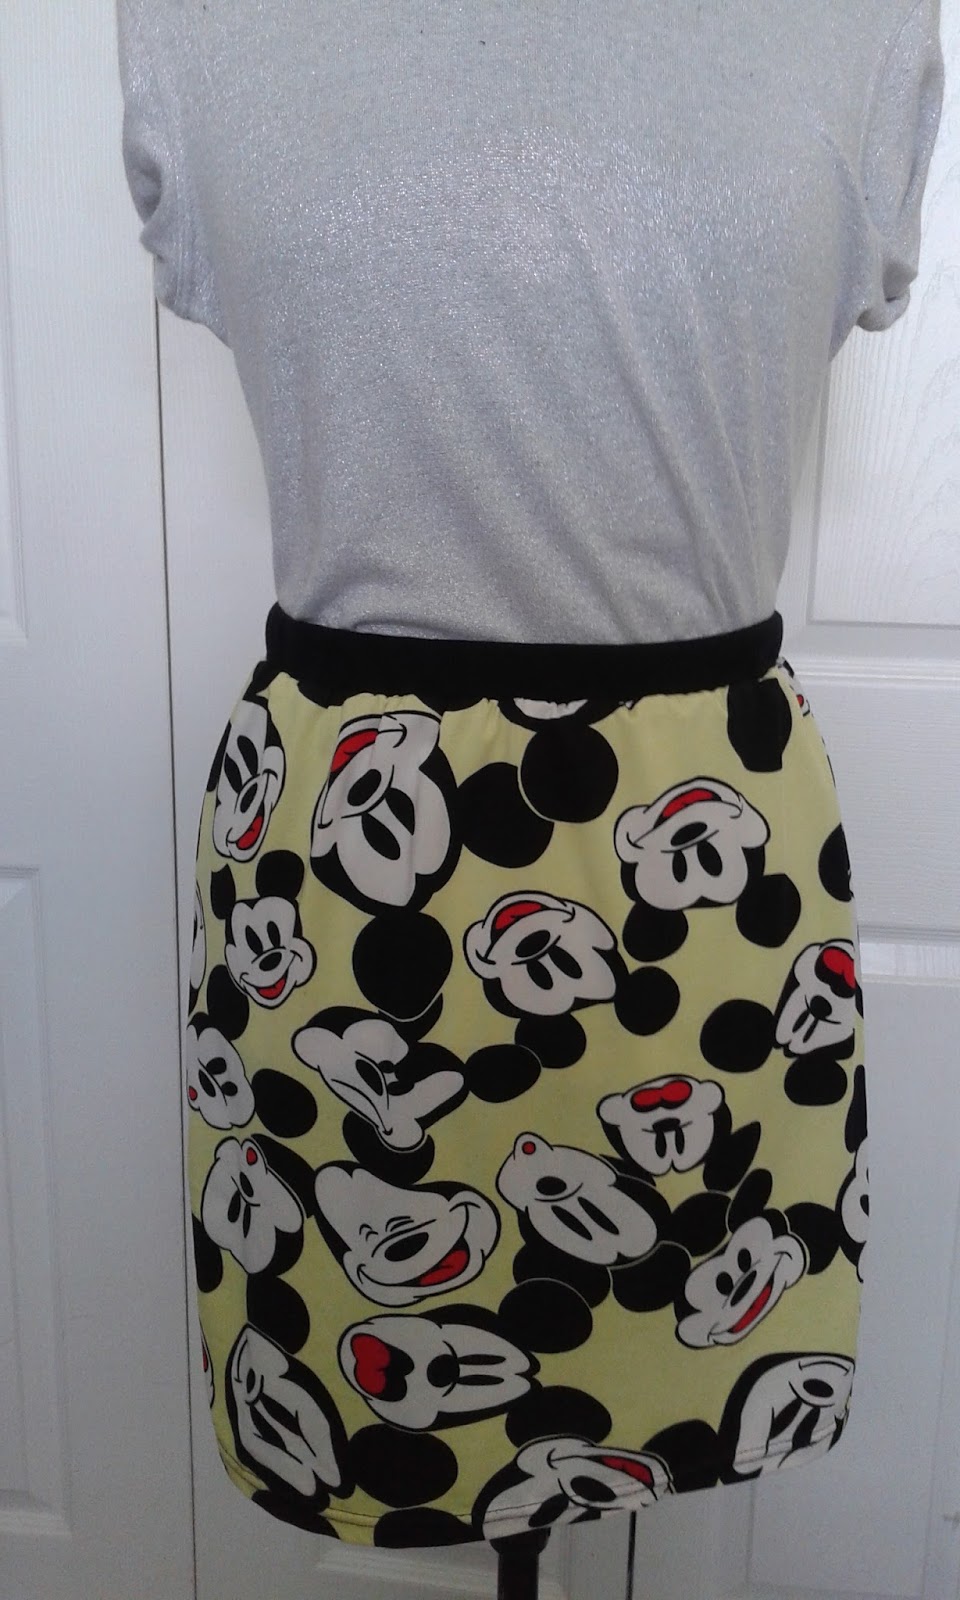
Using some black jersey, I cut out a three inch waist band for the top of the bottom of the shirt. 
It was about to become a skirt.


Then I cut out a 9 inch band of jersey to put on the bottom of the top of the shirt.


Here is the skirt band.


I finally found a bodkin! So...here I am using my bodkin to thread some elastic through the waistband.


Then, I stitched the elastic together and sewed the rest of the waistband seam to close the hole.


Skirt.


Here is the band going on the bottom of the top of the shirt.


Finished.

Okay, so...yes, there is still a lot going on, but at least now I can wear the pieces separately and not look as gross. Even just adding the wide black waist section breaks up the craziness a bit, if I wanted to wear them together. Adding the waistbands has now added shape to an otherwise shapeless garment. I may actually get rid of this entire outfit soon, but I wanted at least to show you how you could salvage and elevate some of those oversized T-shirts you may currently be wearing as pajamas!


The End!


Sunday, April 24, 2016

Refashioning: Turning a Dated Silk Dress into Modern Separates

I love this one.

I found this bizarre 100% silk dress at Good will. So much going on! Yet. . .It had great potential. Especially because of what modern designers are doing on the runways these days.

A note: It is actually a bold green and black in real life. My camera hates green.


So, this is the silhouette I saw in my head when I saw the dress, and I knew the dress had potential. (This outfit is Fendi.)


Here are some of those crazy modern patterns I was talking about. (These are Tom Ford.)


This one is from Pinterest, and I don't know the designer, but. . .let's be honest. They are all doing this sort of thing right now.


Back to the dress at hand. I loved the color. I loved the crazy pattern, and I loved the placement of the pattern with the florals at the extreme ends of the garment. Shoulder detail has been really big for about the past seven years and continues to be a "thing," so I knew this project was going to work.


Something else cool about the dress is if you look at the fabric in certain light, you can see that the fabric is actually a jacquard with satin polka dots embedded in the weave. So 60's throw back!


I found a shirt that I sort of wanted to copy as far as length and sizing and threw it on top to see what I had to work with.


I cut the weird mermaid skirt off.


I folded the top hem over twice and, using a seam gauge (my new favorite thing), I ironed the hem to make a casing.


Here I have pinned the casing.


Sewing from the right side, I stitched in the ditch all around, leaving space between these two pins in the middle back.


Into the opening, I inserted elastic with a safety pin on the end. (I actually bought two bodkins off eBay, but couldn't find either one! Man. . .I wanted to be so official too. Oh well. Safety pins work!)


Making sure the elastic lay flat, I stitched it together.


To distinguish the middle back (in lieu of a tag), I sewed a little ribbon bow.


The skirt: Done!


Now for the top.

The first step was to seam rip out the zipper.


Then, I pinned up the middle back seam and stitched it.


I left a keyhole at the top of the middle back so I would be able to get the shirt up over my head. I also sewed in a little hook and eye clasp.


I cut the sleeves off, folded the top in half, pinned the side and shoulder seams together, and smoothed out the wrinkles.


Using the other shirt as a guide. . .well. . .you know.


I stitched up the side seams (with a straight stitch and then going back over the sides with a zig zag), stitched the arms closed, and then sewed the sleeves to the bodice.


To hem the top, I double folded the hem at the bottom (making sure that the back hung just a tad lower than the front). . .


. . .and the bottom of each sleeve.


Okay, time for a rant. 

I love my Husqvarna. Everyone who knows I sew, knows I love my sewing machine. 

However:

Whoever designed the blind stitching capabilities of this machine. . .

Should be shot.

It's totally backwards from what it should be. See how I had to shove the entire garment up into the inside of the machine in order to do sew the blind stitch??? Also, I had to pin the garment backwards too, which is really annoying.

I'm sure there's some kind of "good reason" for this, but. . .

It's stupid.

End of rant.


The finished shirt! Yay!


Okay, do you notice how the shirt gently nips in at the waist? There are no darts, and the side seams are actually pretty straight. Wanna know how I did it?


If you look closely, you can see that the back seam is curved slightly.


This is easier to see when the shirt is inside out. You can see I'm pointing at the part of the seam that dips in. That part lies against the small of the back.


And here is a close up. Taking a shirt in from the middle back seam, rather than the side seams, looks so much more professional and so much less "amateur hour."


Here is the skirt. I ironed it for you.


And the completed outfit! So modern and cute!


And because we all love before and afters, here it is:


The End!