Showing posts with label own. Show all posts

Friday, November 11, 2016

My Newly Improved Craft Room!....(I Love My In-Laws!)

Okay, so like the crafts that happen within it, my craft room is a constant work in progress. If you have ever read any of my posts prior to this one (especially from the "Fashion" tab), you will see the things I make. However...I never really pictured the room, because this is what it looked like, and I've been sooo embarrassed!!!

Can you even see my sewing machine? (Hint: If you look at the dressform it is directly to the left of it in the background.) Right behind it, on a tiny old computer desk, is my embroidery machine that I barely use because I can barely get to it! I just got a Cricut for my birthday which you can see on the floor just behind that white box. If you look up and to the right, you will see a ton of cardboard boxes. You will notice that just about everything else is piled up or on the floor. I HATE this, but when there is nowhere to put anything, you just have to stack things and move them around when you need them.


This may sound funny to some people, but I'd been praying for a large, sturdy, industrial table that I could put against this big picture window and work on for sewing, embroidering, and Cricut...ing. I saw one at my old job (Blue Ridge Orthopaedics) which would have been perfect. It was about six feet long--perfect dimensions, no one was using it, and it was just cluttering up the hall--but unfortunately, since it is Post Office property, I couldn't take it off their hands. 
Anyways, ever since I'd seen it, I'd been praying for it, or something like it. . .

This is another view of the mess.


Then, a week ago Thursday, out-of-the-blue, my mother-in-law told me about how her brother, Eddy--who works at Duke Power--had a couple large trailers full of old office equipment that he'd rescued because they were throwing it all away. We went to his house to check the situation out, since my father-in-law also wanted to see if there were a few pieces that he could use for some of his projects as well. Ohmigosh, you guys. . .I should have taken a picture of the trailers. They were a crazy, wonderful mess of drafting tables, filing cabinets, shelves, desks, tables of every size, office chairs...You name it, it was there!

Tommy (my father-in-law) and I both tagged a few items and then I went home, okay-ed the prospect with Billy, and then spent my whole last Friday cleaning out the room to make way for my new furniture! I moved most of the mess to the other guest room, and I threw away a TON of cardboard boxes. (I'd been saving them because I sell stuff on eBay, but. . .enough is enough!!!)

So here is the room at that point. You can see that I kept my cube shelves and Rubbermaid drawers.


But everything else was cleared out to make room!


I measured everything to know exactly what dimensions would fit into the room.


Okay, so then the next day, Saturday, Billy and I went to his parents' house and we all drove to Eddy and Shirley's house to load up Tommy's trailer. I decided on not one, but TWO six foot tables! And a six-foot-tall metal shelf cabinet! Thank you to Tommy, Sue, and Billy for helping me get them in here. I DEFINITELY couldn't have done it without them!

So. . .It's not done yet, but I was so excited that I wanted to share what the room looks like so far!


You can see that I kept my cube shelves where they are. . .


Along with crafting, I use this room for exercising. I'm really excited about that part because I can pull the stepper forward and use my yoga mat, and I have all this room now! (In fact, now I can put down an air mattress when we have an abundance of company!)


Also, I like to watch TV shows on my computer while I work out, so I just have to open the doors of my cabinet and set my computer inside, and the computer is at just the right height! (I used to have to use a stack of boxes as a computer rest.)


Here is a closer look at one of the tables. You can see it has a really nice wooden top. I broke the Rubbermaid shelves down and put them under the table. They look so much neater there than when they were stacked on top of each other. Also, my dressform fits nicely there in the corner. The white board on the wall was another Duke Power trailer find. (The dry erase markers were $.25 for two at the thrift store.) You may recognize the ribbon bulletin board from my post here. You can see my embroidery machine and Cricut on this table. That grey thing in the middle is my Bluetooth speaker. (You gotta have a speaker when you're crafting...and exercising!)


This is the corner of the same table. I just wanted to show you my "eBay shipping office." I love this table because it has three file drawers on this end. The top drawer holds all my shipping tape, weight scale, markers, etc. Those Rubbermaid drawers hold all my packing supplies and on top is our printer and my scrap paper that I use for making mailing labels.


This part, I am really excited about! Look at how much sewing space I have now! And it's right next to the window so I get plenty of natural light!


I pulled my sewing machine out to show you. 


The ironing board is still up because we need it on a pretty regular basis, so it needs to stay out all the time. From a sewing perspective, though, having it right next to the sewing machine is ideal, so it works out for everybody!


Here is my cabinet. You can see some of my tools are now hanging from magnets. (I saw that idea on Pinterest, so don't be too impressed!) I love it, though, because I don't have to put any holes in the wall, and my tools are super accessible.


Inside the cabinet again.


And just in case you wondered what was in my closet. . .This is my fall/winter closet. (Yes, I have two closets!)


And when I just feel like relaxing, I can sit on my beanbag and ruminate about how awesome God is and how He not only supplies my needs, but even my desires as well--above all I could ask or think (Ephesians 3:20)!


I hope this gives you some ideas on your own craft room. I know it's not as picturesque as those rooms that cost thousands of dollars with chandeliers and stuff, but it's so much better than what I had! And it was free! If you are on a budget, don't go to the store unless you absolutely have to. First of all, I suggest praying about what you specifically desire and then start looking for answers. I suggest looking at Craig's List, asking around to see if people are getting rid of things, or driving around in neighborhoods to see what people put at their curbs. You don't have to have a lot of money. Feng shui is free! Really. My room was so much smaller when I had a tiny computer desk with a crappy 4'x4' card table in the middle. Now I have three huge pieces of furniture, but my room is so much bigger! The key is to position things at the periphery versus the middle. Anyways. . .that's what worked for me! I hope you were inspired!


The End


Friday, February 19, 2016

How to Make Soap

Making soap is an awesome past-time. I can't quite explain the sense of accomplishment you get when you make a batch of soap, wait 3-4 weeks for it to cure, and then actually use it. Homemade soap makes your skin feel amazing and clears up a lot of skin problems you thought you had. (I even use mine as conditioning shampoo!) Not only that, but few DIY projects give you the sensation that you are at once doing something mystical and ancient. . .and. . .that you belong on Breaking Bad.

Stuff you will need: Goggles, plastic gloves, face mask, drop cloth, glass bowls, wooden spoons. . .base oils, lye, water, essential oils. . .Wait. Hold on. You know what?--

--Okay, so this post is kinda misleading. I'm not actually going to tell you how to make soap. Why? Because there is this genius woman on Youtube who makes awesome soap making videos far better than I ever could. They are only around 10 minutes each and very informative and entertaining. You can see what I'm talking about  here. (Disclaimer: They are highly addictive.) I suggest starting with this video because it's a very easy and accessible recipe to start with.

I took the picture below to show that base oils are really easy to find at the grocery store these days. The two on the left are from Walmart and the organic coconut oil is from Aldi! (Yes, even Aldi has special oils nowadays.) So you don't have to special order your oils anymore. . .unless you want to. 


The thing you will probably have to special order is your lye (sodium hydroxide), unless you live in a big city and can get stuff like that at some specialty store. I get mine off eBay. I think it was $10 for 2.5lbs, and I still have at least a pound left. It lasts a long time. I've made a lot of soap already.

To know how much lye (and other ingredients, for that matter) to add to a given recipe go here.


Here are some soaps I made (below). These ones have charcoal powder, bentonite clay, ground up lavender, cocoa butter, shea butter, coconut oil, and grapeseed oil, plus essential oils (for fragrance). You can experiment with oils and additives. . .But honestly, watch some of that lady's videos. She not only goes through dozens of methods, she also does some experiments with ingredients that DON'T work, so you don't have to. She's awesome. I'm telling you. She even makes lotions and liquid soaps! Just watch those videos. I'm telling you.


P.S. The cream colored soap on top there is one my sister, Rebekah, made. I've been making soap longer than she has, but she's the one who turned me on to Soaping101 (the Youtube lady), and since then, my soapmaking experiences have been a lot more fun (and way less scary). Lye is scary if you don't know what you are doing!!!


Here are some more. This one I was doing a marbling technique.


This soap I did a marbling technique with a pencil line. (I used loose powder eyeshadow for my colorant, because it's mostly mica.)


And last but not least, Millenium Falcon soap! (I went to nerd store and bought a silicone mold.)


The End!
Go thou and do likewise!


Friday, February 12, 2016

Refashioning: Making Clothing More Functional - Star Wars Bodycon Dress into a Shirt

My baby sister, Tabitha, got me this AWESOME Star Wars bodycon dress for Christmas! I wore it once with pink tights, but felt really uncomfortable all day. I'm not really a bodycon kind of girl. However, I LOVE Star Wars and this dress really is killer.


See? Awesome! And the printing is all in a high shine silver! The fabric is that scuba style jersey that is popular right now and I love because of its structure. It's like. . .wins all over the place. . .the only "lose" is in the fact that it's just too long. Time to fix it!


Using a shirt with a nice length, I placed said shirt over the dress and made my first incision. . .


The relief was almost palpable at this point. . .


I cut a strip from the bottom fabric to use as the hem of the shirt.


I pinned it marking the band in equal fourths. Then, I attached the band to the shirt in equal fourths and sewed it on.


That's all it took!


Here it is with my new skirt I made on a previous blog post.


The End!


Wednesday, February 10, 2016

Refashioning: Making Clothing More Functional - Two Okay Dresses into One Great One

Okay, so at first glance, you might wonder what is wrong with these two dresses. They are both perfect Type 4s and seem to be exactly my style. Well, honestly, this is just a personal preference thing to me. This is what I find wrong with them: The dress on the left is just boring to me. I have a couple other hounds tooth dresses that I end up wearing when I am in the hounds tooth mood, so this one always gets neglected. The dress on the right is actually a weird tunic thing and while it looks great in the picture right here, scroll down one.


See??? Who designed this? The pleats billow out right at the boobs, making the wearer have absolutely NO SHAPE!


I am actually a fan of a good Korean hanbok, which also cut off at the boobs, but this dress is trying to attempt the same thing but with slinky fabric, so the result is an epic fail. However, I LOVE the red polka dots, so let the harvesting begin!


So, if you remember my blog post about turning dresses into skirts, you will remember that the placement of your zipper is very important before you start cutting. In this case, I was harvesting the top of the hounds tooth dress, so I made sure that the zipper was zipped all the way up.


Also really important: I cut below the bodice and left about 1/2 an inch of the skirt part. This is to allow for seam allowance.


To free the polka dots, I cut the skirt off the. . .can I even call it a bodice? Anyways, you will notice the skirt part has those pleats and if I had cut into the skirt, I would have had to re-pleat them, so I cut into the "bodice" part up 1/2 an inch to allow for seam allowance and also to save having to re-pleat the skirt.


See the line of black at the top? That's the seam allowance I'm talking about.


Then, I pinned the first bodice to the second skirt.


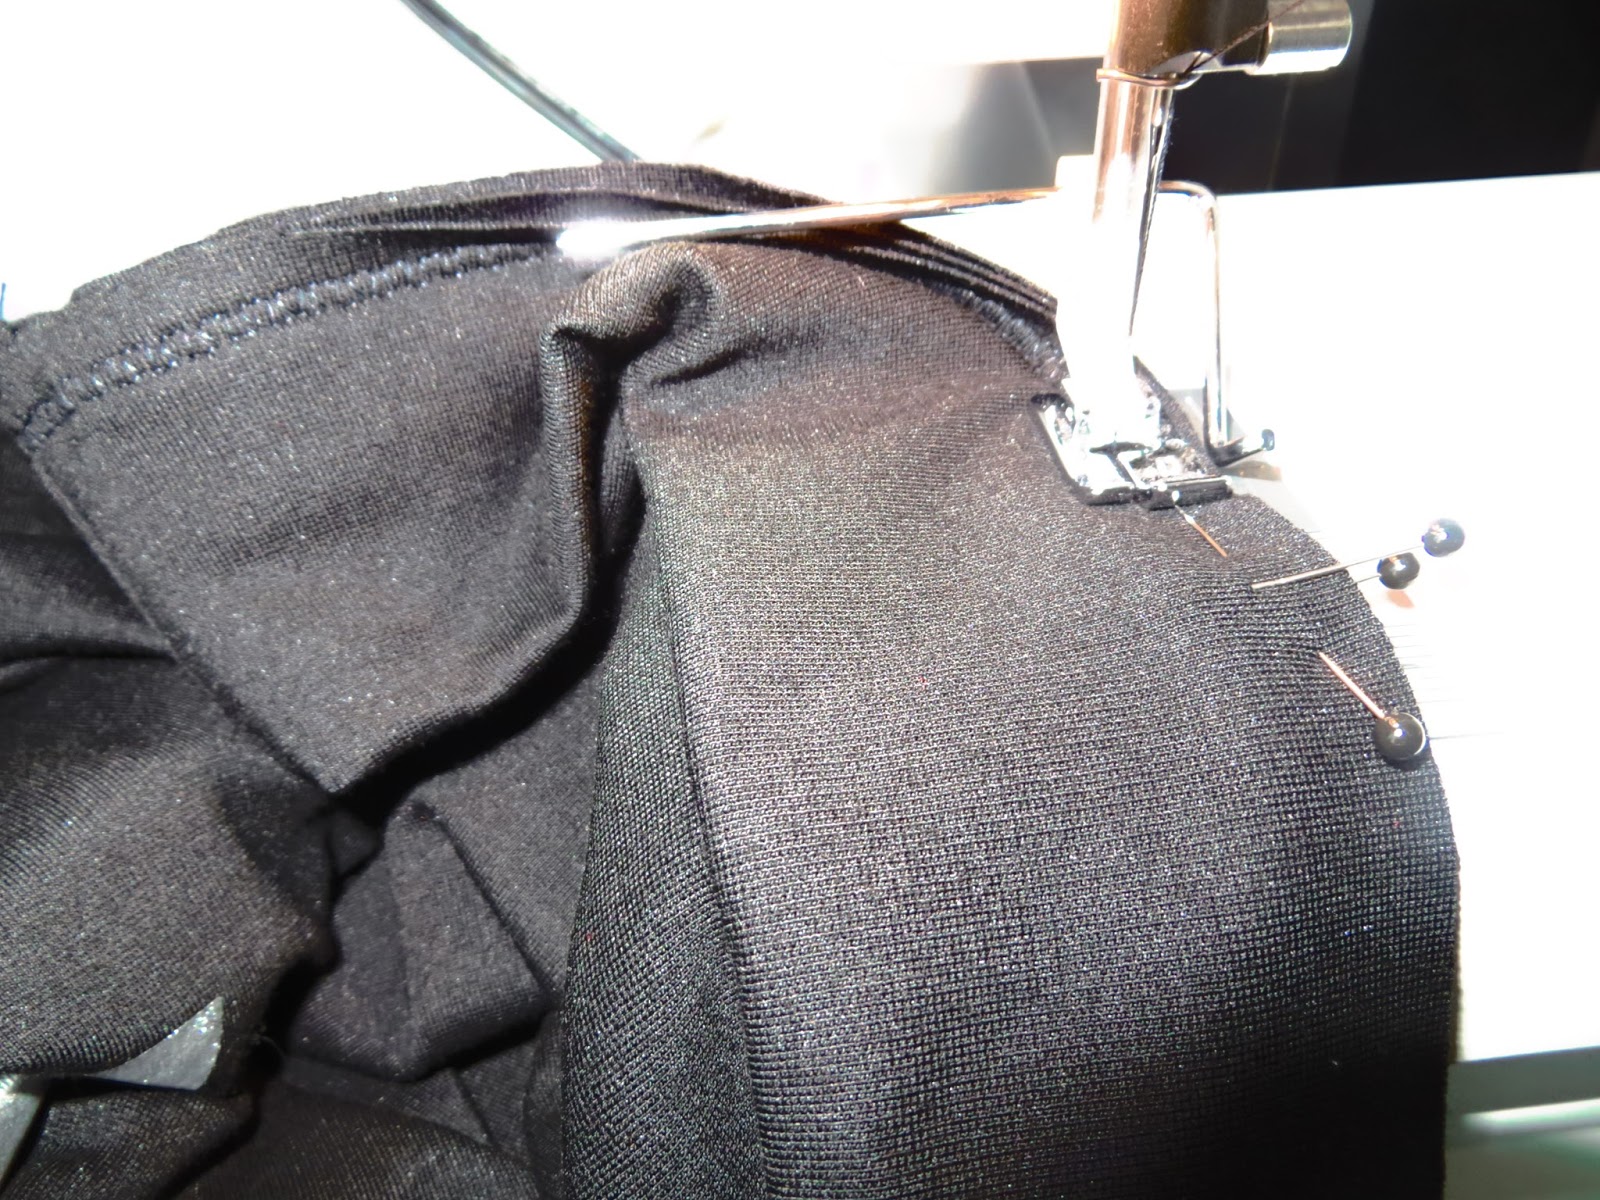
I used my quilt seam allowance measurement thingie (I don't know technical terms sometimes. . .It's that metal arm thing next to the outside of the fabric) to keep a steady measurement of an inch seam allowance.


The finished dress.


Okay, so the belly is still a little pouchy, but at least the skirt starts well under the chest, so you can see that the wearer has a shape! I will definitely wear this dress more often! 


                           It may not be your cup of tea, but hopefully you got an idea from it!


                                                                             The End!