Showing posts with label shortening. Show all posts

Friday, February 26, 2016

Refashioning: Fixing a Neckline

I'm pretty sure I've blogged about ways to take up necklines that are too low, but I can't seem to find them. . .Anyways, here is another way.

You might think that to shorten a neckline, you would have to either add a panel of fabric to the lowest part (too homeschool-looking), or take up the shoulder seam (which can alter the shirt too significantly). Both of those would work, but I did something different.

Look at the picture below. I like the style of the shirt, but my chest is a lot higher than the person for whom this shirt was evidently made.


You can really tell it in this picture where the "V" drops almost between the two breasts. I don't like having to wear tank tops under things like this, so I decided to fix the problem.


Disclaimer: if your arms are very wide, you may not be able to do this fix, because it does shorten the arm hole. I have scrawny arms, so it works for me.


The first thing I did was to put the shirt on my dress form inside out. Then I pinched about 3/4" from the "epaulette seam." (I don't know what to call this seam. It's not the shoulder seam because that is on the top of the shoulders. . .It's not really epaulettes, but. . .You get the idea from the picture.)


Okay, one thing to remember about this is that the top portion is going to be shorter than the bottom portion. See those vertical pins? I had to put a little pleat in the bottom portion in order for the top and bottom to meet flush. You know what. . .look at the next picture. . .
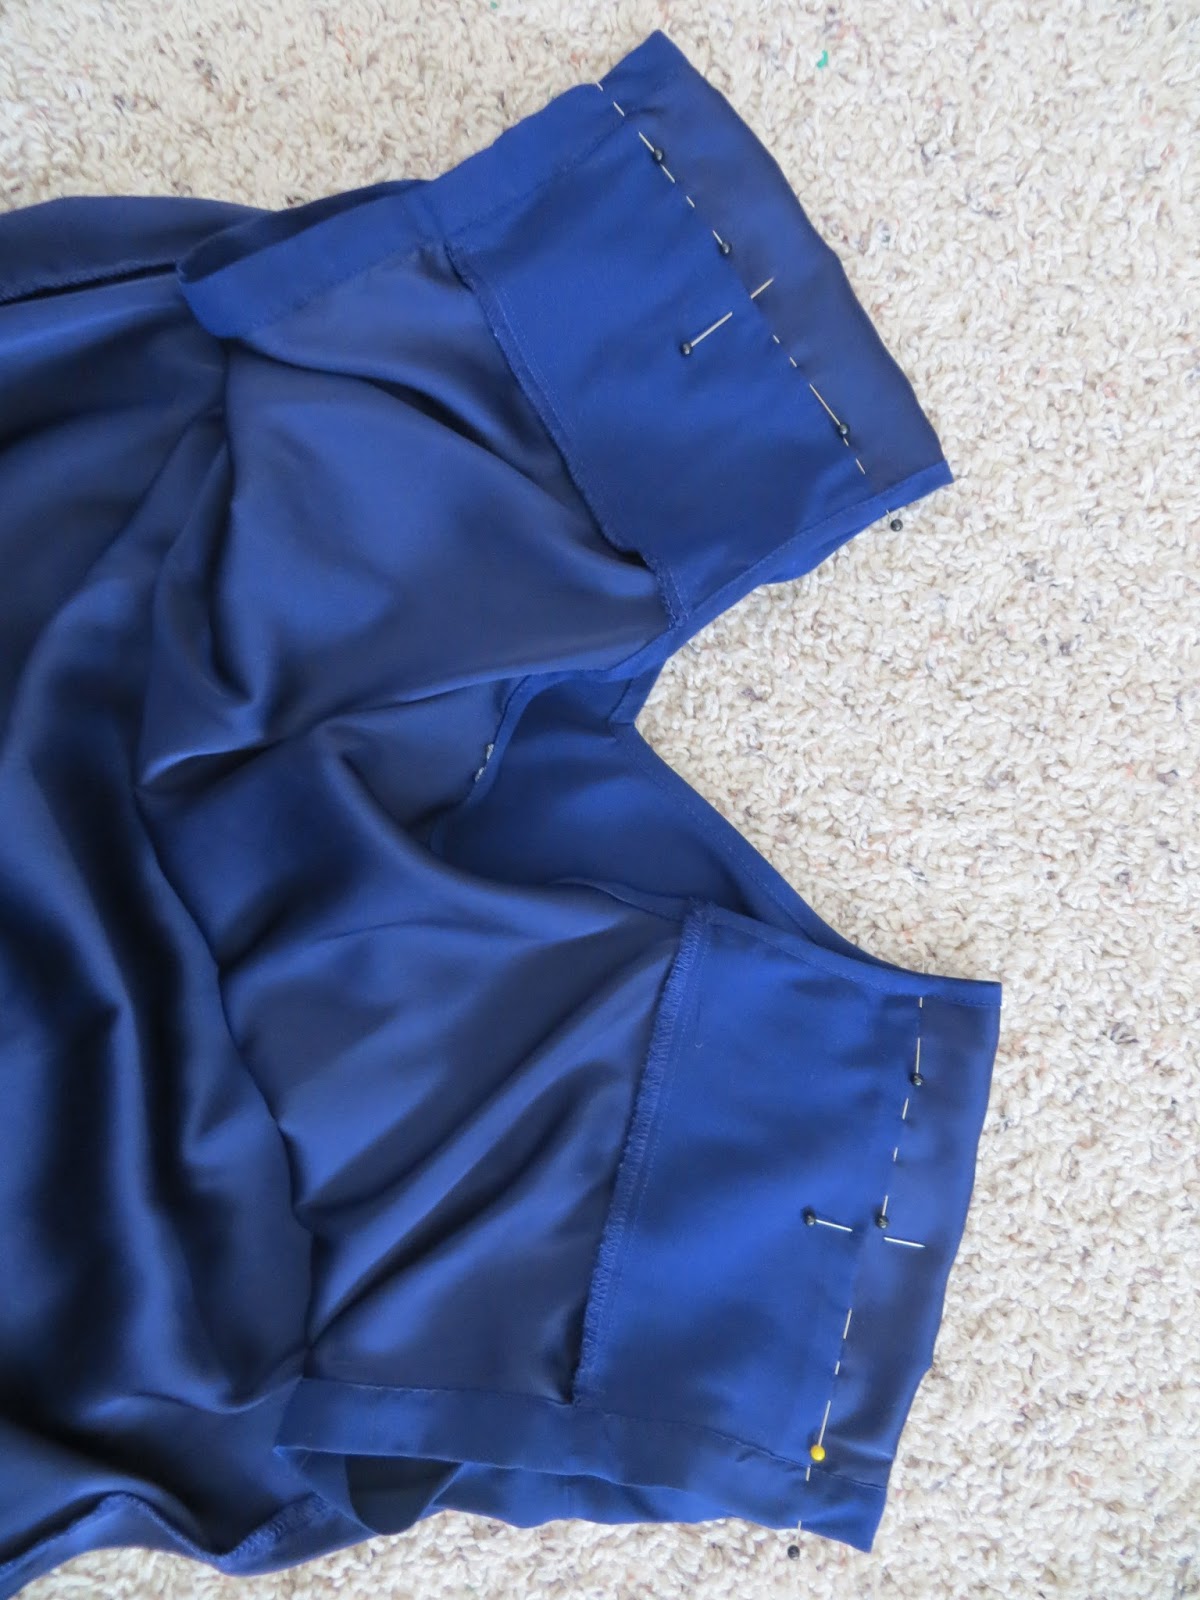


It's a lot easier to see what I'm talking about from the other side here. See those pleats running vertically from the shoulders down? The bottom portion is wider, so it needed little pleats, which is great, because that look is in style.


Then, all I did was to use a straight stitch and stitch up my pinched folds.


I could have ended here, but the sleeve looks kinda funny and I wanted it to lie flat.


So, I top-stitched the seams I made.


Then, with pinking shears, I cut off the excess from the inside.


Here, I put the new alterations next to the original pictures so you could see the difference. 


 You never knew a fix could be that simple, did you!?


The End!


Friday, April 18, 2014

Refashioning: Shortening a Dress

Okay, Kiddies, so here is another way to alter your garments. This post is a continuation of an on-going process to revise my wardrobe so that 100% of it will look good on me every day. To learn about my journey to find this process, go here.

If you would like to join "Dressing Your Truth" at a discounted rate of $99 (rather than the normal $297) click here.


So, recently, I have joined a group of older ladies who go yard saling on Saturday mornings. It's fun and educational. If you are worried about not being able to spend money on revamping your wardrobe, I highly suggest yard saling. It's even cheaper than the thrift store and you can find much cooler stuff, because people are trying to make a buck off their yard sales, whereas thrift stores carry the clothes people throw out. Anyways, I found this super cute bright red dress at a church yard sale for $2.00. It is lightweight polyester. Notice how the bright red clashes with the colors in the mess of clothes behind it. That stack was part of my purging process (most of them being sold on eBay or given away). . .This dress was cute, but way too long--like mid-calf. Therefore, I cut off about 7 inches.


I had a friend ask me one time what the "surger stitch" was on a regular sewing machine. I don't know if it's called a "surger stitch" or not, but when I use that term, I mean the stitch on the left of the red dot below.


I used that stitch to keep the cut edge of the dress from fraying. (This is a faster alternative to double folding a hem which takes forever because you have to fold, press...fold, press. No thanks.)


Then, I folded the dress up on the wrong side measuring with two fingers and pinned it.


Then I hand-stitched an invisible hemming stitch in red thread. I could have done this much faster on the machine, but. . .I didn't.


As the last step, I pressed the hem just to make I flat, but you don't have to if the fabric lies flat. This whole process took about 10 minutes.


The End!