Showing posts with label to. Show all posts

Wednesday, November 2, 2016

Sunday School Craft - Saul to Paul. Paul's Conversion.

This one is super easy....Also, it's my 200th post! Yay, I guess!

For this one, you just need paper, crayons, and a star sticker.


Print out the last picture in this post, color Paul and the tree and the donkey, then put a star sticker on the top right corner, color yellow streams coming out of the star, and you're done!


The End!


Monday, February 15, 2016

One Way to Fix a Broken Zipper

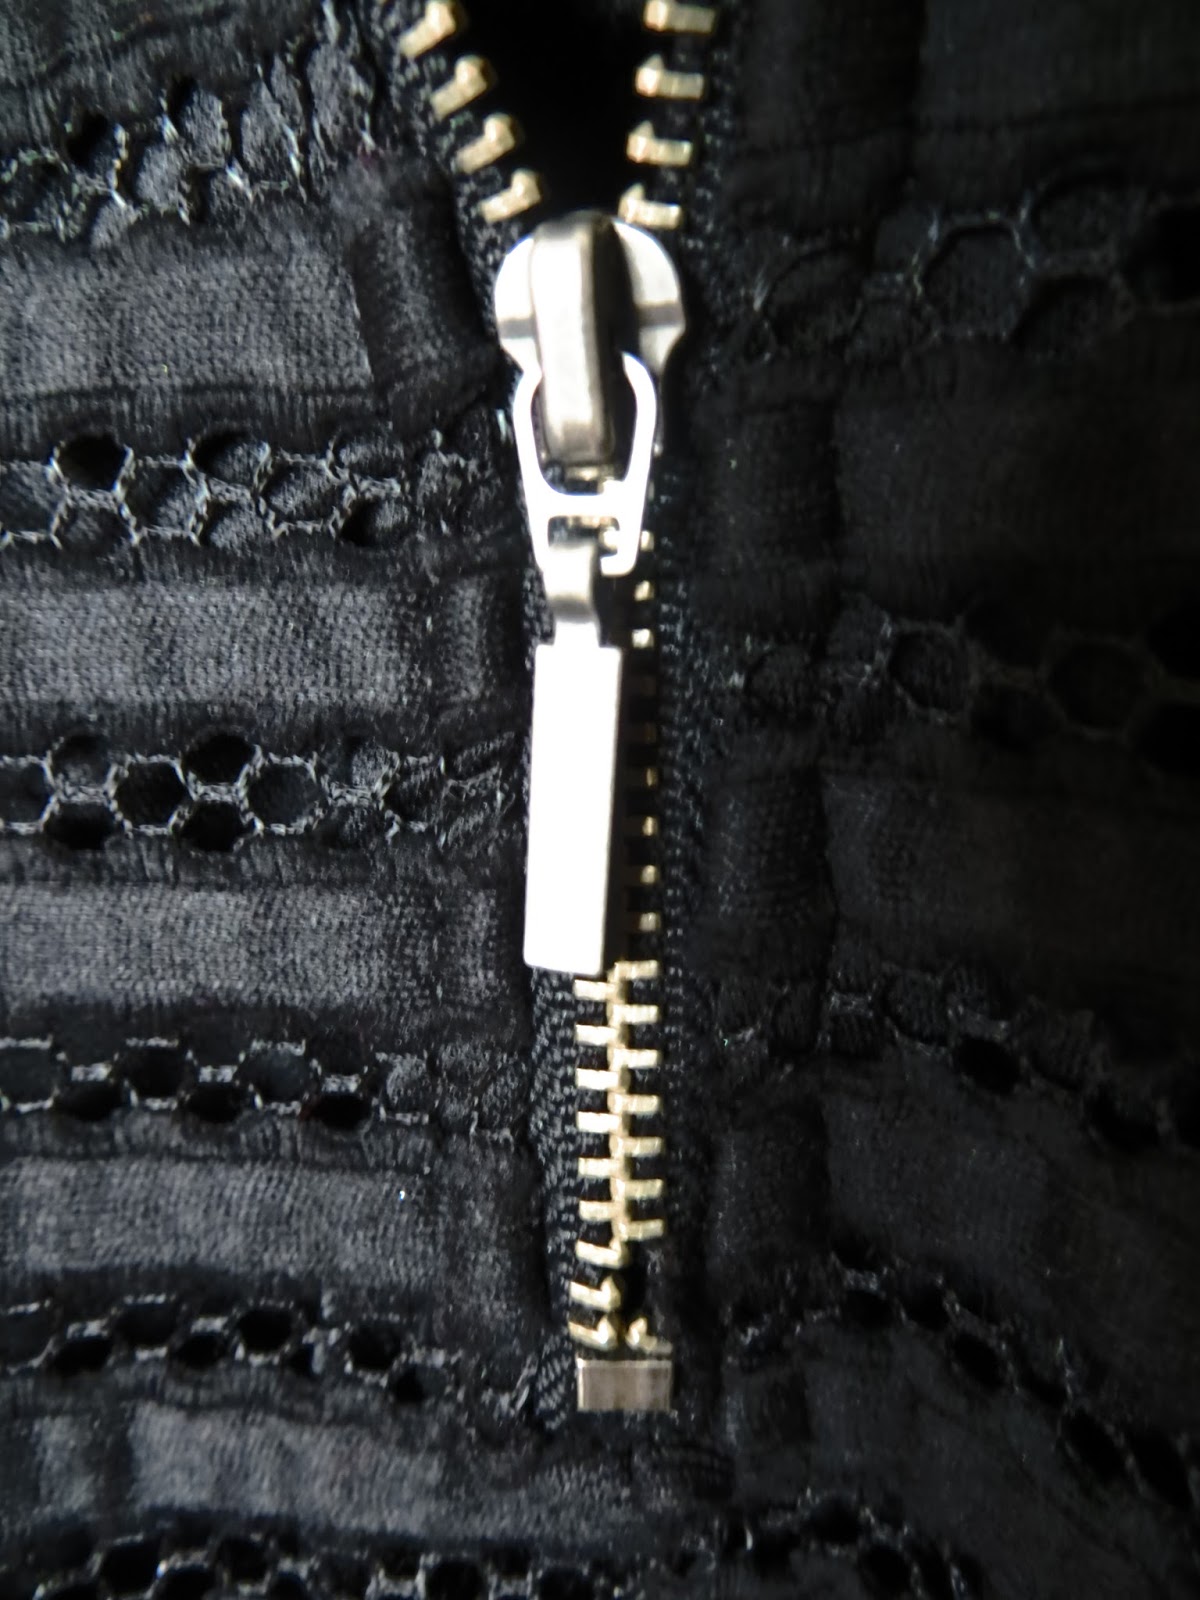
Sometimes, you find really great clothing items at the thrift store, and the reason they are there is because the zippers are broken. Here is one method of fixing that issue. 

So I found this black sleeveless skater dress, but the zipper had missing teeth at the very bottom. The dress was only a dollar, and I figured if nothing else, I could easily turn it into a skirt, or if I wanted to work a little harder, I could replace the zipper. 

I kinda didn't want to do either option. I kinda just wanted to fix the current zipper. Work smarter, not harder! I didn't know that I even could, but when I realized I could, I thought. . ."I bet other people might want to know this too."


So here's the deal. It wasn't easy. Actually, I wanted to give up after about ten minutes of constant failure. But finally, I persevered and overcame! What I did was to push the zipper tag down as far as it could go, and then I pushed the broken teeth side into the other side of the tag until it finally caught. 

There is no easy way to explain how to do this. You just have to keep trying. The only way to describe what you have to do is to pretend you are zipping up the front of a coat or jacket. If you aren't good with your hands, this may be height of frustration. . .so find someone who is! Maybe they can help you! It doesn't seem possible when you are in the midst of it, but. . .if the zipper ever aligned once, it can and will do it again! (I actually did it twice myself. Once as soon as I got the dress home. . .and then I realized that I needed to take a picture of the zipper broken, so I re-broke it--which is the picture you see above. That's how much I love you guys! I'm willing to go through frustration twice!) :)


Okay, so if this post seems like a cop-out so far (i.e. "The way to fix a broken zipper is to. . .uh. . .fix it!" Not helpful.), let me finish the post by telling you what to do once you re-align the zipper to assure that it doesn't break again. First of all, zip it up!


Next, thread a needle. The focus is really bad in this picture, but if you look just above the missing zipper teeth on the right side, you will see a needle poking through. Do this. (It's really important that your first stitch go above the missing teeth.)


Then, push the needle back through on the direct left side of the zipper. Continue those two steps until you have several stitches. Then, make a knot on the back side and cut your thread.


This is the back side of the zipper. See my several stitches?


From far away, you can hardly tell. . .and if someone CAN tell, then tell them to stop staring at your butt! How rude!


Fixed! The zipper won't go down any further than those stitches!


(Those other clothes are my "to do" list. . .a.k.a. "future blog posts.")


The End!


Sunday, February 14, 2016

Refashioning: Turning an Old Lady Shirt Backwards. . .Literally!

I frequent my Goodwill on the weekends because all tags of a predetermined color are only a dollar! Honestly, most of the clothes you see in this blog. . .and on my person. . .come from this rack. Anyways, I'm always on the lookout for my "Type 4" colors, and my green in particular because it's my favorite. When I find it, I usually just buy it--even if the item is gross--because I love this color, and I know I can turn it into something else. I hope. . .as always, that this post gives you some ideas!

Here is an old lady shirt I found the other day. 


It's that really weird crinkly, yet stretchy, polyester fabric. It's usually really horrid, but on this particular shirt, the color really shines--almost sparkles. I can't stop looking at it. These pictures don't do it justice. (My camera has a hard time with greens, unfortunately.) Just picture the boldest green you have ever seen, and. . .that's it!


The first step was to cut the shoulder pads out!

Then, I cut the collar off.


Then, the sleeves.


Next, I pinned and sewed up the button placket. 


This used to be the front, but I wanted the buttons in the back, so I pinned it to the back of my dress form and used the form as my pattern. (This is actually a technic of pattern making called "draping" because you drape and pin the fabric onto a form and then cut away everything that doesn't lie flat. I don't do it very often, but I probably should. It worked really well.)


I also draped the front (which used to be the back).


Next, I worked on the sleeves. For this, I did my usual cheating method of cutting around sleeves of a shirt I already knew fit me well.


I sewed up the sides of the sleeves.


Then, I pinned the two bodice pieces together and sewed them.


I added elastic to the tops of the shoulders as reinforcement. This fabric is super stretchy and I didn't want the shoulders to stretch out. I've noticed this method on factory-made shirts I own. Turn your garments inside out sometimes! You can learn a lot!


I pinned , then sewed, the sleeves to the bodice.


Then, I sewed some black stretchy fabric to the neckline, but. . .I guess I forgot to take a picture. (I get ahead of myself sometimes and forget that blog posts need pictures. . .Tons of my projects never even make it on here because I forget to take pictures. . .Oops.)


Okay, so. . .It kinda looks like Star Trek, but. . .I love Star Trek (especially Mr. Spock, may he rest in peace), so I'm okay with that!


I added a leather Peter Pan collar necklace that I made (example of a project I never photographed), and wore it with a jumper so I wouldn't look like a Starship Trooper.


The End!


Wednesday, May 13, 2015

How to Fix an Ink Stain on Your Coach Purse....or...Dying a Coach Purse

I bought this beige Coach purse at a yard sale. It had lots of ink stains on it. "No problem!" I thought.
...Yeah...It ended up being a problem.
I searched the internet for ways to remove leather stains. I tried soap. Nothing. Rubbing alcohol. Nothing. Vinegar. Nothing.
So then I got into the harder stuff--and like drugs--the deeper I got, the more of a mess I was in. I tried nail polish remover...and...bleach! (WHAT??) So now I had an ink stained purse...that had all the shiny factory protective coating removed. Great.
Then I got the bright idea to buy Guardsman Leather Ink Stain Remover sticks. It's in the name, right? How could I go wrong? Yeah. After using them, I now had a waxy, sticky...yet infuriatingly STILL ink stained, protective coating-less mess.
I was going to give up, and it was making me mad, because it was a really nice purse. No holes or tears. I was mad because I had spent money. I was mad because I couldn't fix it. I was mad because the stuff that was supposed to fix it, didn't--plus costing more money! I was mostly mad because I thought I could make the purse better and had only made things even worse. Not acceptable!
Then I remembered that I still had half a jar of silver leather paint from the previous project that nearly gave me a heart attack: dying a pair of Chanel shoes.
I literally had nothing to lose, so I spent the next two or three hours painting my beige purse silver...and now it looks almost new. Yay for having a new warm weather purse! I am actually glad it's silver, because I don't like beige anyway! So there, Universe!
(The pictures are of this process, and I'm writing this from my phone, so it won't let me narrate them. You will just have to use your imagination.)
The End!